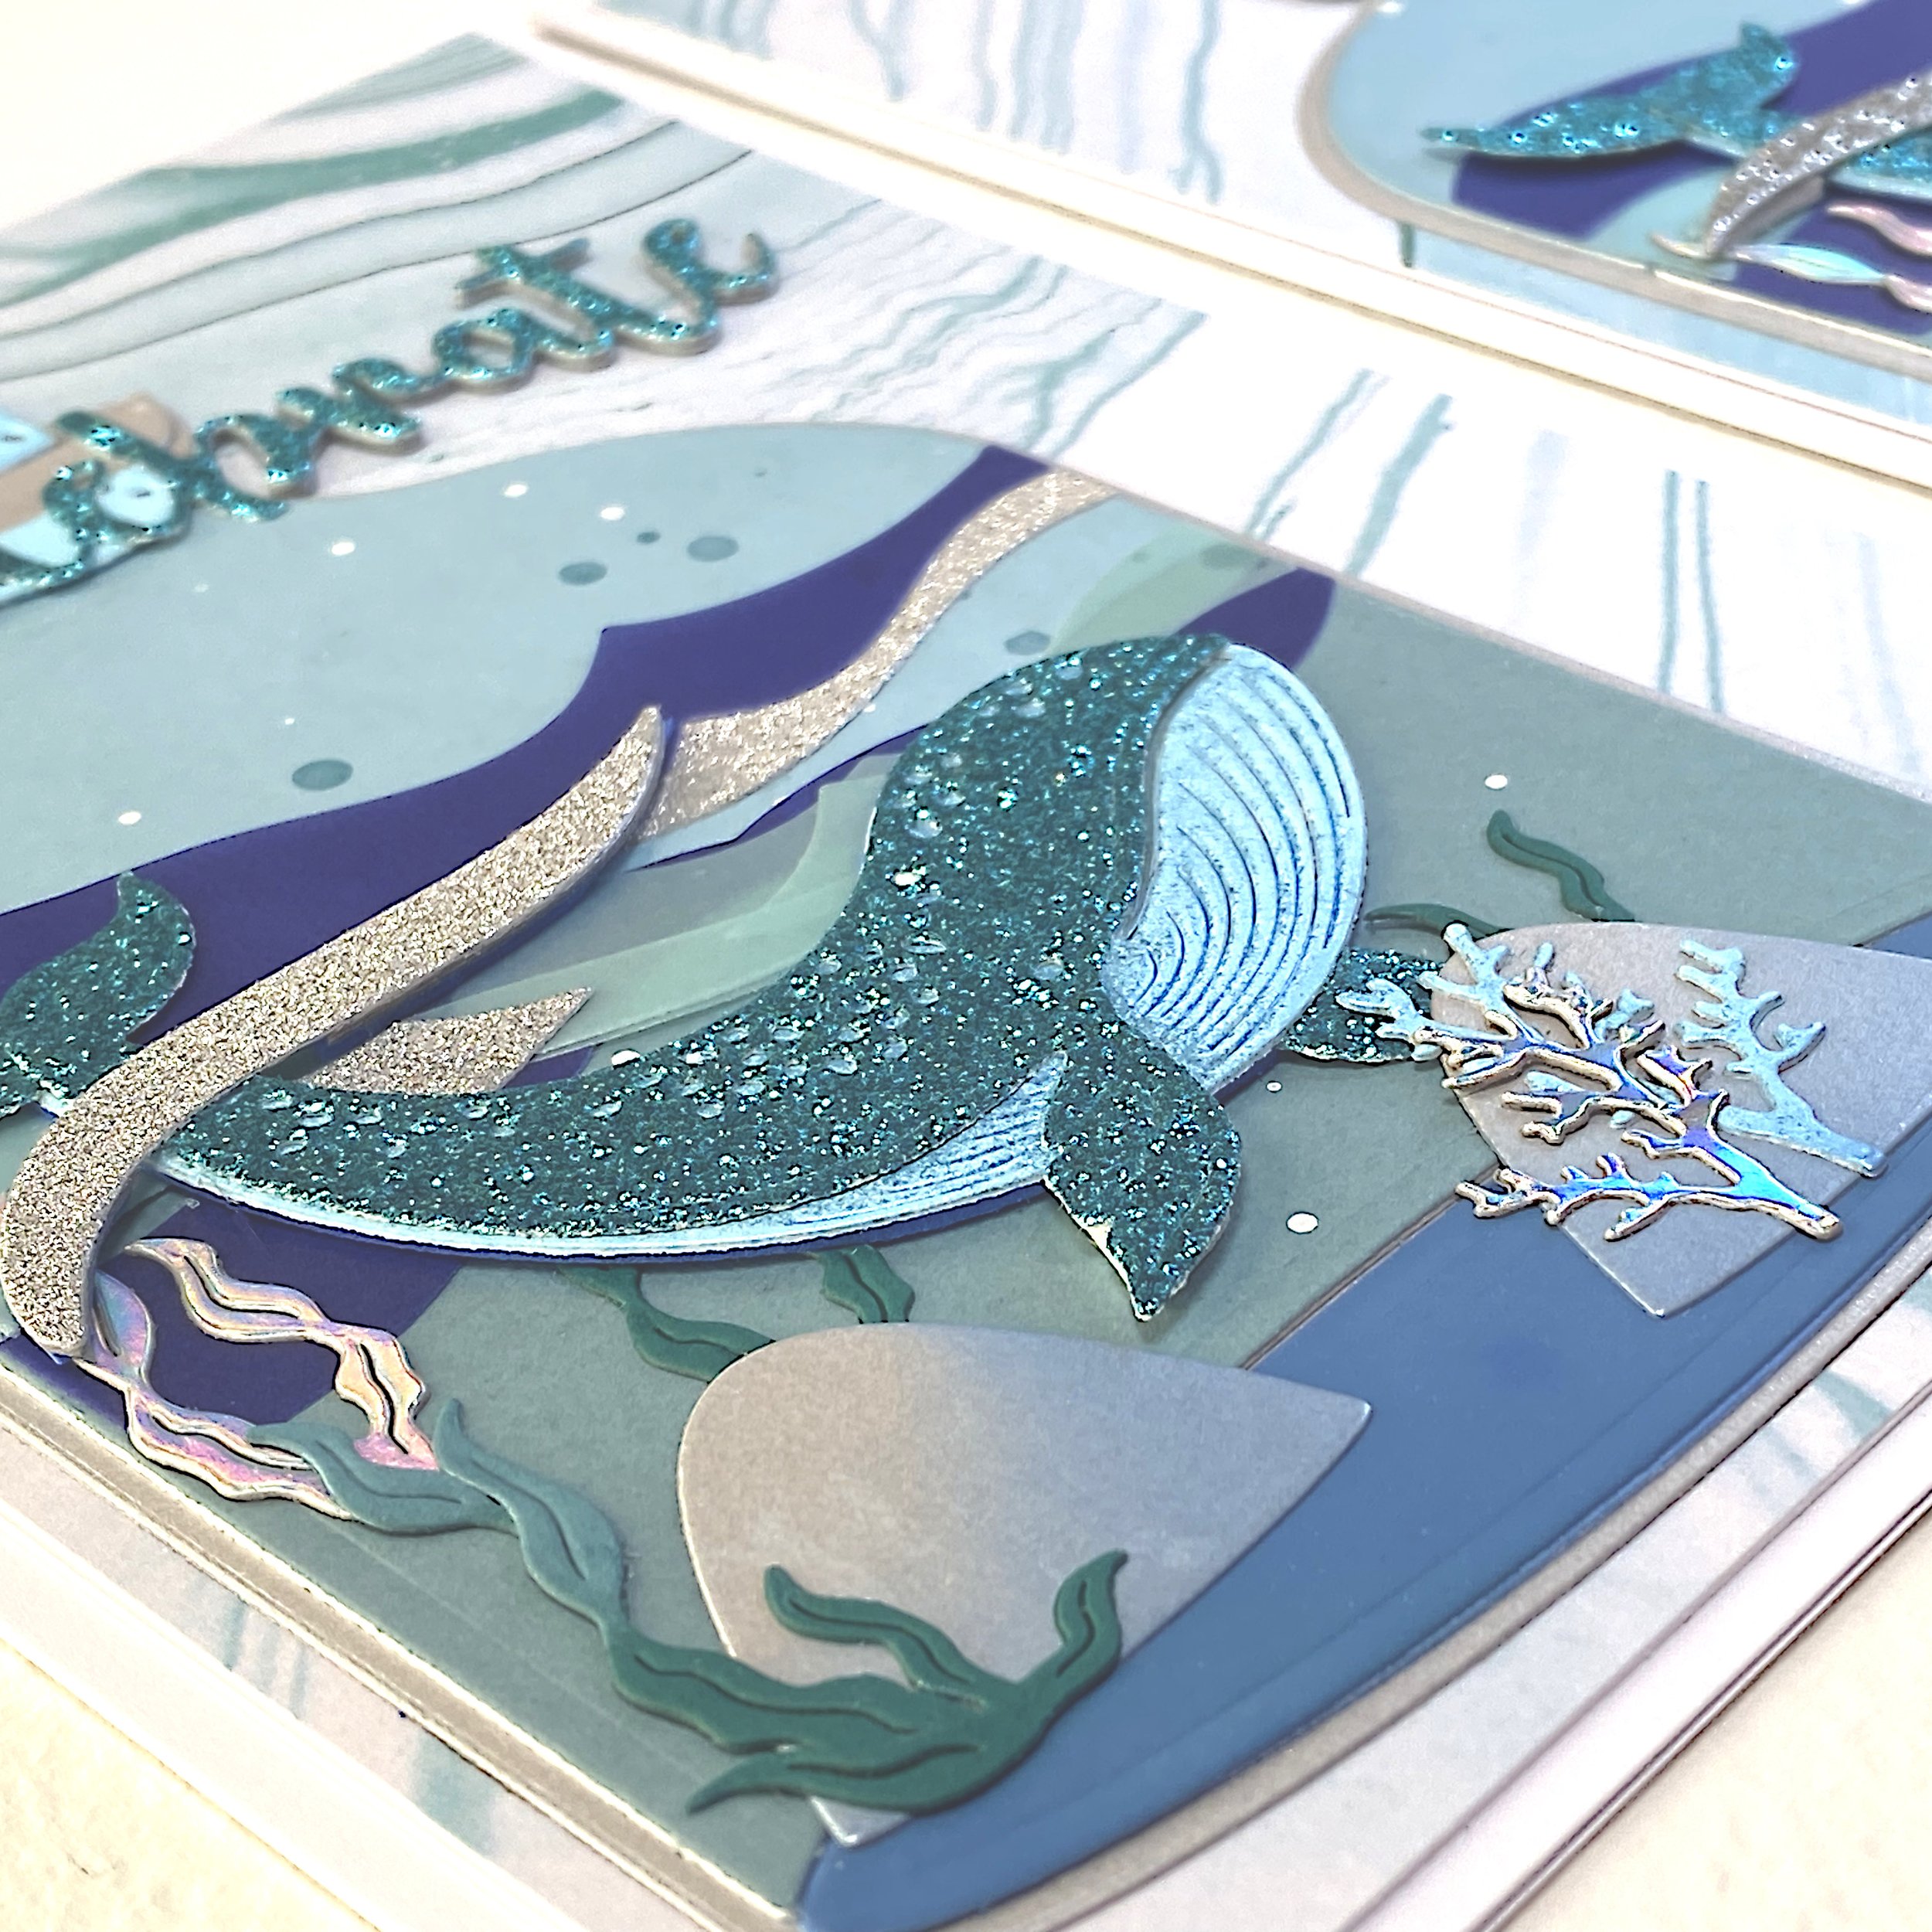
Whale in a Bottle
This die set was Spellbinder’s Large Die of the Month for June 2023. Sign up for July is now open. The July Large Die of the Month is a cute Yule stocking with a gingerbread person and a gnome.
The bottle die is 5.5” tall. That means that you can use it to create a shaped A2 card. Unfortunately that also means that it’s a little too big to fit comfortably on an A2 card, particularly if you want to use the cork. That’s why I chose to make this a 5 by 7 card instead. For the background I used a turquoise marble paper from a Colorbook pad.
Cut list
Bottle background: Brushed silver cardstock
Bottle overlays: Three shades of blue, starting with the darkest for the bottle bottom and the lightest for the top
Two rocks: Brushed silver cardstock
Bottle lip: Brushed silver cardstock
Waves: Silver glitter cardstock, dark blue and turquoise vellum, thick foam to match the silver glitter cardstock shapes
Sea plants: Teal and holographic cardstock
Whale base: Pale blue shimmer paper, thin foam
Other whale parts: Turquoise glitter paper
Cork background parts: Medium blue
Cork foreground parts: Pale blue shimmer paper
Celebrate sentiment: Turquoise glitter paper, thick cardstock and/or foam for the parts of the word that don’t overlap the bottle
Bottle
I started by adhering the three parts of the bottle to the bottle base. Then I splattered it with white and blue ink to simulate bubbles. I added the cork and the lip.
Whale
Next I built the whale. It consists of a base layer and three separate die cuts for the tail, the far fin and the back. I put a thin layer of foam under the whale, to raise it a bit from the background. But I didn’t glue it down yet.
Seascape
I inked the rocks with dark blue around the base and started building the landscape at the bottom of the bottle. I placed some of the plants behind the rocks and some in front of them. Given that the whale is looking toward the right, it made sense to build up the seaweed vertically on the left side and keep it shorter on the right side. I only adhered the rocks at their bases, so I could tuck things in under them later.
Having watched the instructional video on the Spellbinder’s YouTube channel, I knew that the waves aren’t meant to fit together neatly like a puzzle. My goal was to have the tail stick up above the waves, and the silver glitter waves to be popped up over the tail. I also wanted the waves to conceal the seam between the different parts of the bottle. So I moved the whale and the various wave bits around until I was happy. In the end I glued the whale in place so that the far fin was behind the center rock and the tail was above the water, as I wanted.
Next time I think I’ll try to move the whale and the waves a little bit higher up, so there’s less empty space at the top of the bottle.
Sentiment
I finished up by cutting and glueing the sentiment die cuts so that the surface would be level when I applied it to the card, partly over the bottle.
Prime Day Deals
Waffle Flower are participating in Prime Day. Here are some of the best deals:
Waffle Flower nesting dies, including A2 nesting set and A7 nesting sets.
Waffle Flower media mats. These are heavy duty silicone mats with built-in palettes. Great for any water-based medium!
Waffle Flower shaker pouches. These are pre-cut and scored and have double-sided adhesive on the edges. The A2 infinity shape is particularly easy to use.
Waffle Flower stitching dies, e.g. the Holiday bundle with mittens, a sweater etc.


