

Moose Birthday Card
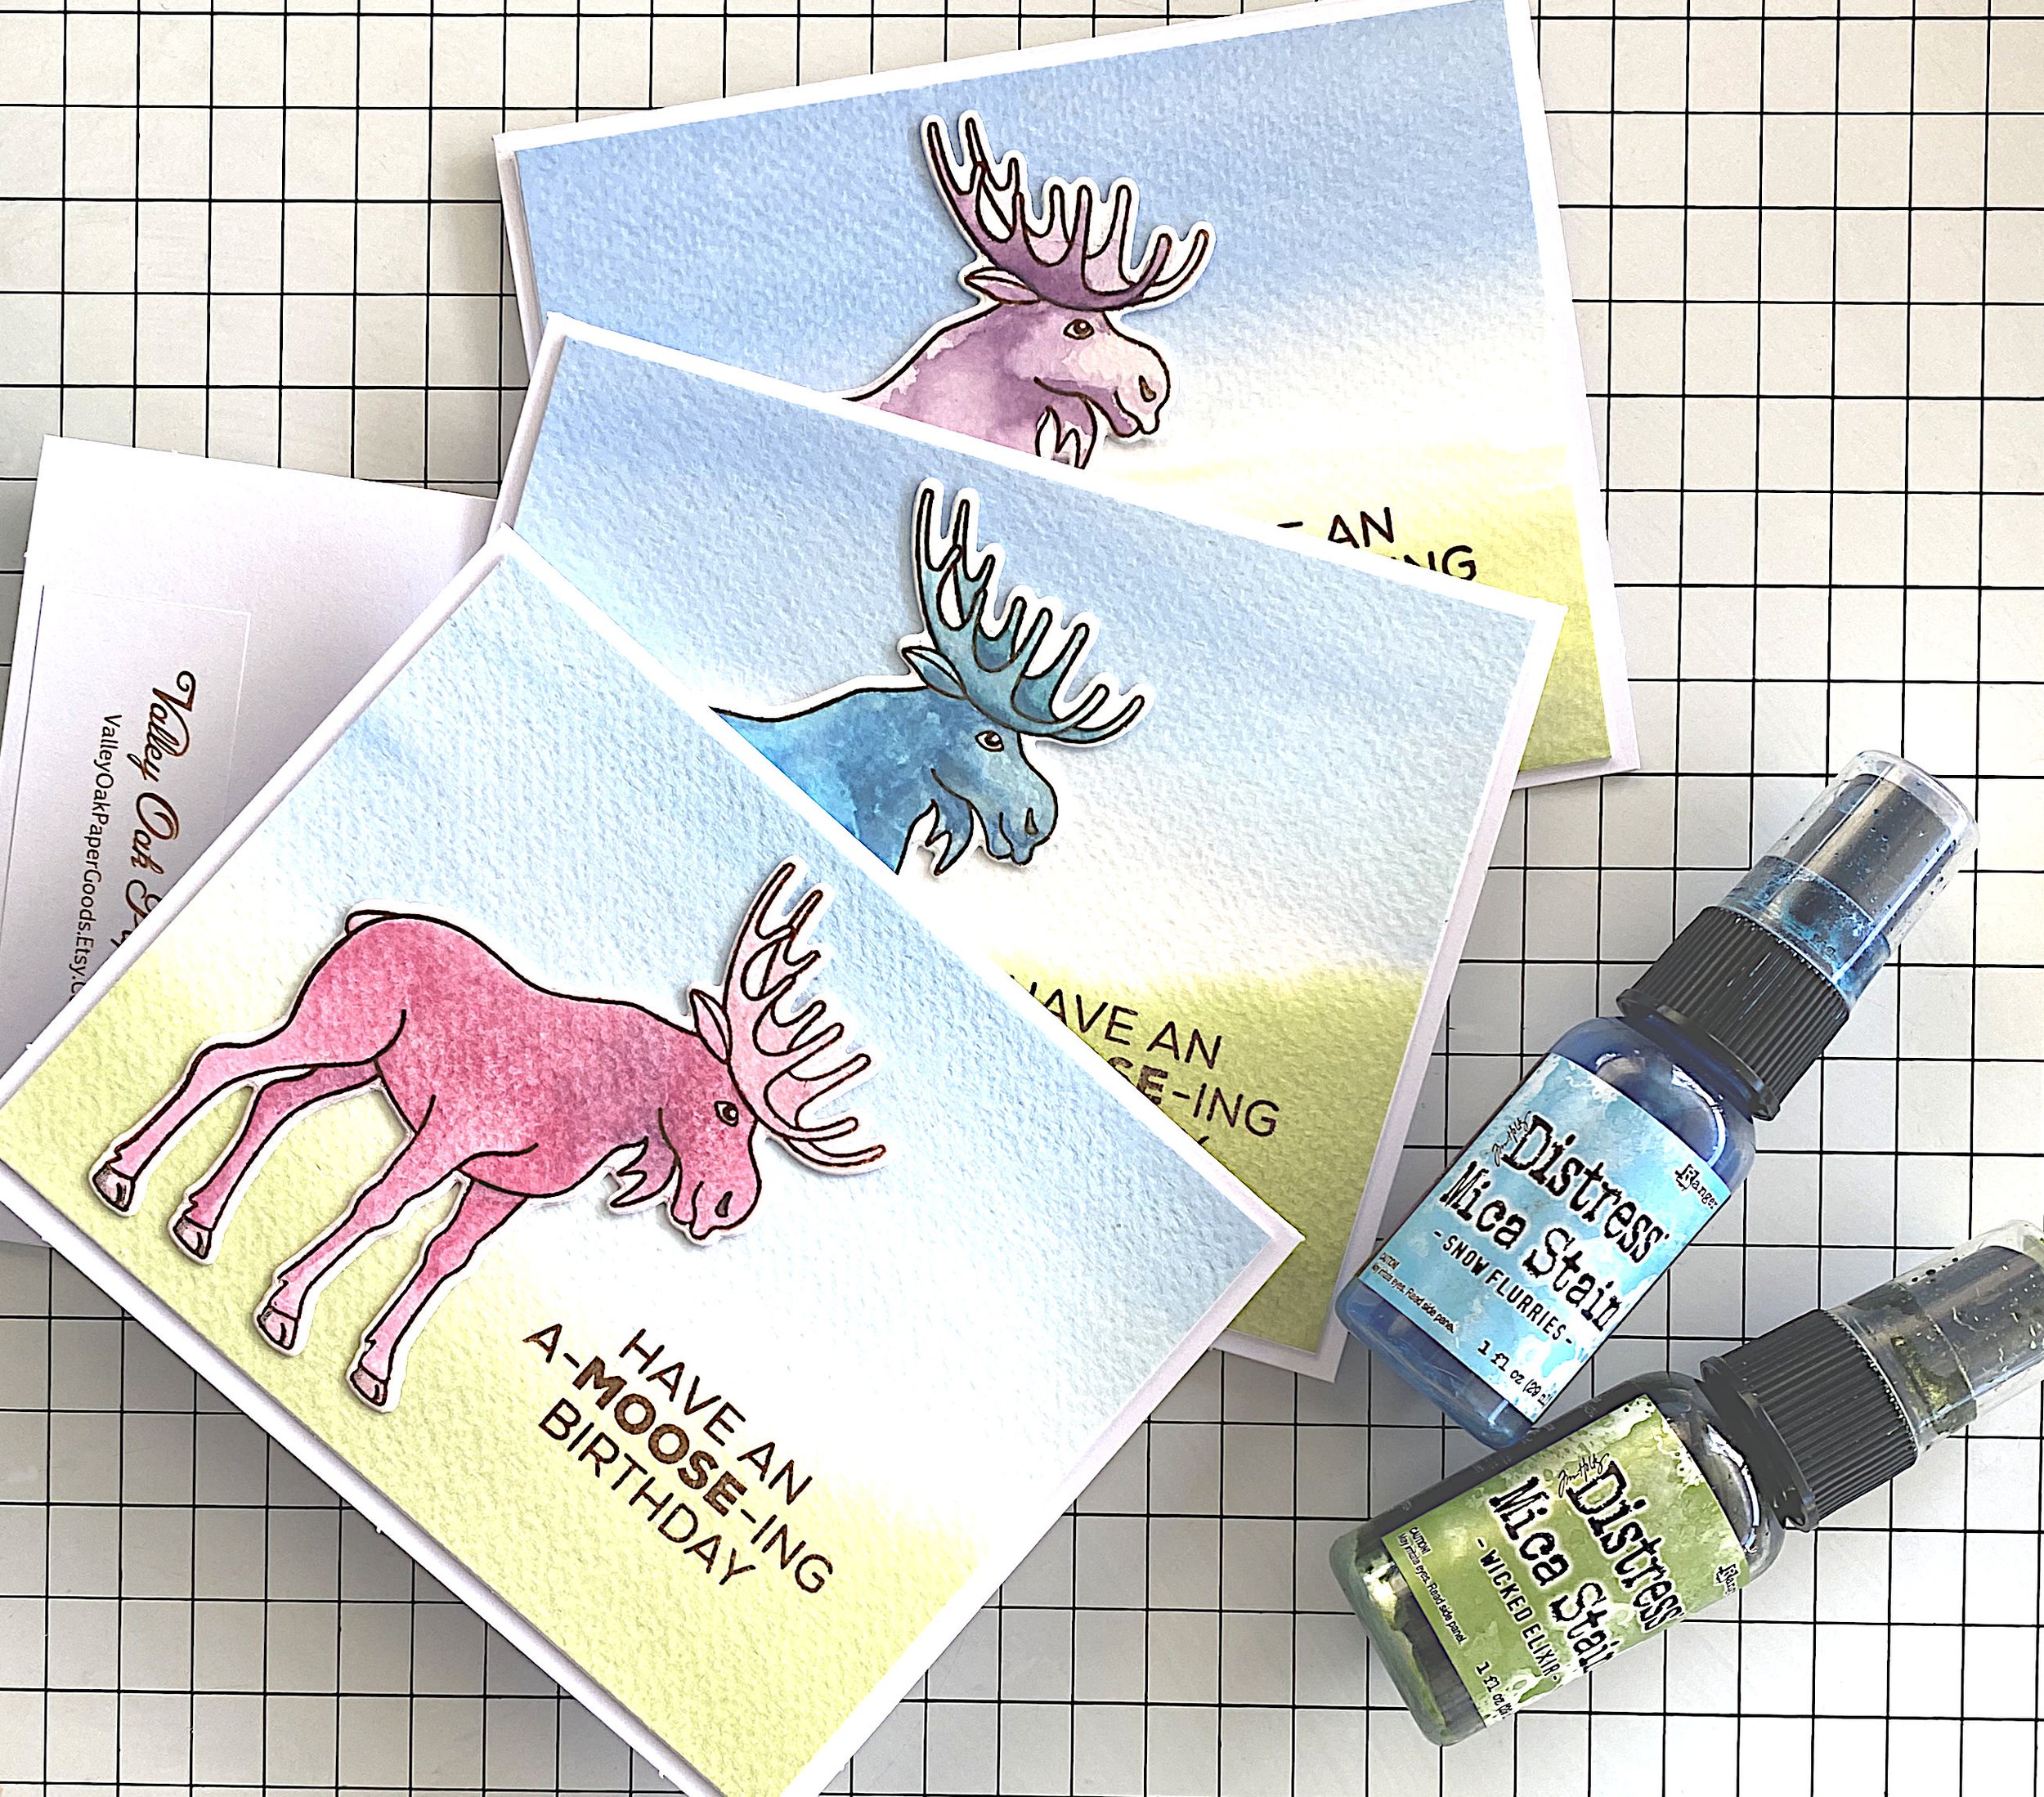
Moose birthday cards with some mica spray stains I used for coloring them
These moose birthday cards are currently available in my Etsy shop. Here’s how you can make your own.
Background
I started by creating the background. For this I used watercolor paper cut a little larger than A2. First I wet down the bottom of the paper and applied a gradient of Prize Ribbon blue ink. I dried it, using my Wagner heat tool on the low setting. Then I repeated the process with Twisted Citron green ink.
Moose
Next I stamped the moose on another piece of watercolor paper with my favorite ink, Ranger’s Archival in Coffee. It’s a warm-neutral brown. Archival ink is oil-based, so it’s perfect for water coloring over.
Stamp positioners
Important: Nestle the watercolor paper into the corner of your stamp positioner when you stamp the moose. Then you need to leave the stamp in your stamp positioner. We’re going to use it again later.
The stamp platform I use is by Tonic and Tim Holtz. As of writing this, it costs $98 and that’s just ridiculous. There are lots of stamp platforms on Amazon for less. The only thing that really matters, is that there’s one corner that you can nestle your cardstock against. That way you can stamp multiple times in the same place. That’s a game changer for stamping.
I watercolored my moose with mica spray stains. If you need detail brushes, these are the ones I use.

I colored my moose in fantasy colors, like this light blue one
By now my background was dry. I ran it through my die cutting machine to straighten it out. (Right now and until the end of February 2023, you can win a Spellbinders Platinum 6 plus the Glimmer hot foil system. See bottom of this post for more details.) That made it much easier to cut to size. Like pretty much everybody in the cardmaking world, I use a Tim Holtz guillotine trimmer. I like to have 1/8” white border around the background, so I cut it to 4” by 5.25”. Finally I glued it onto heavy white card stock, for a more professional look and a sturdier card.
I turned my attention back to my moose. First I stamped my moose again. To do this, you make very, very sure that your watercolor paper is nestled in the corner of your stamp platform, then you stamp. If the paper is warped, run it through your die cutting machine first. You’ll be surprised how much crisper the result is when you stamp again after watercoloring.
I die cut my moose, plus a piece of white cardstock, and glued them together for sturdiness and dimension. Then I glued the moose onto my background, and stamped the funny greeting. Finally I adhered the card front to the Ohuhu card base.

Enter to win a Glimmer Hot Foil Machine and a Platinum 6 Die Cutting Machine