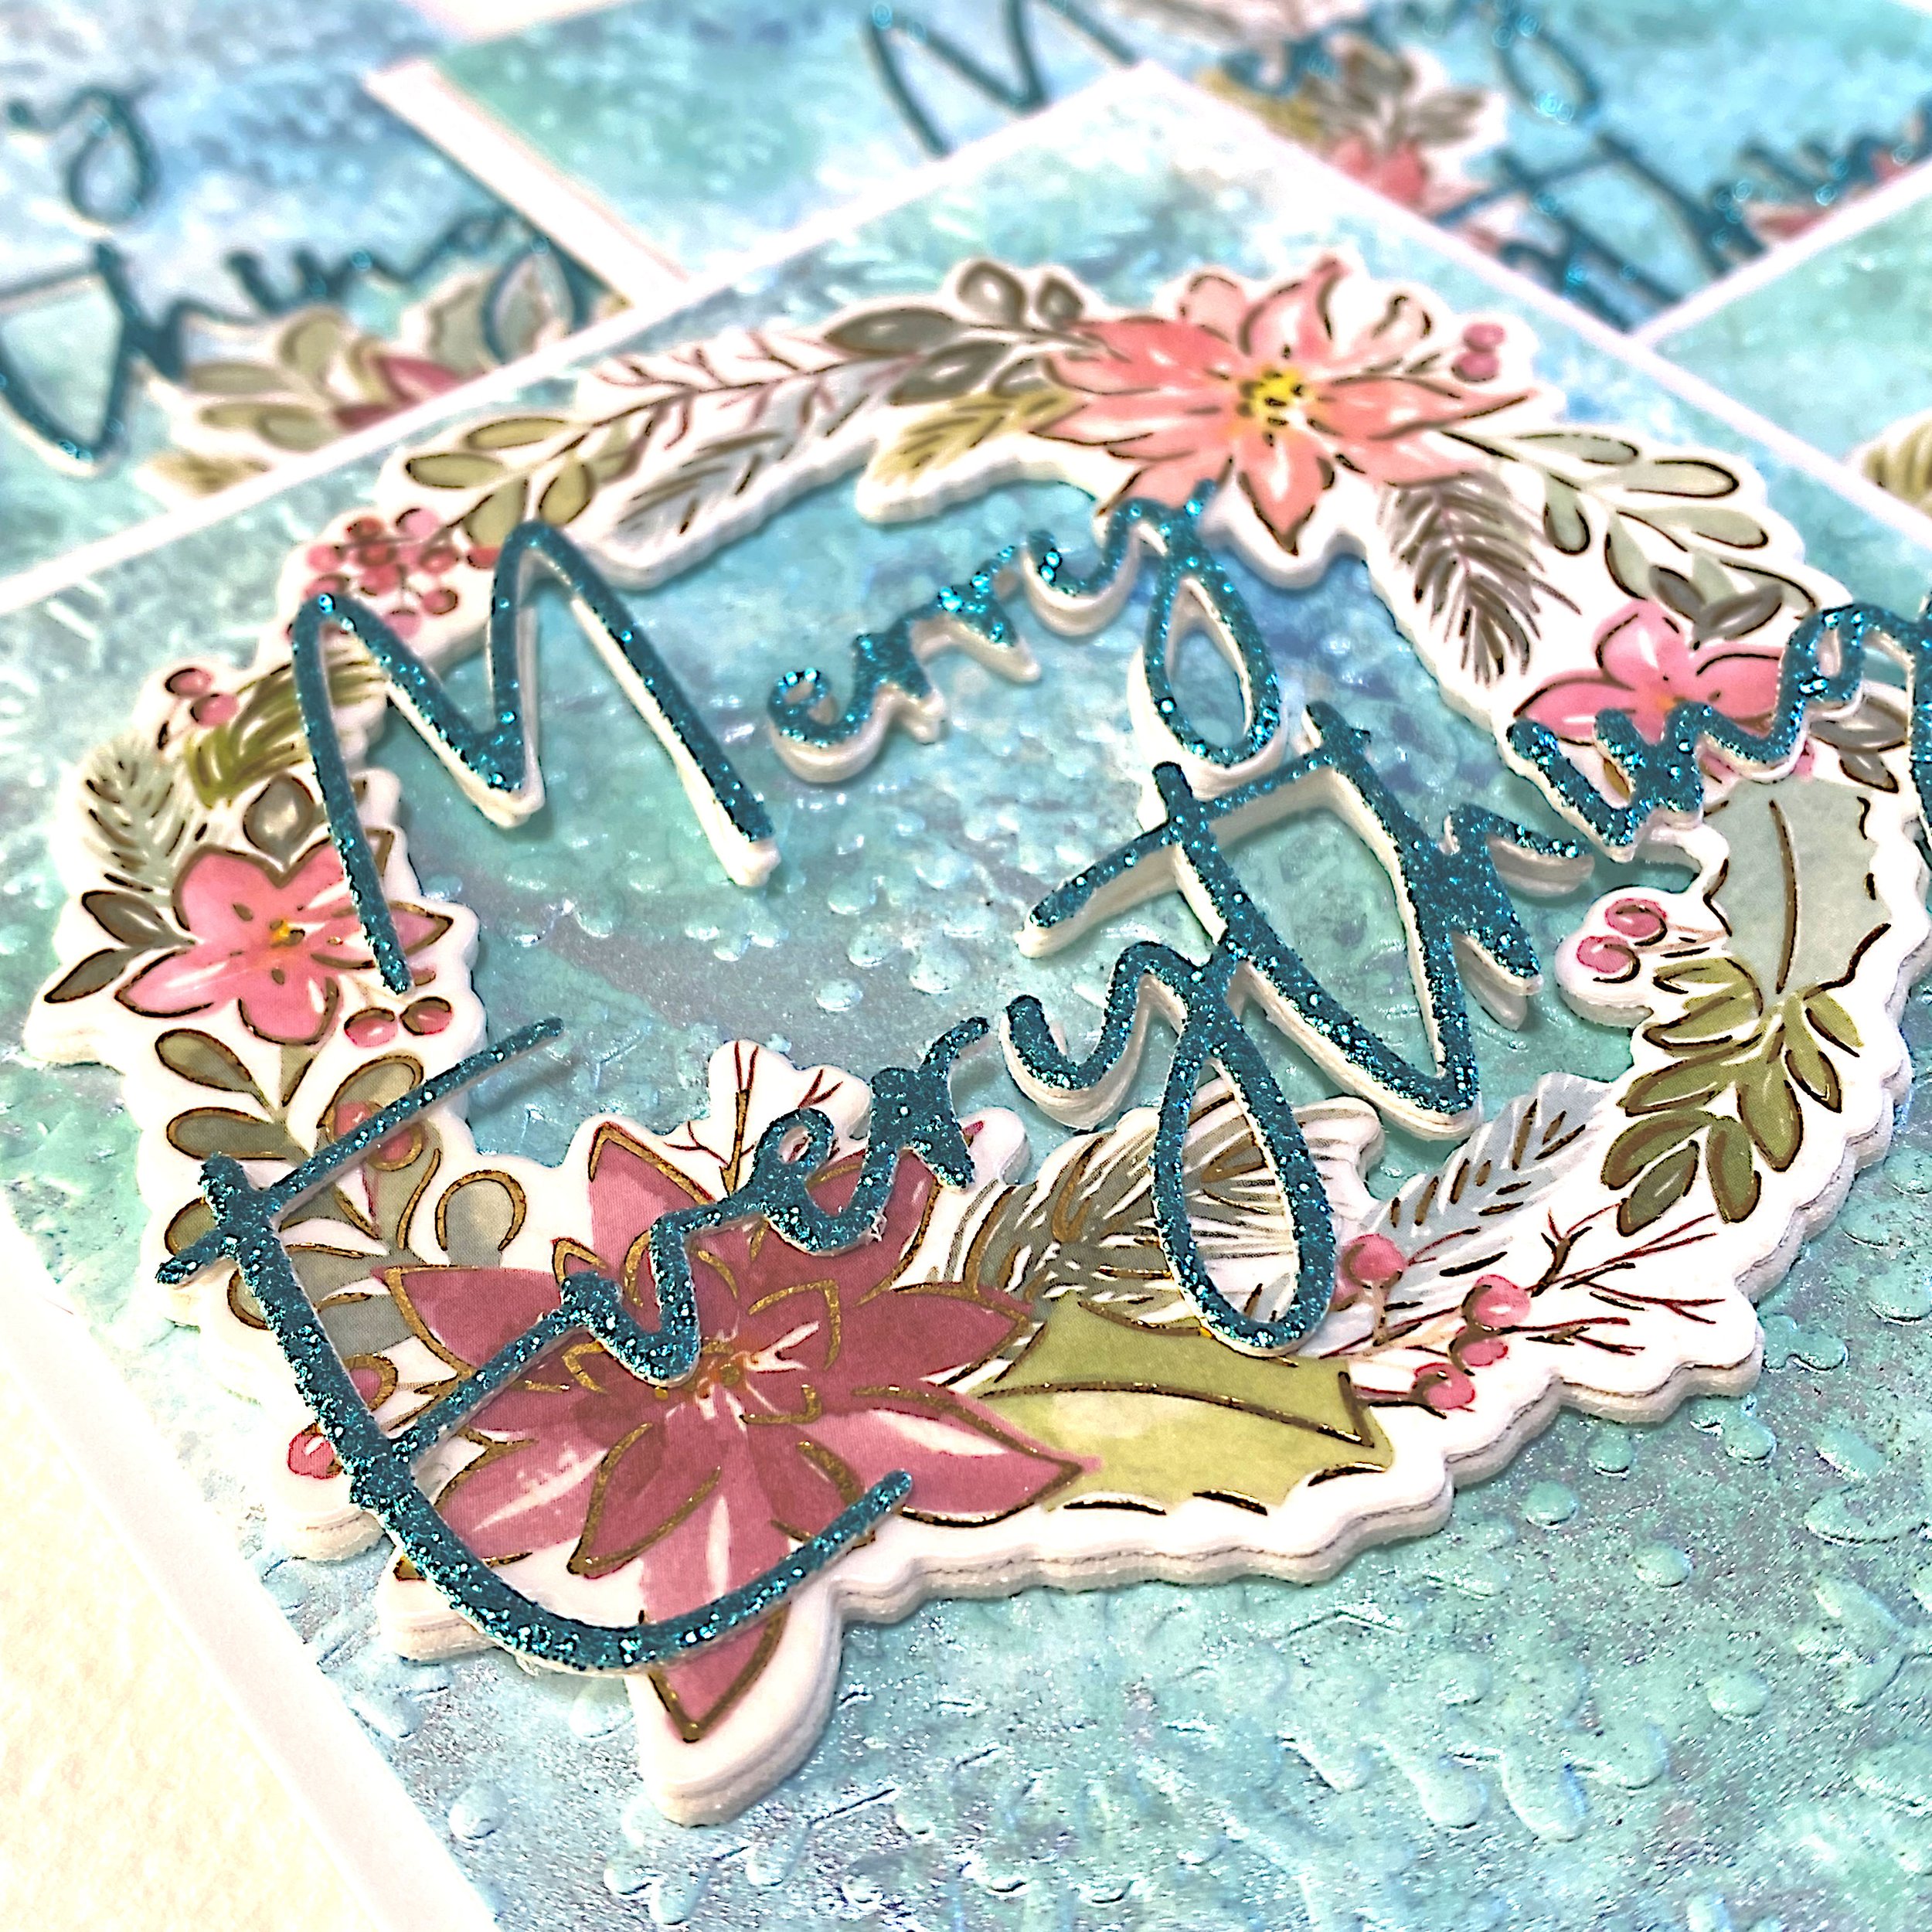
Merry Everything
The theme for June’s Crushing Yule Insta hop was swinking. Swinking means dragging your ink pad on the card panel. Unfortunately I misunderstood the technique, so I did ink smooshing instead. Oh well. 🤷🏼♀️
So I created five ink smooshed cards and I’m happy with the result.
Ink smooshing
Ink smooshing is a very popular technique that creates backgrounds with random blotches of ink. A couple of tips:
Use colors that are close on the color wheel for a harmonious result. Complementary colors = greige 😫
Add the ink to a silicone mat for interesting texture. It works much better than glass.
You can smoosh your ink pads onto the silicone mat. That’s where the name of the technique comes from.
You can also use sprays. Reinkers OTOH will probably give more saturation than you need.
Add water and use your fingers to break up patterns on the crafting surface.
If you want the inks to move, wet your paper before dunking it in the ink. The more water, the more movement.
Dry each layer before adding another. I let mine dry in the California 😎 sun, but you can also use your heat gun.
Wet your paper for the first few layers to get light, even coverage.
Watercolor paper is great for ink smooshing, particularly if you like using a lot of water.
Leave the paper dry for later layers to get more intense drips and blobs.
More layers = more interest 😻
It’s really easy to create multiple backgrounds using ink smooshing, so I recommend cutting up a couple of panels and going to town.
If you don’t like the result, leave it alone over night. The next day it will 🧙🏼♀️ magically look better.
Resist the temptation to improve the result by using a brush your your hands on the paper. It will never look organic.
Your card panel will most likely be warped by the time you’re done, even if you use watercolor paper. To smooth out the panel, run it through your die cutting machine with or without an embossing folder.
I used white, green and light blue mica sprays from Ranger for my backgrounds.
Snowflakes embossing folder
To add to the wintry feel of the pearlescent white, green and blue, I ran my card panels through a 2D snowflake embossing folder. Even though I used watercolor paper, the card panels were badly warped before. As you can see in the photo, they were lying flat after the trip through my Platinum 6.
Pretty much every crafty company has their own snowflakes embossing folder. The one I have is from Echo Park. I got it at Tuesday Morning (what is remembered, lives 😭). In my opinion, Echo Park dies and stamps are on the expensive side without being obviously better quality than other brands.
Here’s a 2D snowflakes embossing folder from Kwan Crafts and here’s a 3D snowflakes embossing folder from Spellbinders. The Kwan Crafts folder is half the price of the Spellbinders folder and in this case you get what you pay for. OTOH the recipient of your card is not going to turn up their nose at it because you created it with a 2D folder. They won’t know the difference unless they’re a cardmaker themselves.
In case you’re confused by 2D vs 3D embossing folders, both are obviously three-dimensional in the mathematical sense. As a term of art, the difference is that a 2D folder only creates two levels: for each location on the card panel either it pushes the paper in or it doesn’t. 3D folders have smooth gradients between peaks and valleys. This gives a more realistic effect and it also makes it less likely that your cardstock will rip. 3D folders are a relatively new technology and they tend to be more expensive than 2D folders. They’re also much thicker, so you need to use a different sandwich in your die cutting machine for them.
Merry Everything
For the sentiment I used a holiday bonus from Spellbinders to their monthly subscribers from a few years ago. It was designed by Yana Smakula. If you like the style, she has designed some layered sentiments. Here’s Happy Birthday and Thanks and here’s some more sentiments by Yana. If you like the irreverence of Merry Everything, you can put it together from this Spellbinders die set. I’m totally getting that one because it’s in a style I like and it has lots of uses.
There are two layers of Accent Opaque 120 lbs and one layer of Recollections turquoise glitter cardstock in my sentiments.
Poinsettia embellishments
Pinkfresh Poinsettia washi tape and die set was part of their 2021 holiday release and is now sold out. With Pinkfresh, like many small crafty companies, you need to be on their mailing lists to find out about new products and sales. I got the complete Poinsettia set in a recent sale, as you can see from my haul photo.
To use washi tape, you apply it to cardstock and use the coordinating die to cut it out. From this washi you end up with 8 separate embellishments of varying sizes. Pinkfresh washis typically feature a round wreath as the hero motif, one large cluster of flowers and an assortment of smaller clusters. I typically use the wreath at the top center of a card and the secondary cluster at the bottom right. Of the smaller ones I like to use two: one in the top left corner and one in the bottom right.
In this case I popped up the wreath on white craft foam. For the other embellishments I just doubled them up with Accent Opaque 120 lbs. I had one extra background, so I cut out another pattern repeat of washi and chopped up the wreath into two parts. One is coming in from the top left, the other from the bottom right.


