
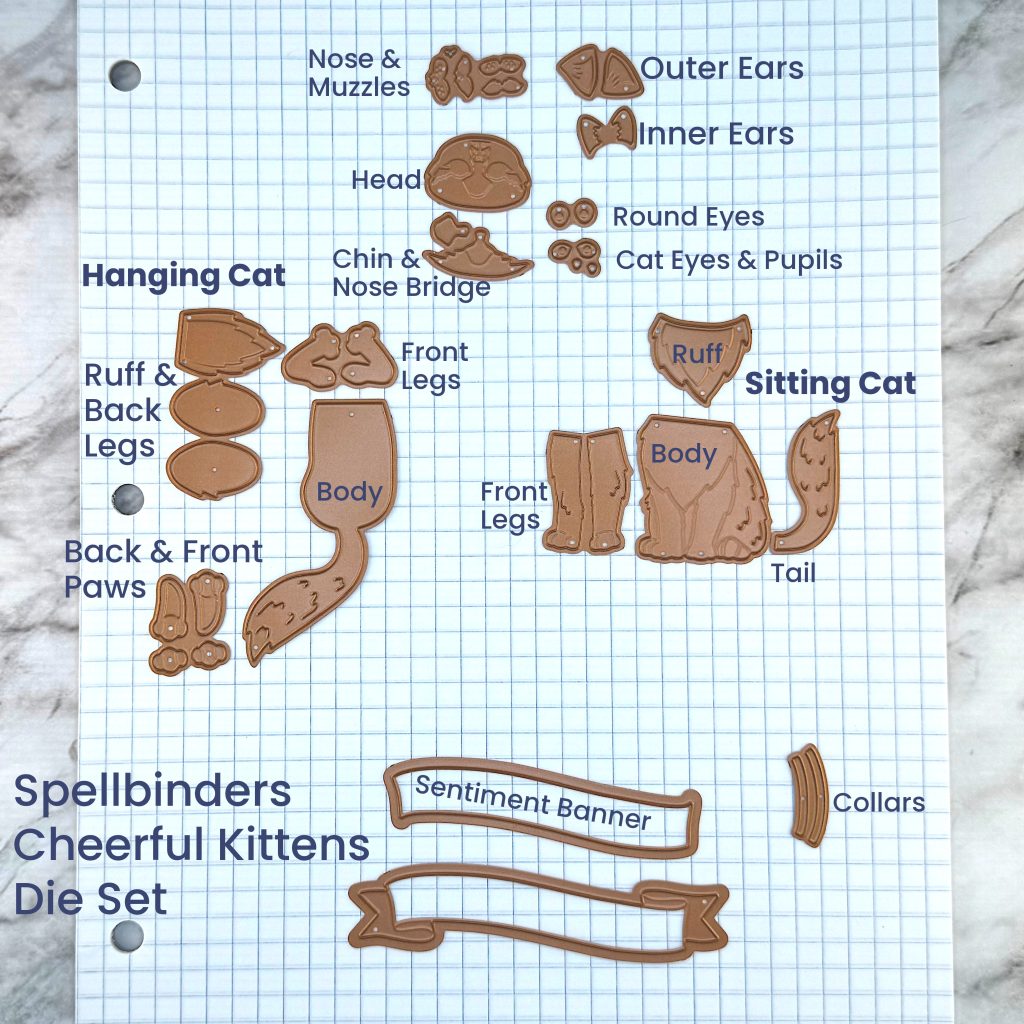
I created these cards using Bibi Cameron’s Cheerful Kittens Die Set and leftover die cuts from recent projects. You can make two cats with this die set: one who hangs from a banner and one who sits. The head is the same for both. So if you want to make two cats, you need to cut most of the head and face parts twice. I used mostly black and grey cardstock from Recollections 110 lbs Coffee & Cream Cardstock Pack. Most of the die cuts are very small, so it’s a great opportunity to use up scraps, particularly specialty paper scraps.
Heads
Glue the chin to the head and then add the nose bridge partly on top of it.
Select which die cuts from the nose & muzzles dies you want to use. I went with two of the larger muzzles, and put the die cut with the dimples for the whiskers on top. OTOH I didn’t use the nose. Instead, I colored the nose black with a marker and added a little Glossy Accents to it.
Select either round or almond-shaped eyes and glue the pupils in place. Then add the eyes to the head.
Glue the inner ears onto the outer ears. Then glue the assembled ears to the back of the head.
Hanging Kitten
Glue the ruff onto the body. If you want to add a second layer to the tail, do that before you place the back legs. Then glue the back legs in place and add the back paws. They’re longer than the front paws.
Hold the banner in front of the kitten, to figure out the placement of the front legs. Then glue the front legs to the back of the body. The “elbows” should show below the banner.
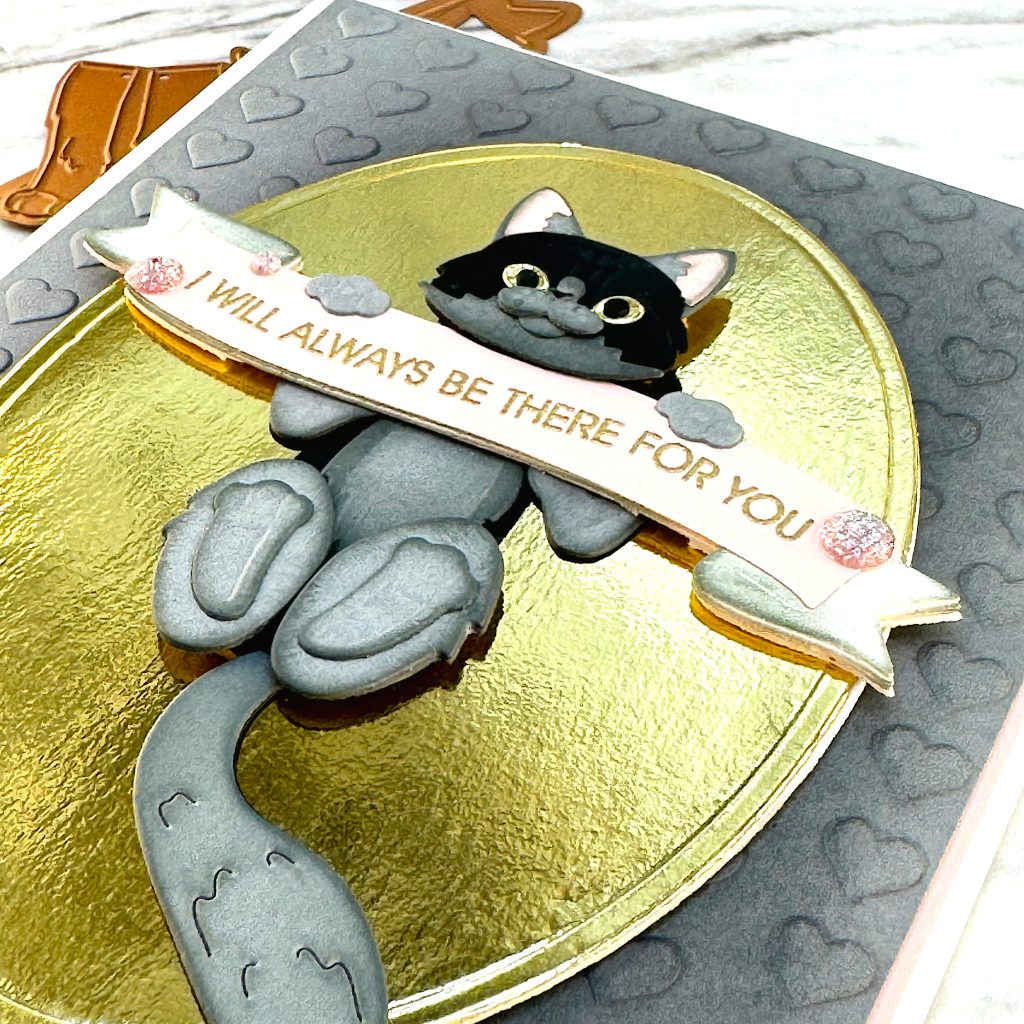
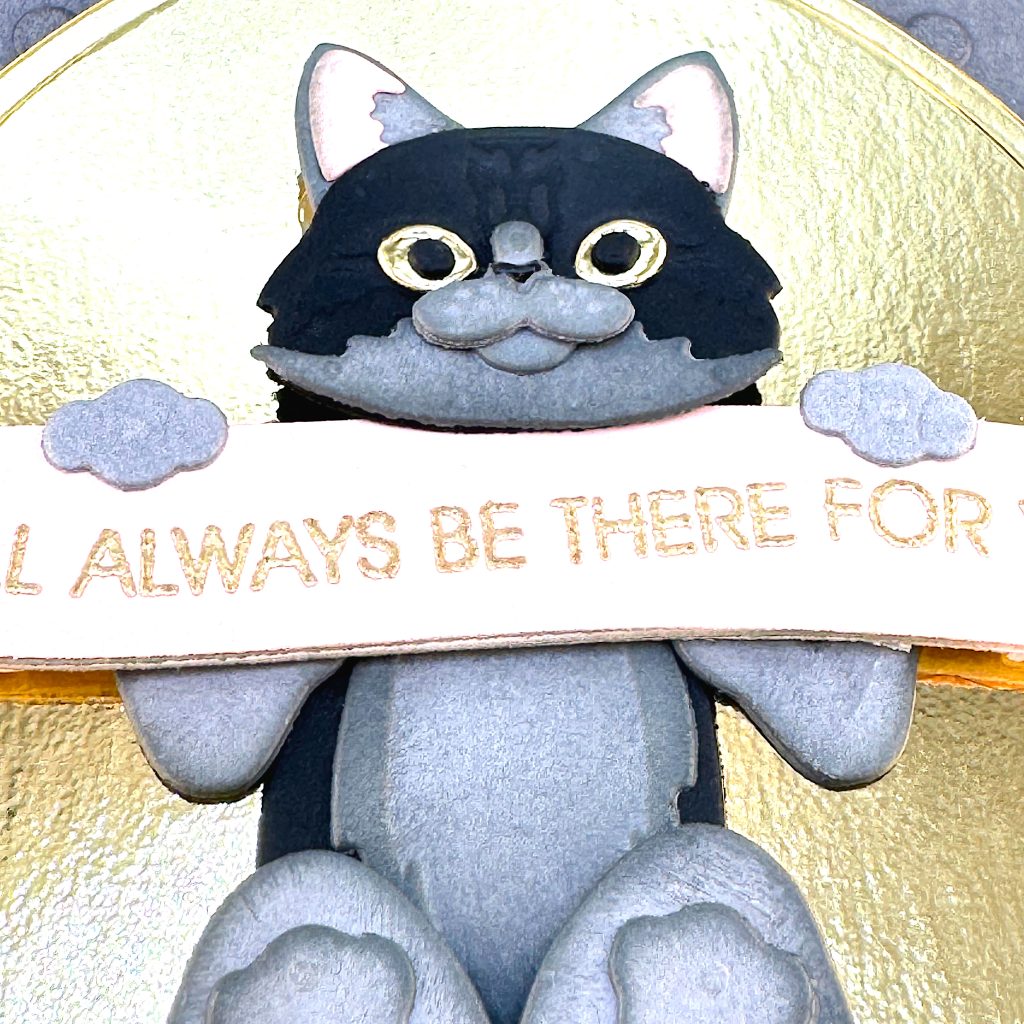
Glue the banner and body to the background. Glue down the head with the chin on top of the banner. I used a double layer of foam tape behind the head. If you’re using a collar, add it now. Then add the front paws partly on top of the banner.
Sentiment Banner
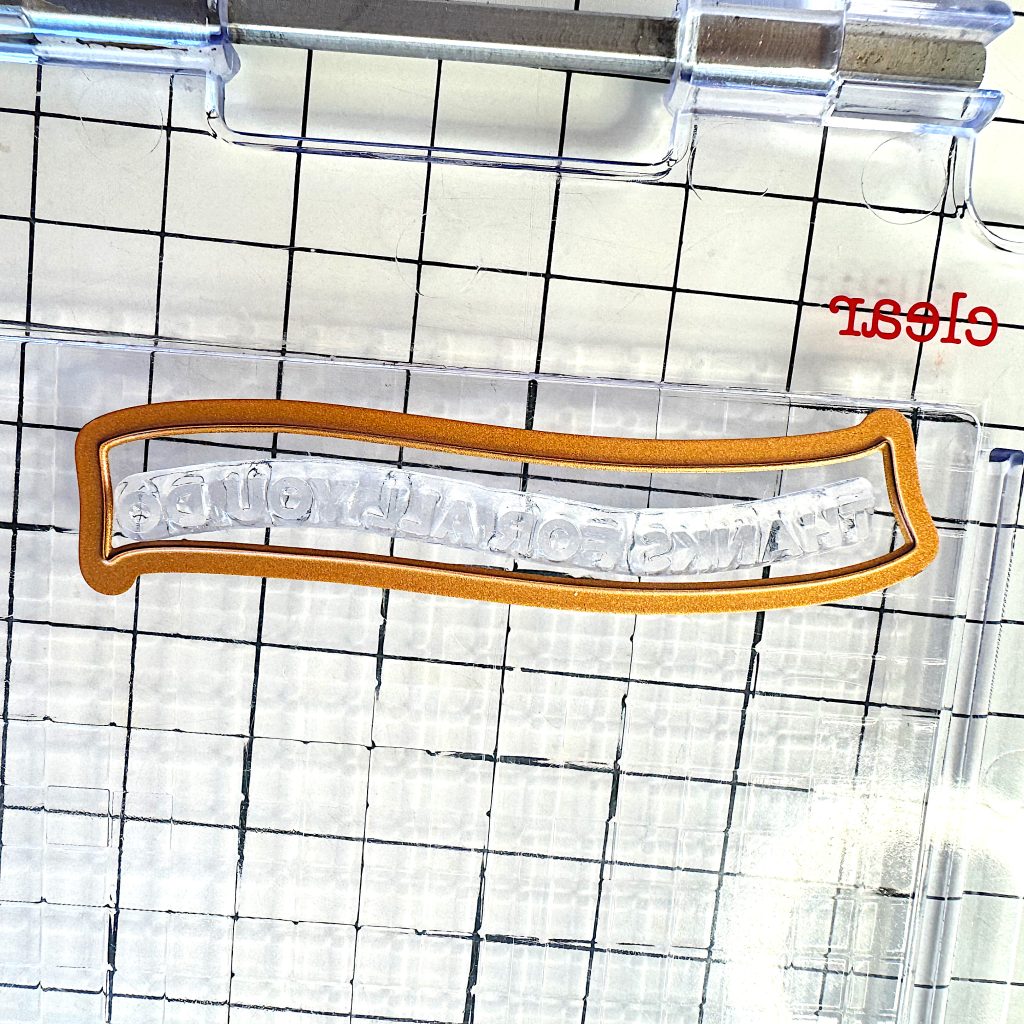
The banner has two parts, which makes it easier to stamp and cut out. If you have sentiment stamps with the right curve, this is your chance to use them. But you can also use straight, single-line sentiments. Check out the photo above of how I used the inner sentiment die to give my sentiment the right curve.
I stamped the sentiment in Versamark Embossing Ink and embossed it with Ranger Ink Super Fine Detail Embossing Powder in Gold on pink cardstock.
Background
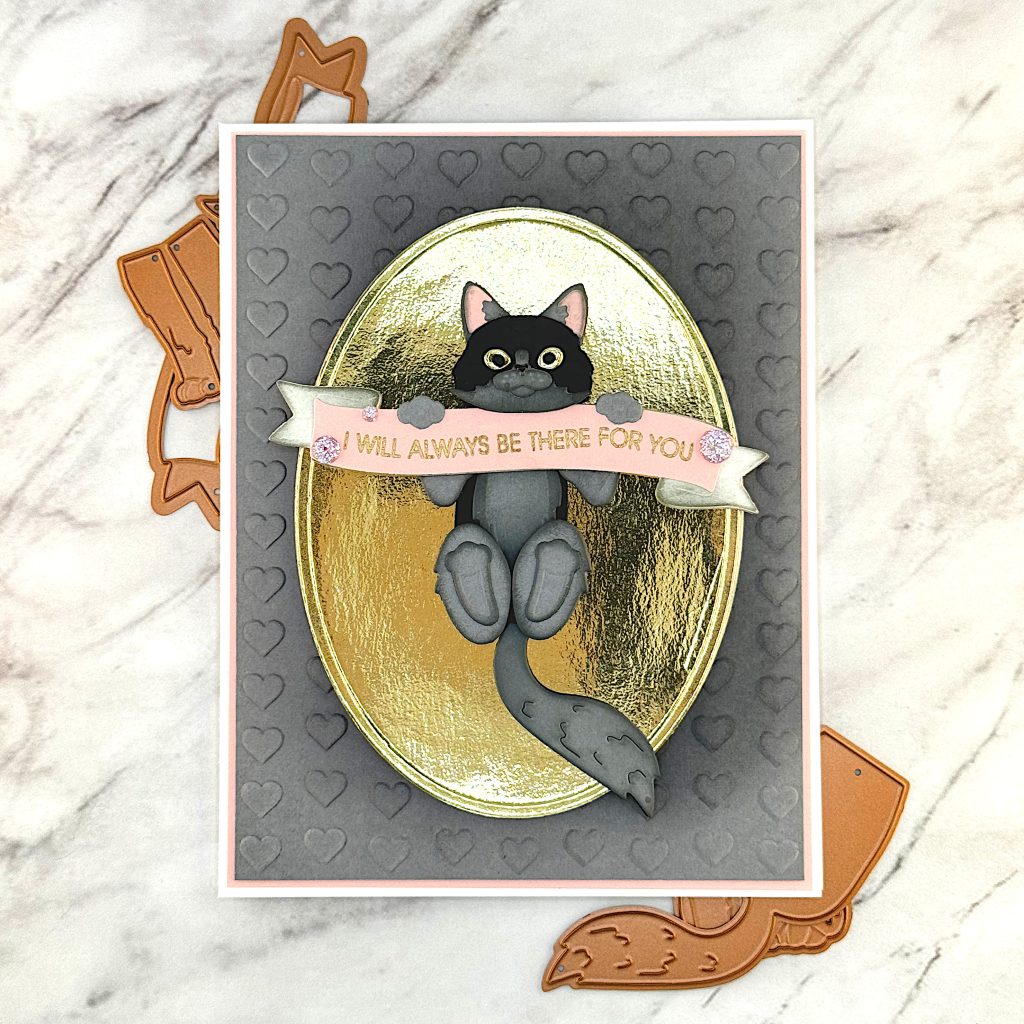
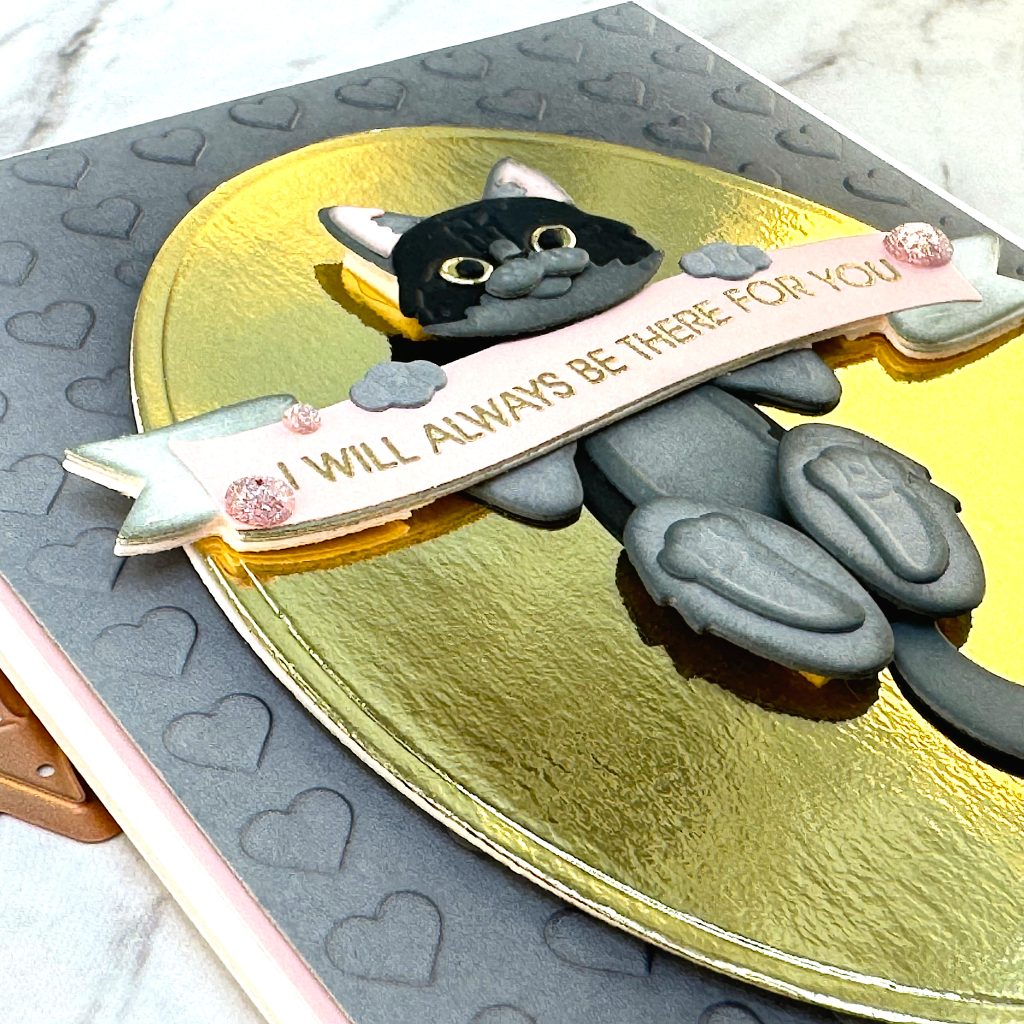
For my hanging kitten, I used a leftover oval die cut from yesterday’s project. It was cut from Recollections Gold Foil Cardstock with the smallest embroidery hoop die from Spellbinders Stitched Wall Hanging.
I created the background from Recollections grey cardstock, dry embossed with an unfortunately-retired Spellbinders Embossing Folder called Heart & Soul. To give it a bit more contrast, I ink blended it with Distress Oxide ink in Black Soot from the center and outwards. Then I matted it on a piece of Recollections pink Cardstock to tie it together.
I adhered the cat’s body directly to the gold oval. Then I added extra layers of cardstock behind the banner ends, so the banner would be level. I glued down the banner and added the head and the front paws. The head needed two layers of foam tape to sit level on top of the banner.
Finally I scattered some Pinkfresh Studio Glitter Drops in the color Blossom around the sentiment.
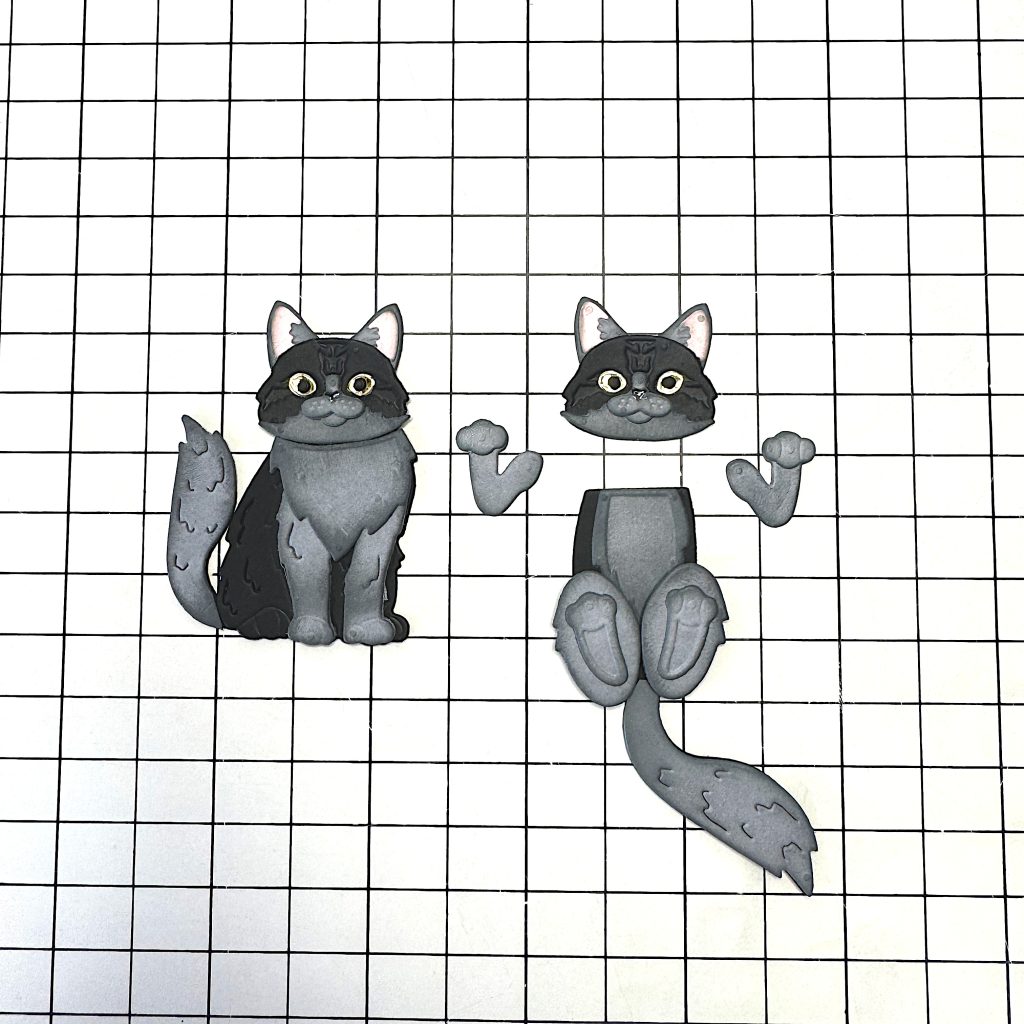
Sitting Kitten
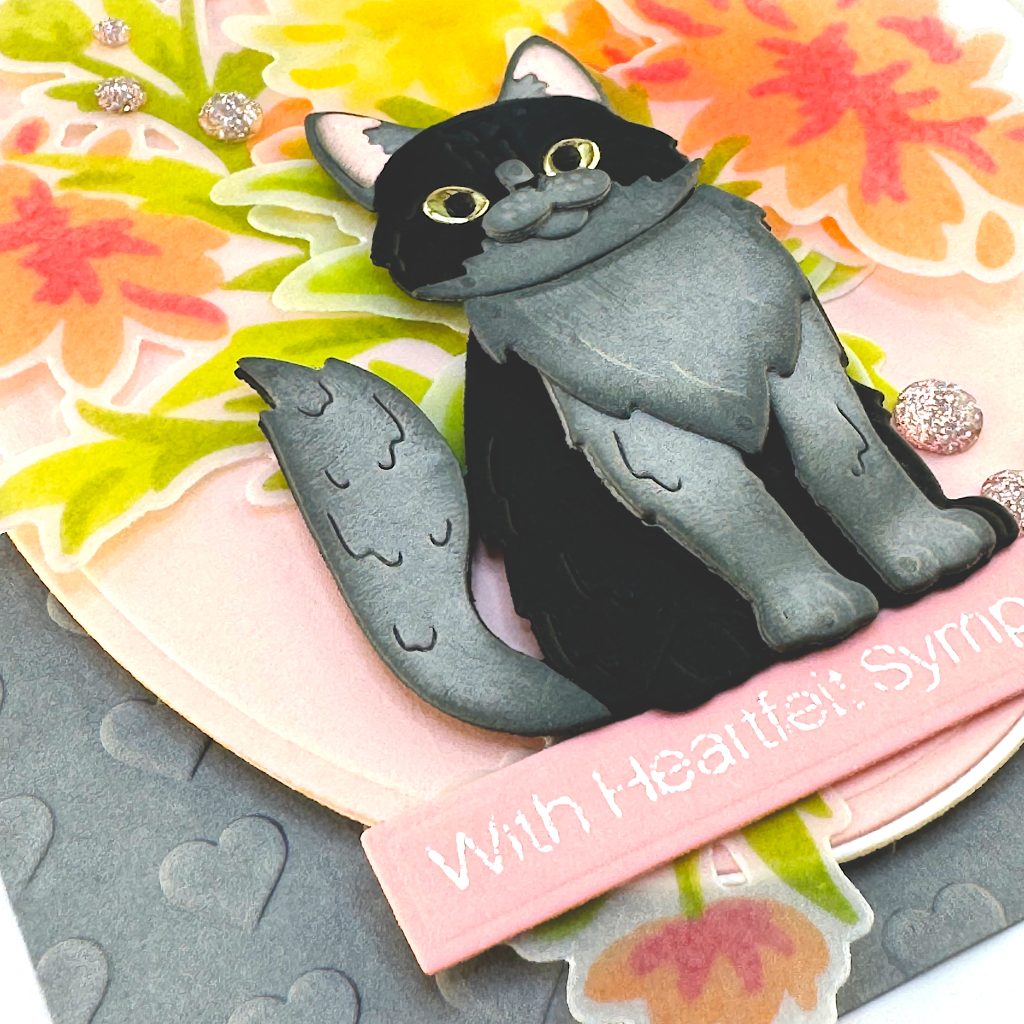
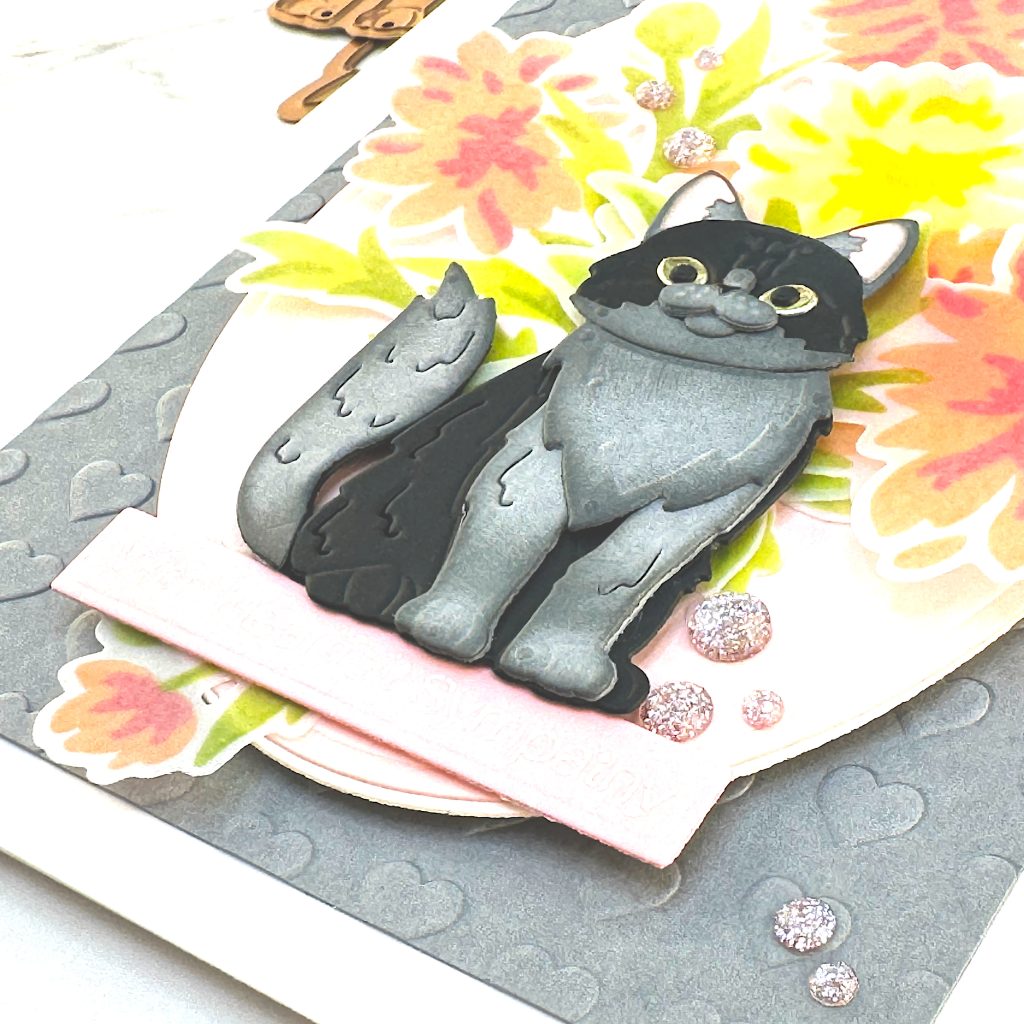
Glue the tail to the backside of the body. Glue the front legs to the body. Then glue the ruff onto the body.
Glue the head to the body. If you’re using a collar, you can add it now.
Sentiment
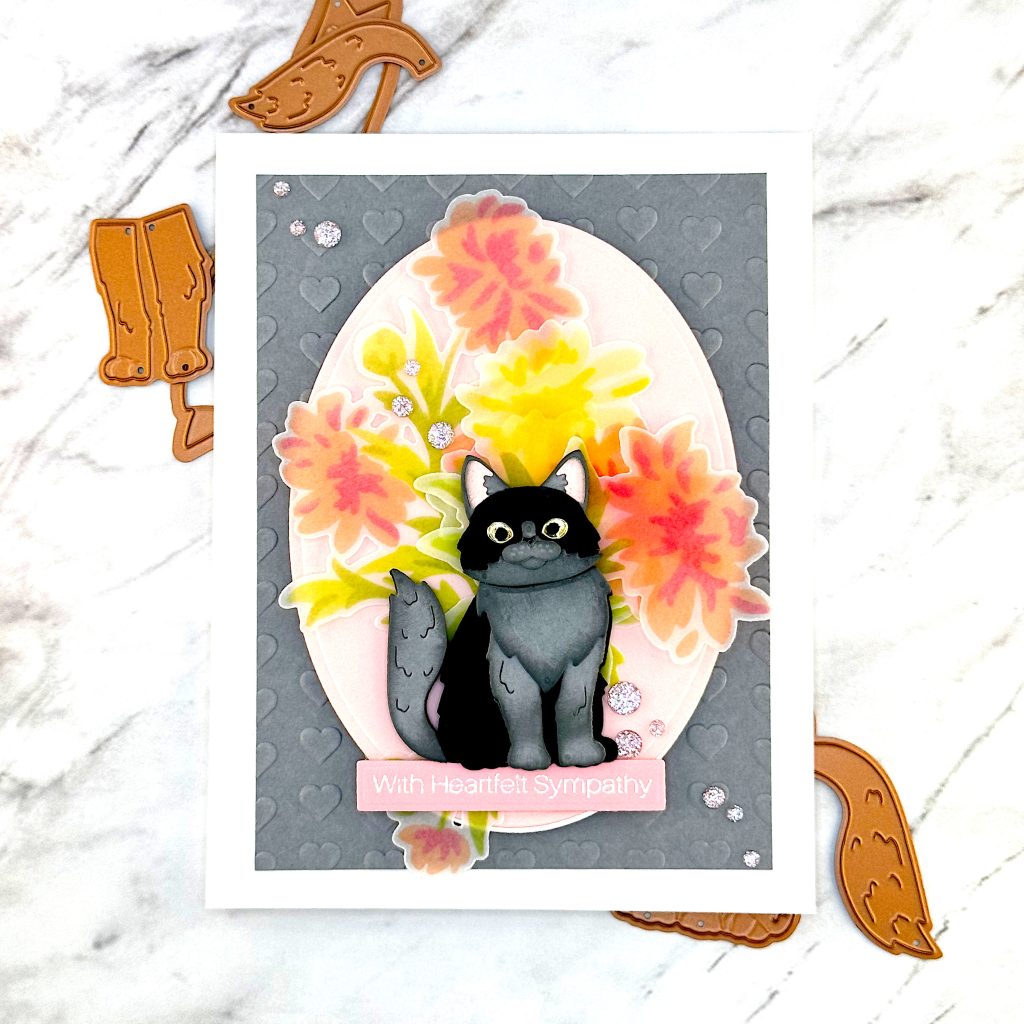
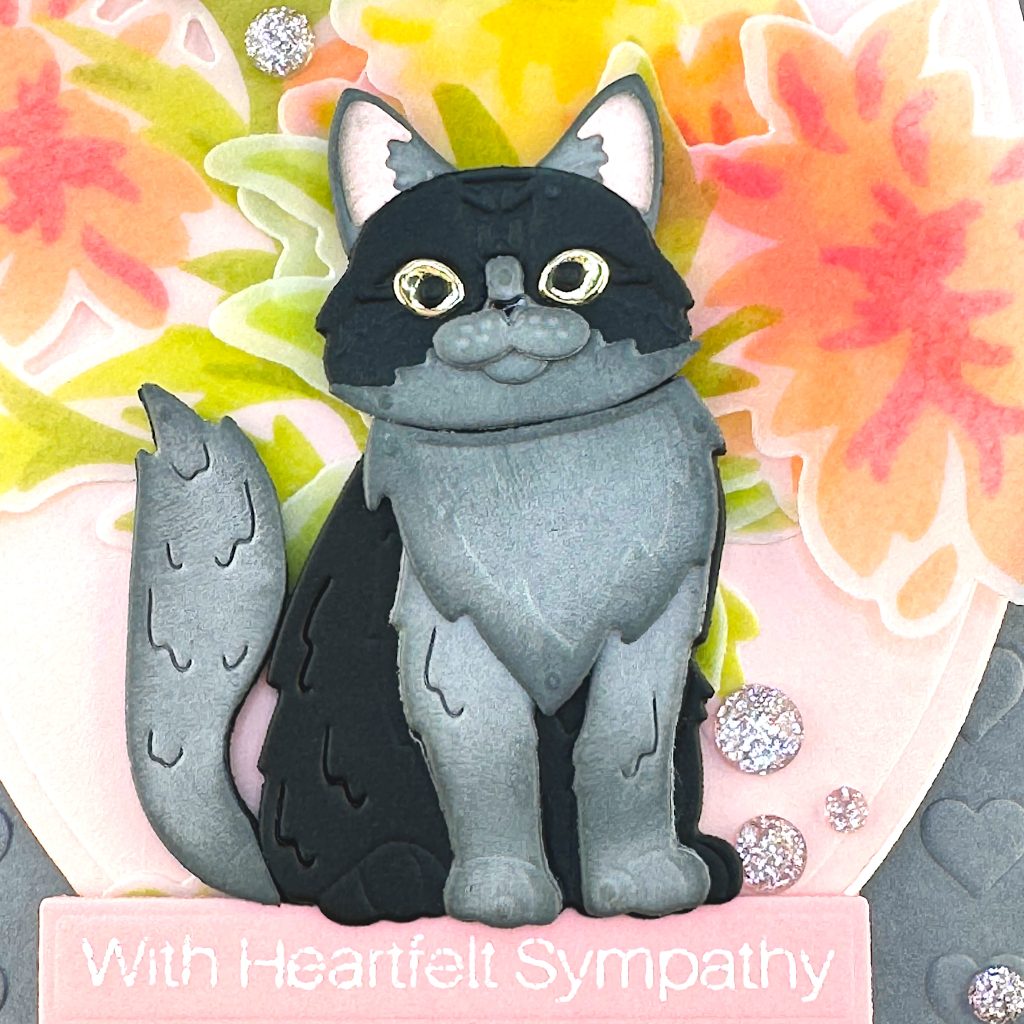
I heat embossed the Kat Scrappiness Simple Sentiments with Ranger Ink Super Fine Detail Embossing Powder in White on pink cardstock. Then I cut it out with the coordinating die.
Background
I used leftover stenciled vellum die cuts from a previous project to decorate the background behind my cat. The products were Pinkfresh Studio’s Chrysanthemum layering stencils and die set. To get brighter colored flowers, I layered an orange die cut over an orange flower and a yellow flower over another yellow flower.
The pink oval was cut with the smallest embroidery hoop die from Spellbinders Stitched Wall Hanging.
I placed the oval on a background of Recollections grey cardstock, dry embossed with an unfortunately-retired Spellbinders Embossing Folder called Heart & Soul. Then I placed the cat and the sentiment.
Finally I scattered some Pinkfresh Studio Glitter Drops in the color Blossom across the card.
Supplies Used
- Spellbinders Cheerful Kittens Die Set
- Spellbinders Heart and Soul Embossing Folder (retired) Similar Folder: Tiled Hearts
- Spellbinders Stitched Wall Hanging
- Pinkfresh Chrysanthemum Stencils and Die Set
- Pinkfresh Glitter Drops Blossom
- Recollections Gold Foil Cardstock
- Recollections 110 lbs Rose Petals Cardstock
- Recollections 110 lbs Coffee & Cream Cardstock