
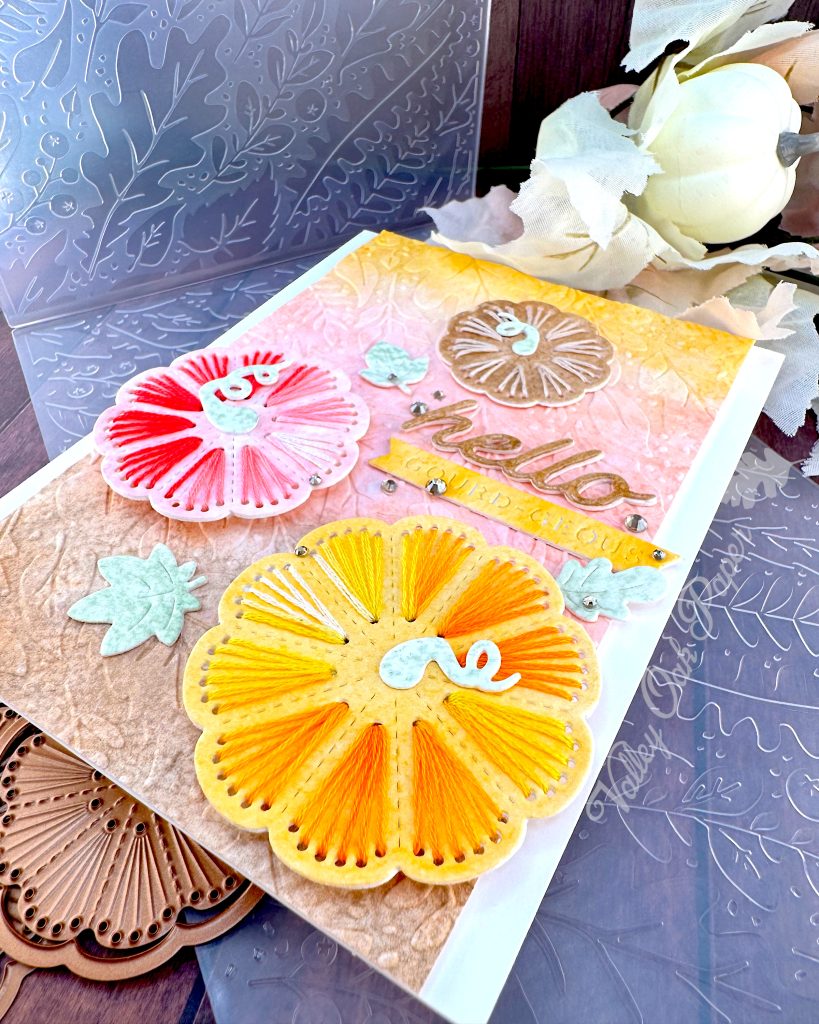
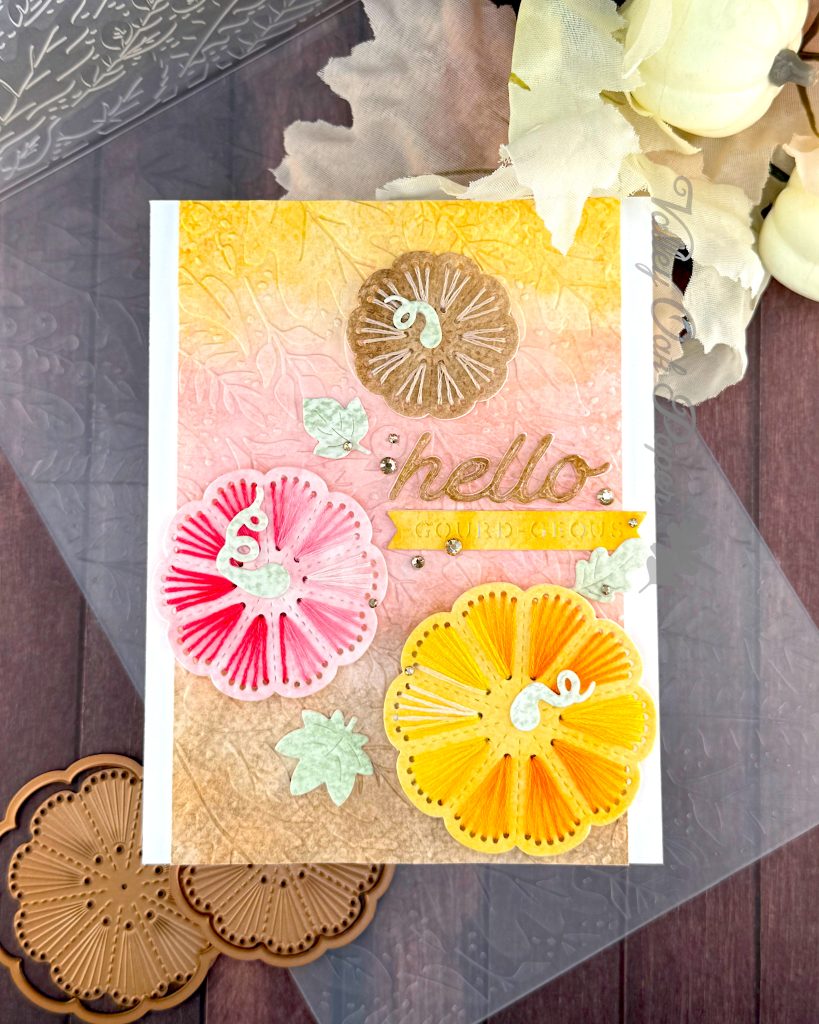
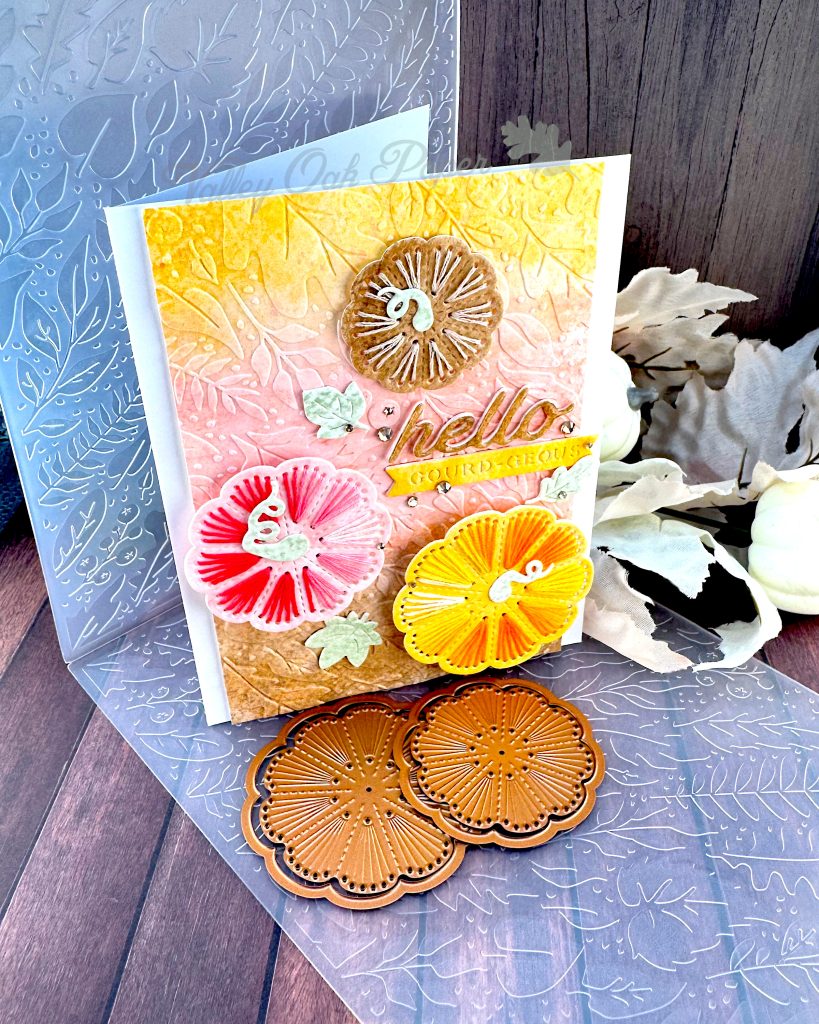
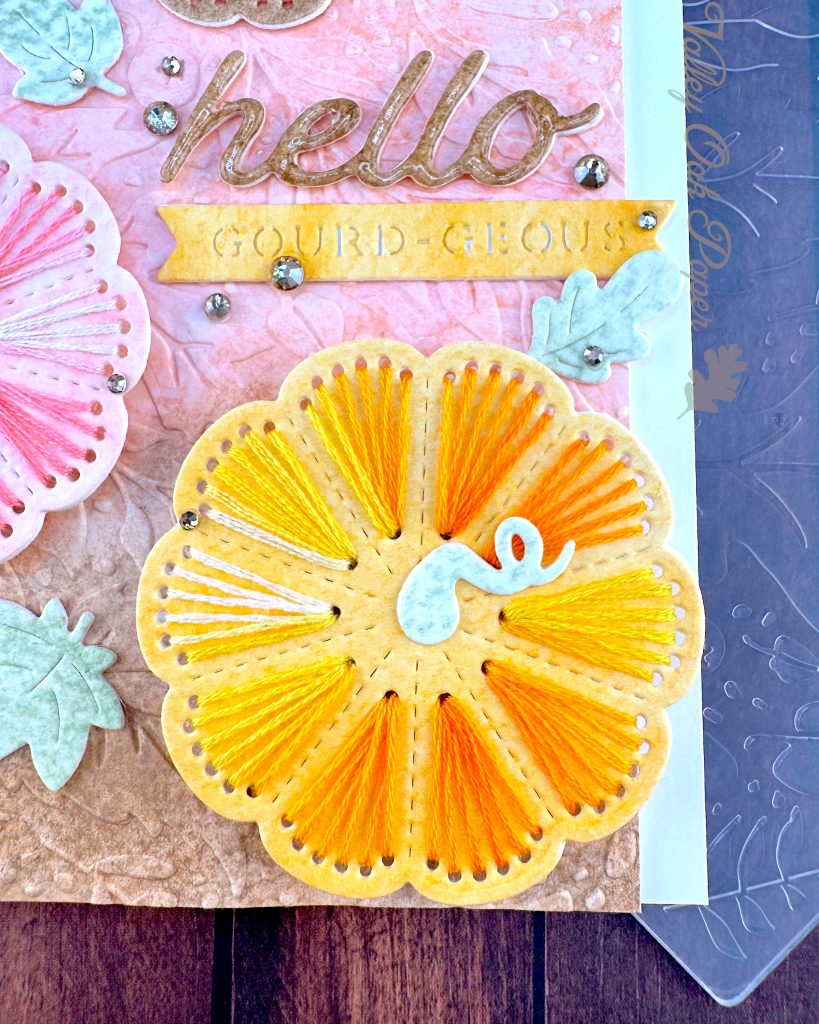
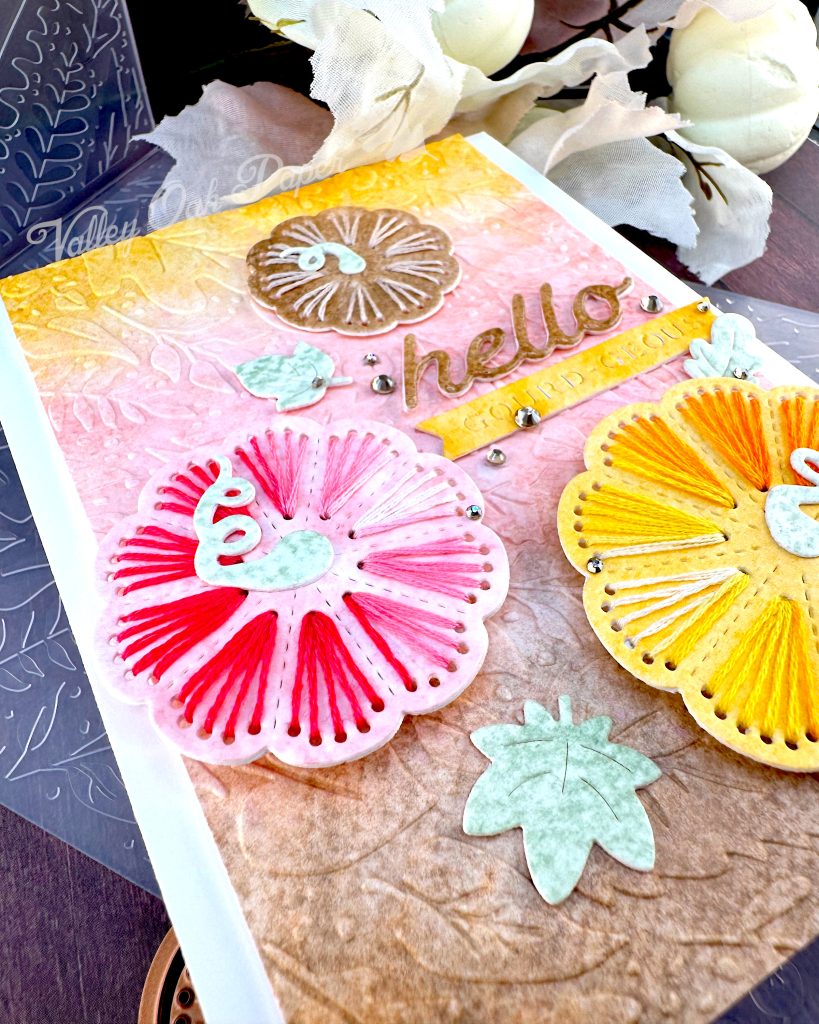
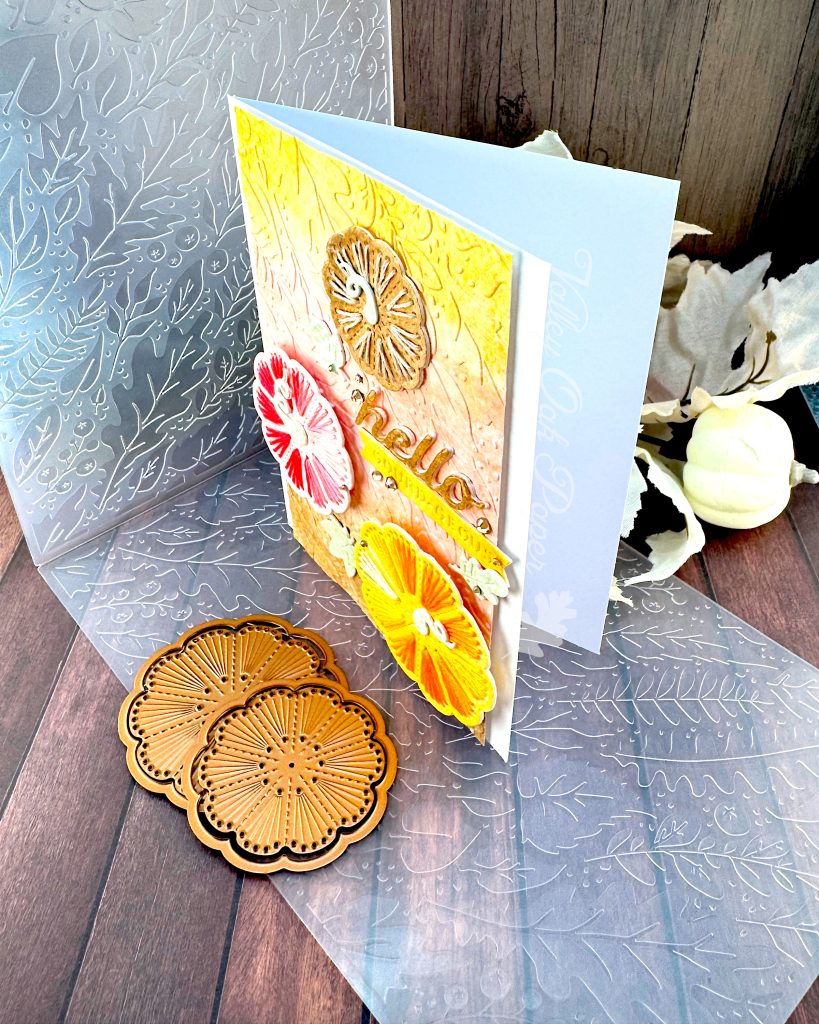
The Spellbinders Stitching Die Set for September 2025 is a fun top-down view of pumpkins in three different sizes. It’s called Stitched Pumpkin Tops.
For the embroidery floss I went to Michael’s and picked up two bags from Loops & Threads. One was labeled Variegated, the other Vintage. Personally I haven’t found any big differences in quality between different brands of floss. For the simple stitching done on these cards, any brand should be fine. Just make sure that the floss consists of six strands that can be separated.
Die Cutting & Embossing
I started by die cutting the three pumpkins from watercolor paper colored with Distress Watercolor Pencils in Wild Honey, Kitsch Flamingo and Ground Espresso. I also cut them from Accent Opaque and then I stacked them. The colored watercolor paper was leftovers from a project that you’ll see later this week…
While I was die cutting, I also cut the leaves and pumpkin vines included in the set from watercolor paper colored with Bundled Sage, the included Hello sentiment from Ground Espresso and the Gourdgeous from more Wild Honey. Then I did it again with Accent Opaque 100 lbs and stacked them.
I also dry embossed the September Embossing Folder of the Month, Autumn Breeze, on a piece of watercolor paper colored in Wild Honey, Kitsch Flamingo and Ground Espresso.
Pumpkins
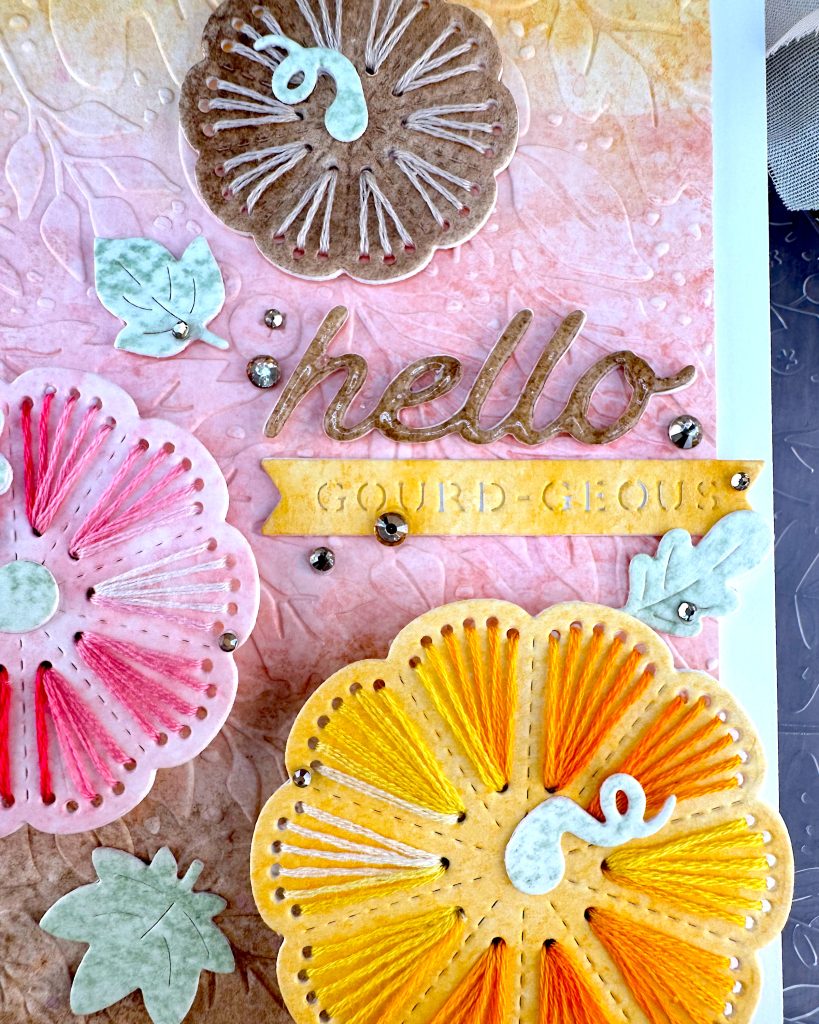
I stitched the yellow pumpkin with a white-to-orange variegated floss. For the pink pumpkin I chose a white-to-red floss and the brown pumpkin got stitching in a tan color from the Vintage packet. For all of these I used 3 strands. The stitching pattern is identical on all three pumpkins. The largest one has ten segments of six stitches, the medium one has ten segments of five stitches and the smallest one has ten segments of three stitches each.
When I had stitched the pumpkins, I glued the pumpkin vines to the centers and added foam tape to the back of the pink and yellow pumpkins.
Background
First I cut my embossed panel down to 3 ¾” by 5 ½”. Then I added a slightly smaller layer of Accent Opaque to the back. When that was dry, I added a layer of thin Dollar Tree craft foam to the back and glued it to the front of my card base.
Assembly
Next I placed the three pumpkins on the embossed card front. Then I added the two sentiments. I decorated with leaves and Gold Mix Color Essentials Gems. But I still felt that the Hello didn’t stand out enough, so I added two layers of Ranger Glossy Accents to it.
