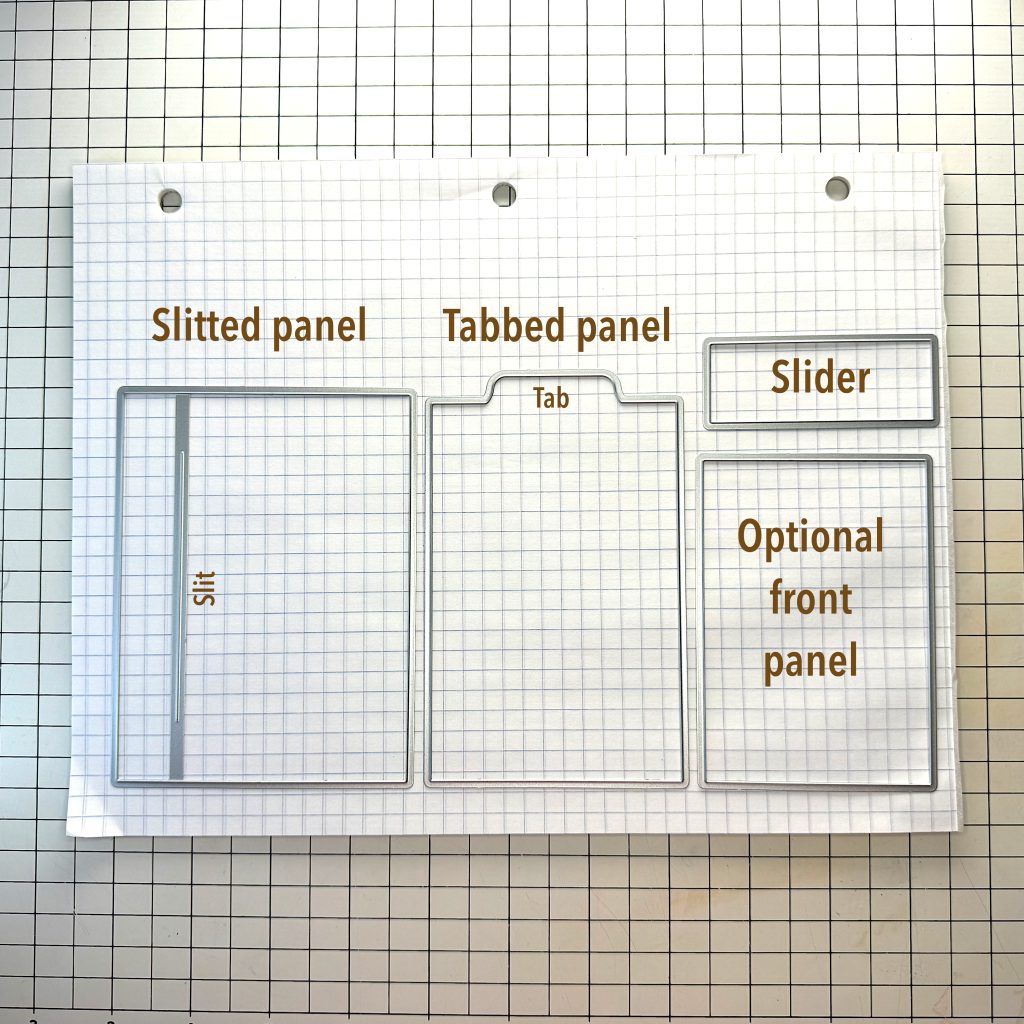
There are four dies in the Pinkfresh Studios Side Slider die set. To create a slider you only need three of them. The Front Panel is optional.
Once you’ve die cut the parts you want to use, turn the Slitted Panel over and thread the Slider through the Slit. Place the Slider in the bottom position. You will add foam tape along the sides of the slitted panel, so take care to leave at least 1/8” between the end of the Slider and the long side of the Slitted Panel.

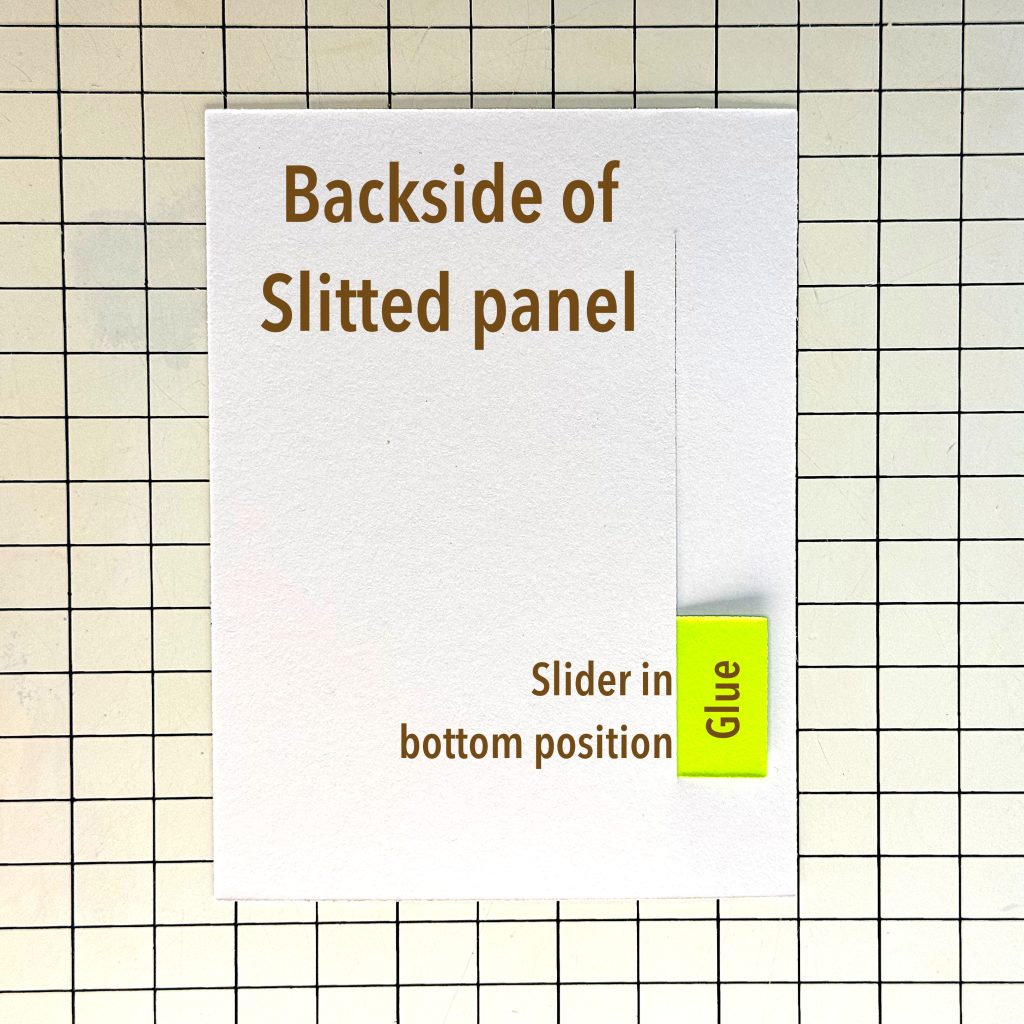
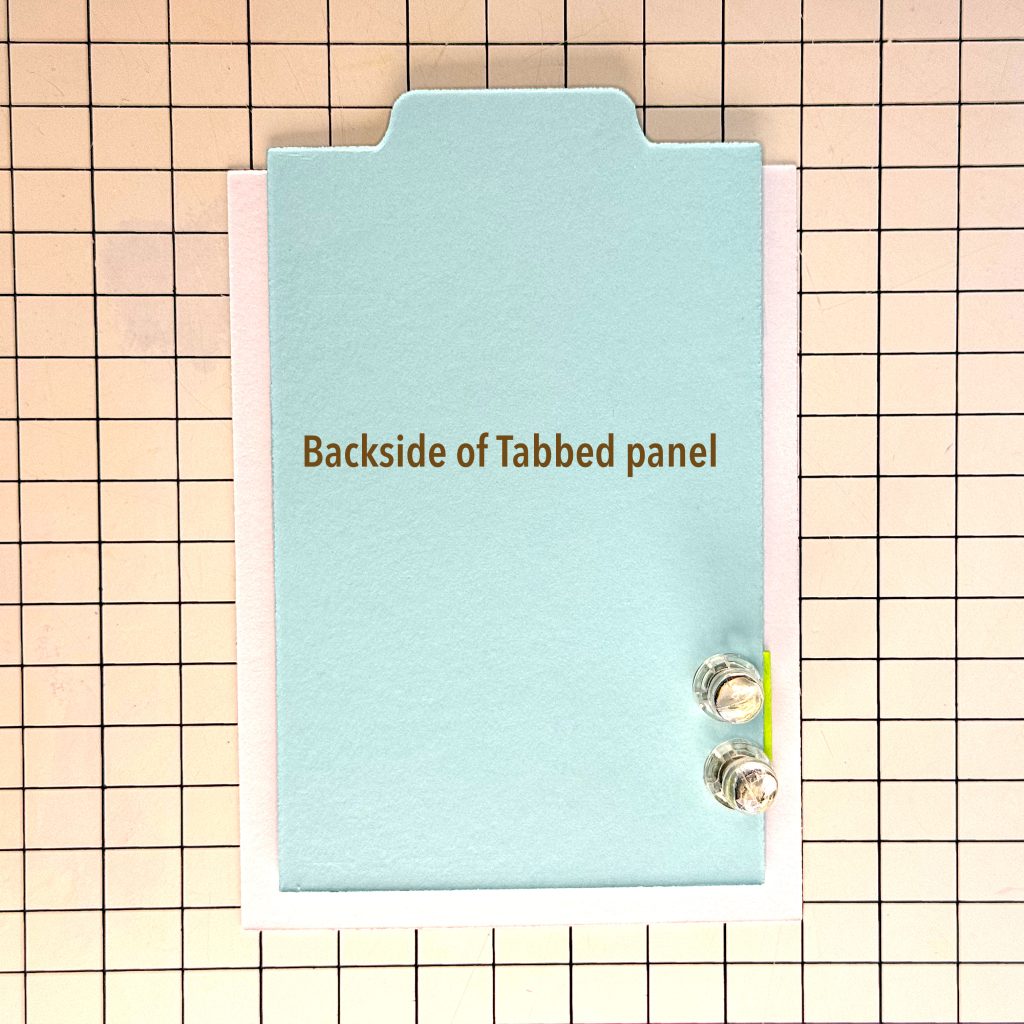
Make sure the Slider sits straight and apply glue only to the part that you see. Place the front of the Tabbed Panel down on the glue, as shown.
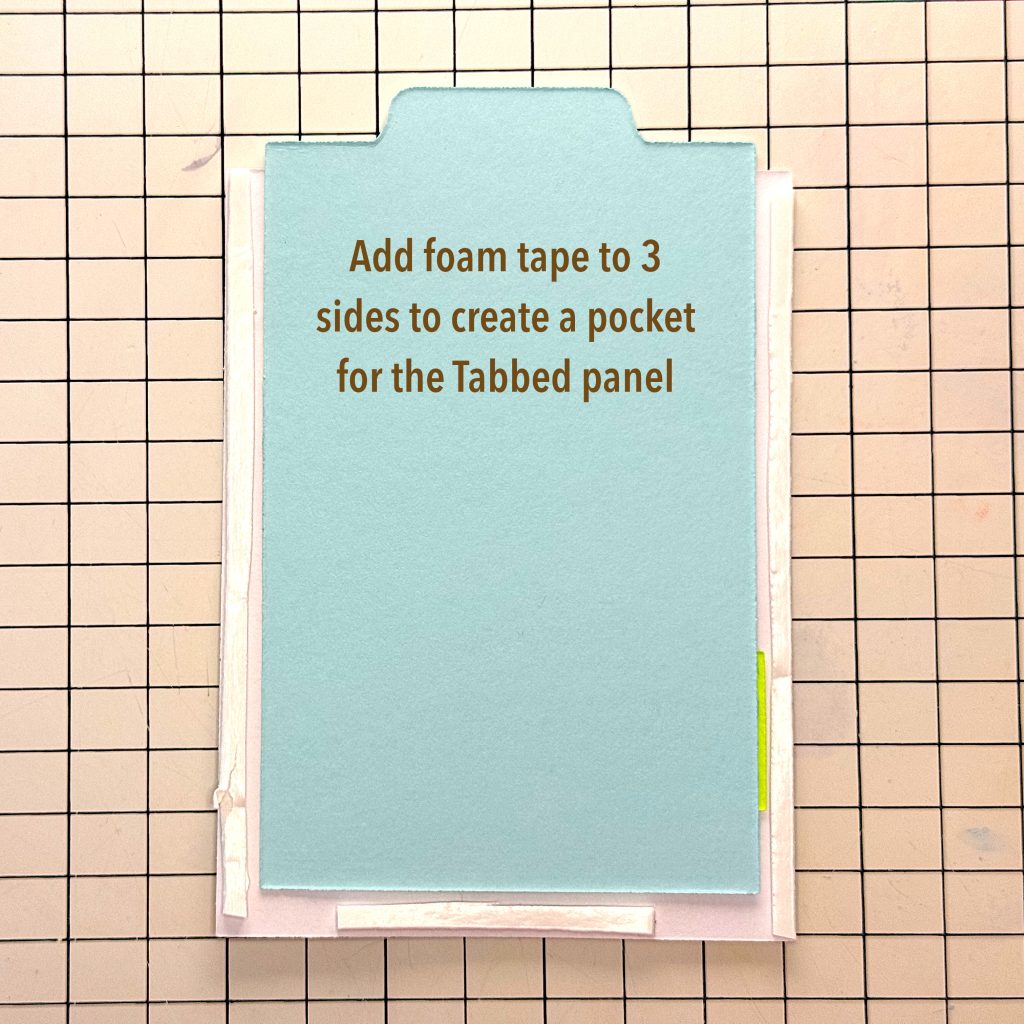
Add narrow strips of foam tape around the long edges and bottom edge of the Slitted Panel. The foam tape will likely show, so this is an opportunity to break out the colored foam, if you have some in your stash.
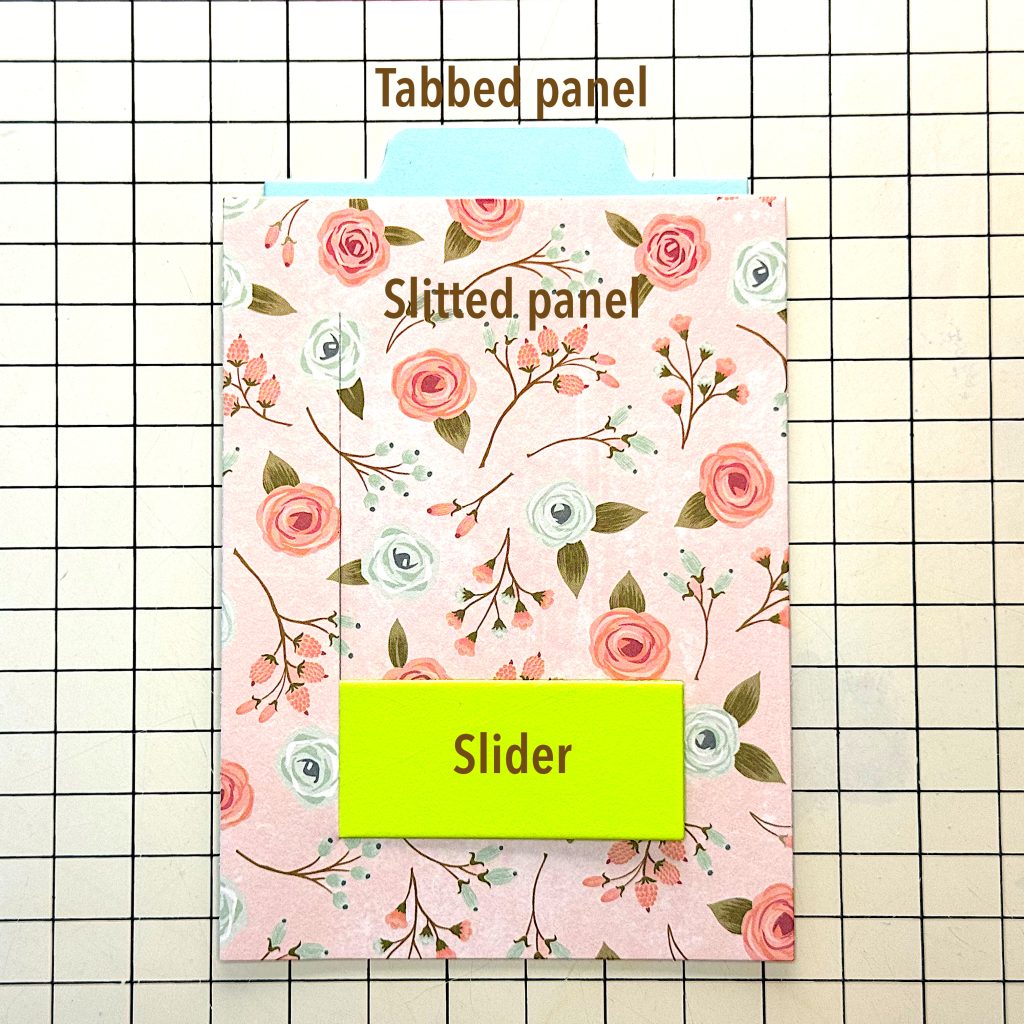
Turn the project over and test the Slider by gently tugging on the Tab. The Slider should glide up and down along the slit in the Slitted Panel. If it does, you can remove the backing paper from the foam tape and adhere the mechanism to your card front.
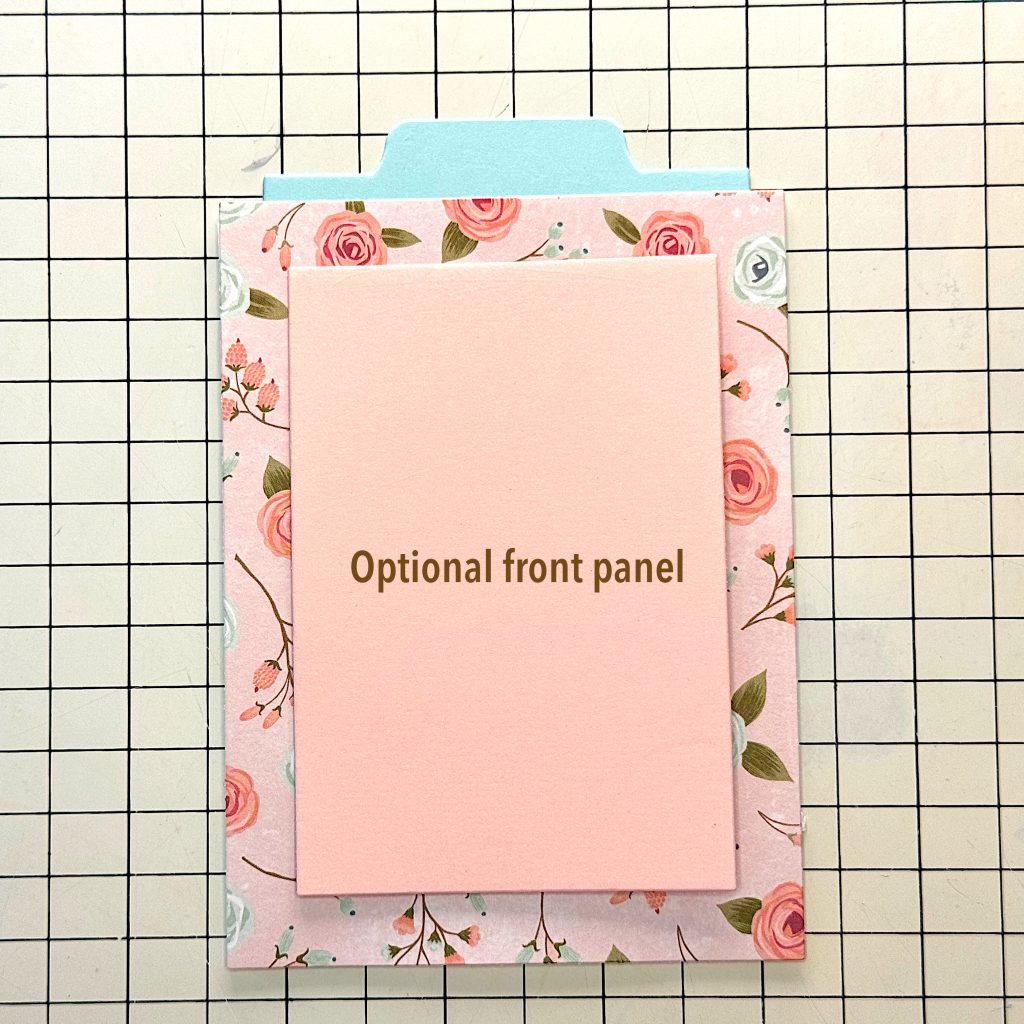
Add foam tape to the front of the Slider. Place the element you want to slide on top of the foam tape. In my example, I’ve used the optional front panel.
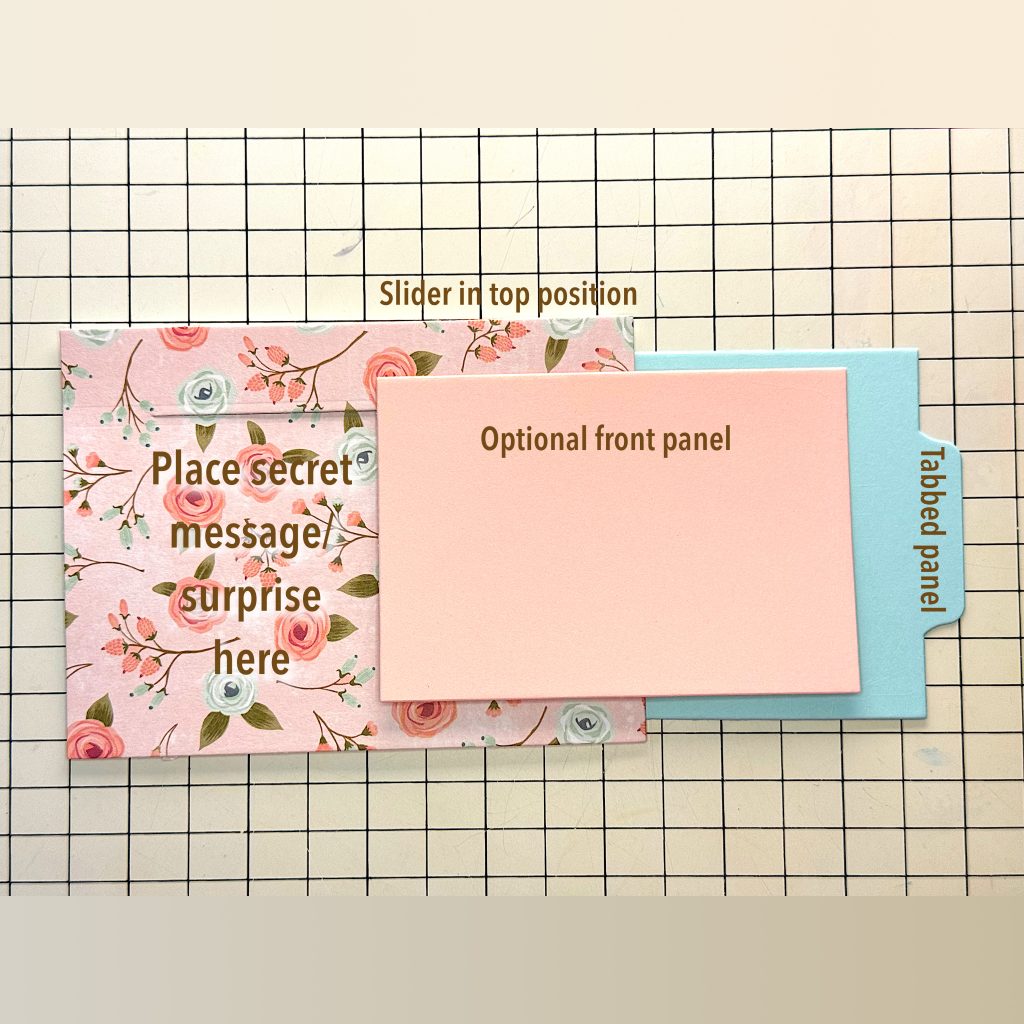
If you use the front panel, you can place a hidden message or feature as shown above.
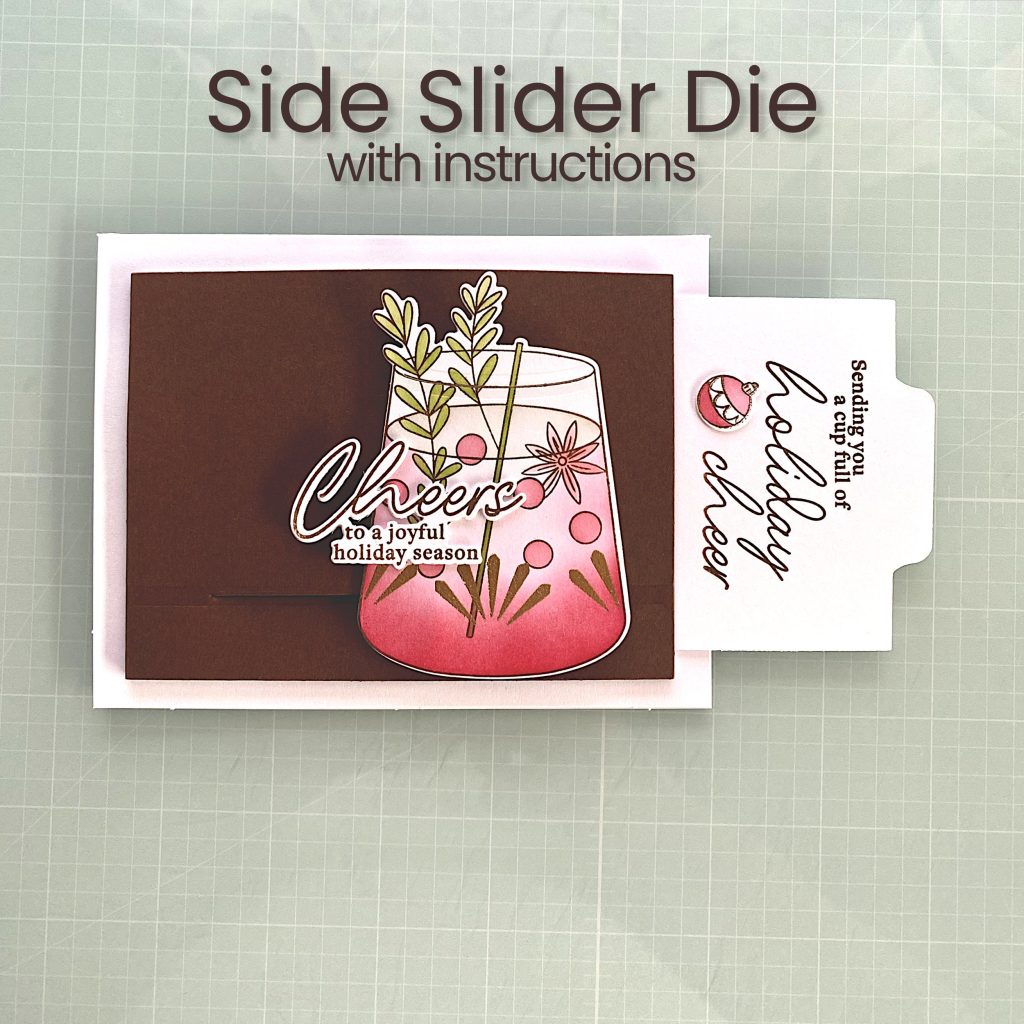
You can also use smaller die cuts on top of the Slider. If you do that, you can place a surprise on the Tabbed Panel, as shown in the Pinkfresh Holiday Spirit example above.