
For this card I’m using Spellbinders Clear Stamp and Die Set of the Month for June 2024. It’s called Paradise Resort. This card is part of a monthly YouTube hop that I’m hosting. Get in touch if you want to join us!
Background
Let’s start with the background, because that’s the trickiest part and also what makes this card special. I’m stamping a pattern on vellum with the hexagonal stamps in the set. Stamping with white pigment ink and heat embossing in white gives a wonderfully crisp and fresh result.

Preparation
I started with a piece of vellum that’s much larger than what I’m going to use on the card. The first thing I did was to decide which side was going to be the back and write BACK on it with a pencil. That’s going to save my bacon later.
Then I drew a straight line at an angle on the back. If you want the same direction as me, your line should lean to the left. Then I drew parallel lines every 1.25”. That’s the distance between the center vertical of the stamps on the packaging.
I used the vellum (right side up) with the lines to line up the stamp packaging and taped it into my Tim Holtz Stamp Platform. Then I lined up the stamps with the packaging and picked up the stamps with the lid.
Stamping
I placed the vellum facing UP in the stamp positioner, making sure to line up the lines with the center of the stamps on the packaging.
I’m going to use Ink on 3’s white pigment ink in the color Sharktooth and Ranger’s Super Fine White Embossing Powder for the pattern.
Then I kept shifting my piece of vellum around until I had a large pattern that I was happy with. For some of the impressions, I turned the piece of vellum upside down. The advantage of this method is that you don’t have to keep repositioning the stamps. You just move the vellum around. This would work with acetate too.
Pattern stamping is about creating a pattern, an overall effect. Each impression doesn’t have to be perfect.
When I have enough of a pattern, I’m turning the vellum over and erasing all the pencil on the back. The result is so pretty! White embossing on vellum looks so fresh.

Cutting Out Card Panels
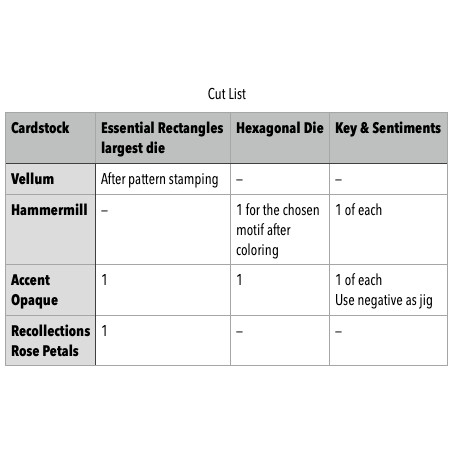
I cut out the vellum with the largest two dies from the Essential Rectangles Dies from Spellbinders. I’m definitely taping down the dies, since I’ve spent so much time on the background.
You can see that some of the motifs are upside down. That won’t matter once the card is assembled.
I also cut pieces of Recollections Rose Petals Cardstock and Accent Opaque 100 lbs with the outer die. Then I stacked them.
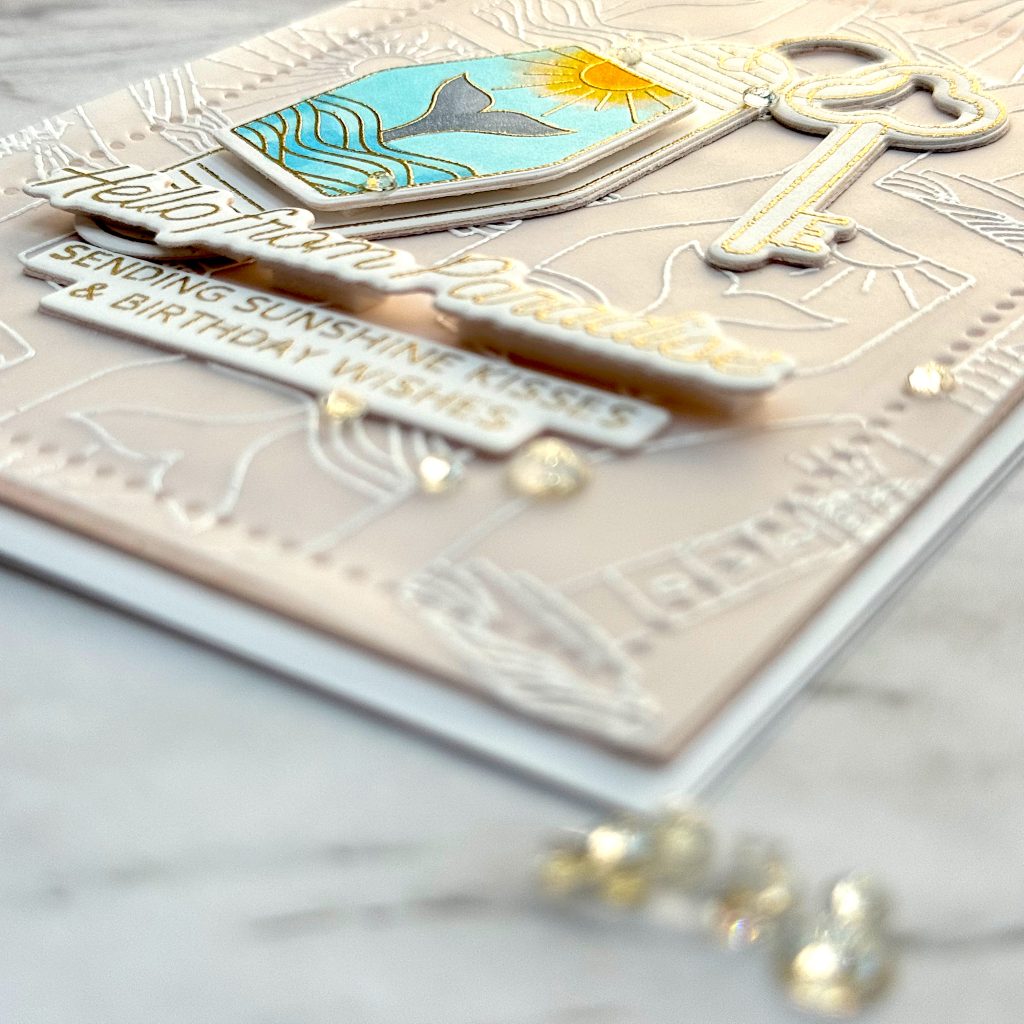
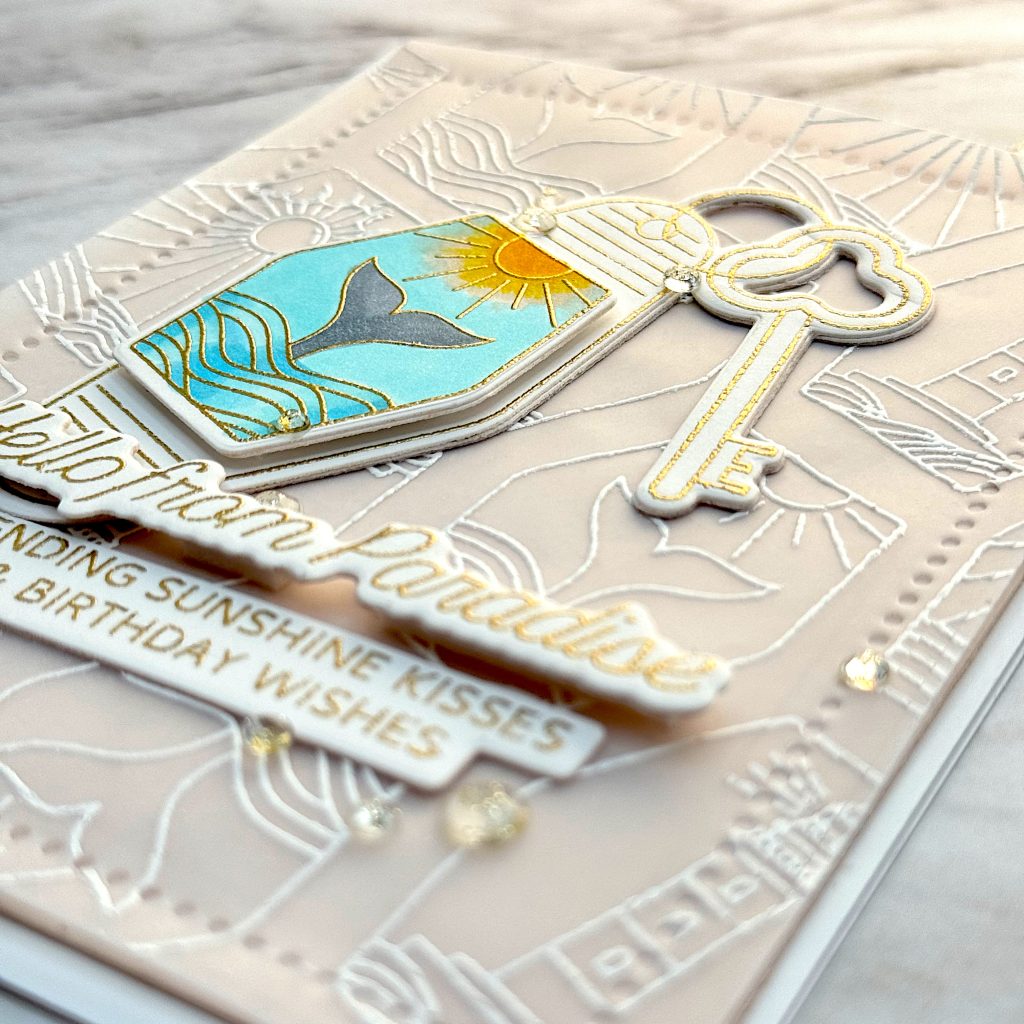
I’m going to glue the blush cardstock and vellum together too, but I want to apply the adhesive behind the key and sentiments, so it doesn’t show through. So I’m going to put my panels aside until I’ve created the key and sentiments.
Focal Points
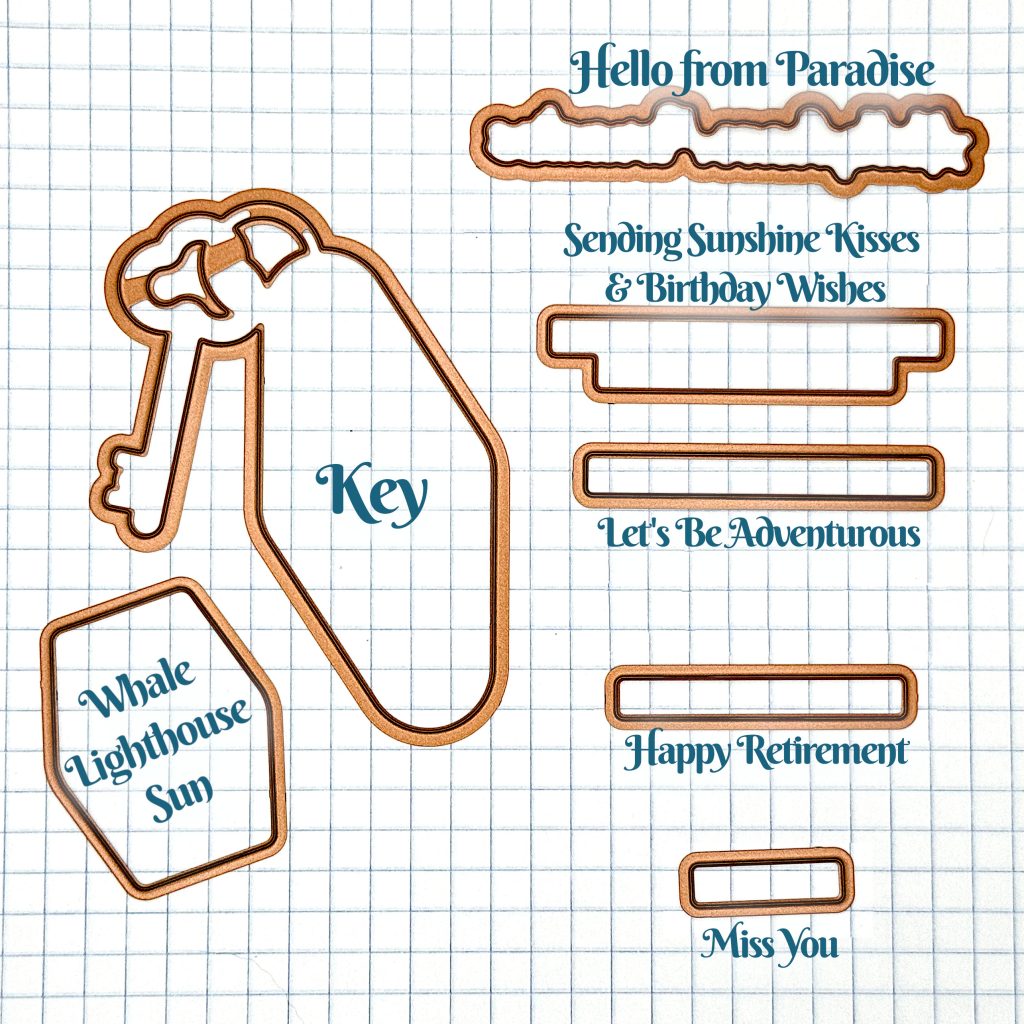
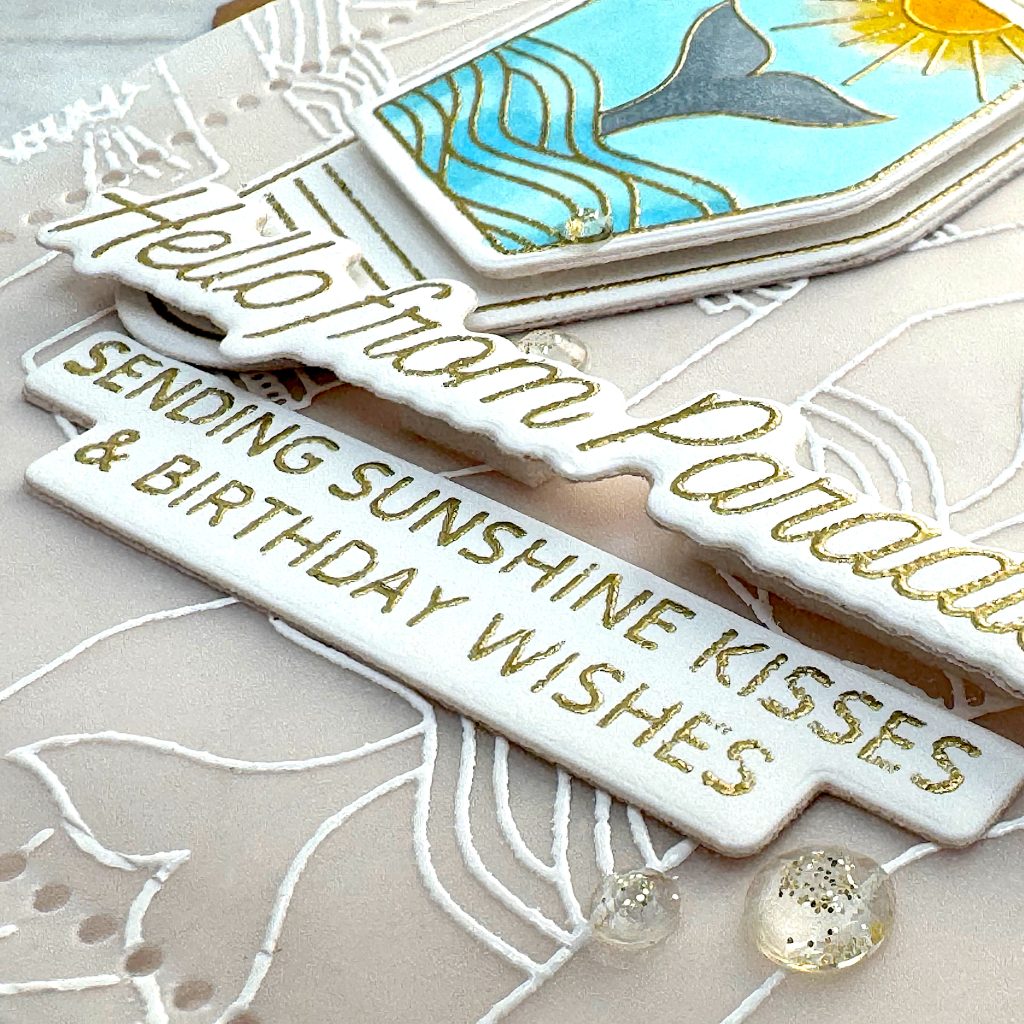
I’m going to stamp the key and sentiments with gold embossing powder. As you can see, the key is only connected to the keyring at the top. There’s a risk that if I just stamp it normally, the key will be out of alignment and then the die won’t cut correctly. So I’m die cutting first and also creating a jig.
I’ve die cut the key and the sentiments from Hammermill and Accent Opaque 100 lbs. I’m stacking the die cuts with Hammermill on top. It has a nicer white tone than the Accent Opaque.
I’m going to use the negative spaces left from die cutting for my jig. I put washi tape on the back of it, to help my die cuts stay in place. Then I very carefully place the stamps in the jig and close the lid to pick them up.
I use my anti-static powder tool and stamp all three stamps with Versamark. They’re still in the jig, because of the washi tape. That worked really well!
Then I use gold embossing powder first on the large sentiment, the key and the sub sentiment. I just left it in the jig, so I won’t burn my fingers. I’ll keep the jig with the stamp set, so I have it for next time.
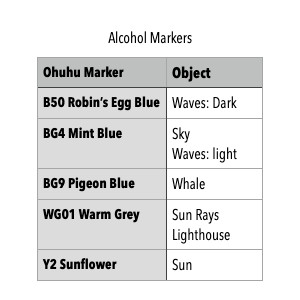
Alcohol Markers
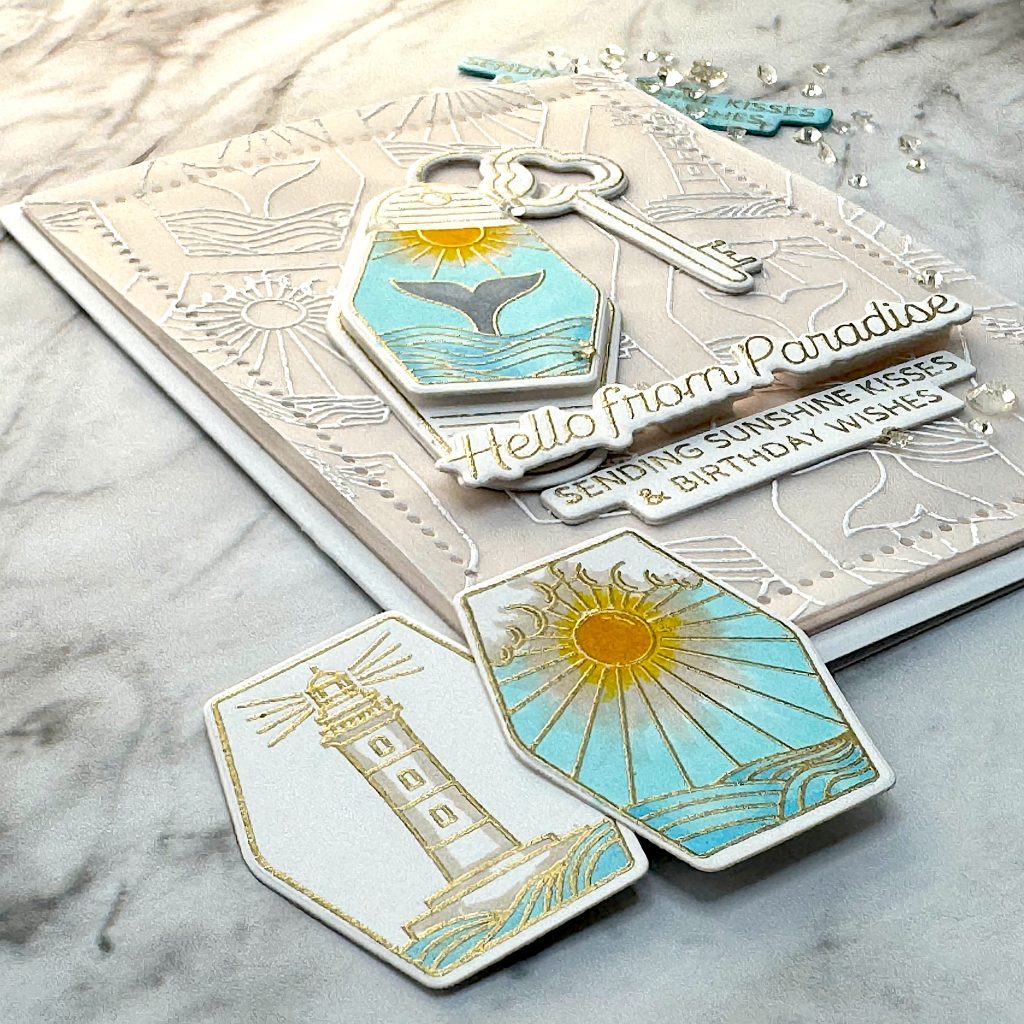
I’m heat embossing the hexagonal motifs with gold embossing powder too. I’m going to color them with my Ohuhu alcohol markers. Then I’ll select the one I like best and use it on my card.
I’m stamping on Hammermill, which I’m treating with my anti-static powder tool and stamping with Versamark.
I really like the style of the hexagonal motifs. I wonder if Spellbinders will release more of them. They would be super cute with holiday or Valentines motifs.
Check out the Ohuhu Alcohol Marker table above for the colors I used.
I liked the sun and the whale tail. So I used my lilac Scout to cut them out.
Assembly
I preferred the whale tail because of the contrast. It really draws the eye. The sun is cute too, but I think it’s a bit bland. This card needs the contrast from the whale.
First I glue the key to the vellum.
Once the glue is dry, I can attach the vellum to the pink card panel. I’m hiding the glue behind the key and in some places where there’s a lot of heat embossing.
When that’s dry, I can add the panel to the card base.
I’ve added foam tape to the back of the whale tail and I’m adhering it to the key.
I’ve added two layers of foam tape behind “from Paradise” and one layer behind Hello. That’s because I’m placing it partly on top of the key. Finally I glue the subsentiment under the main sentiment.
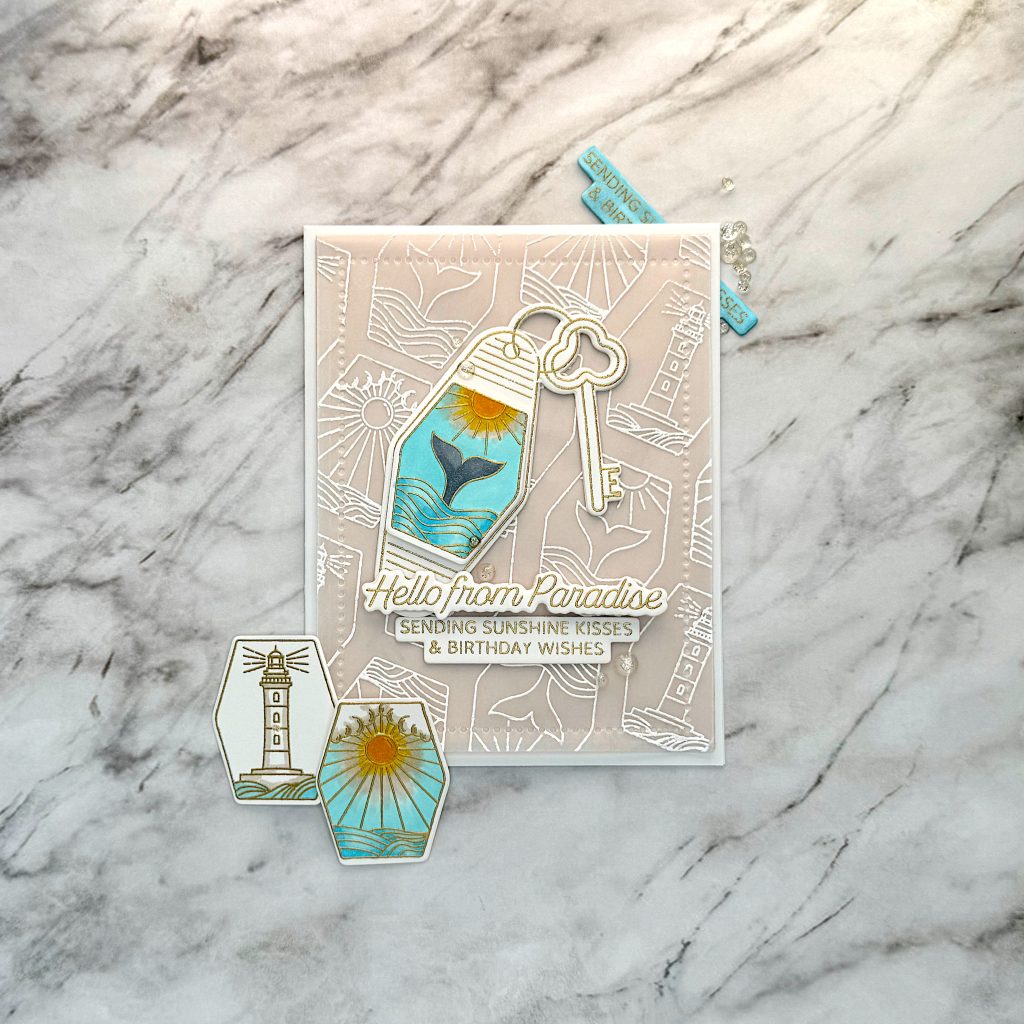
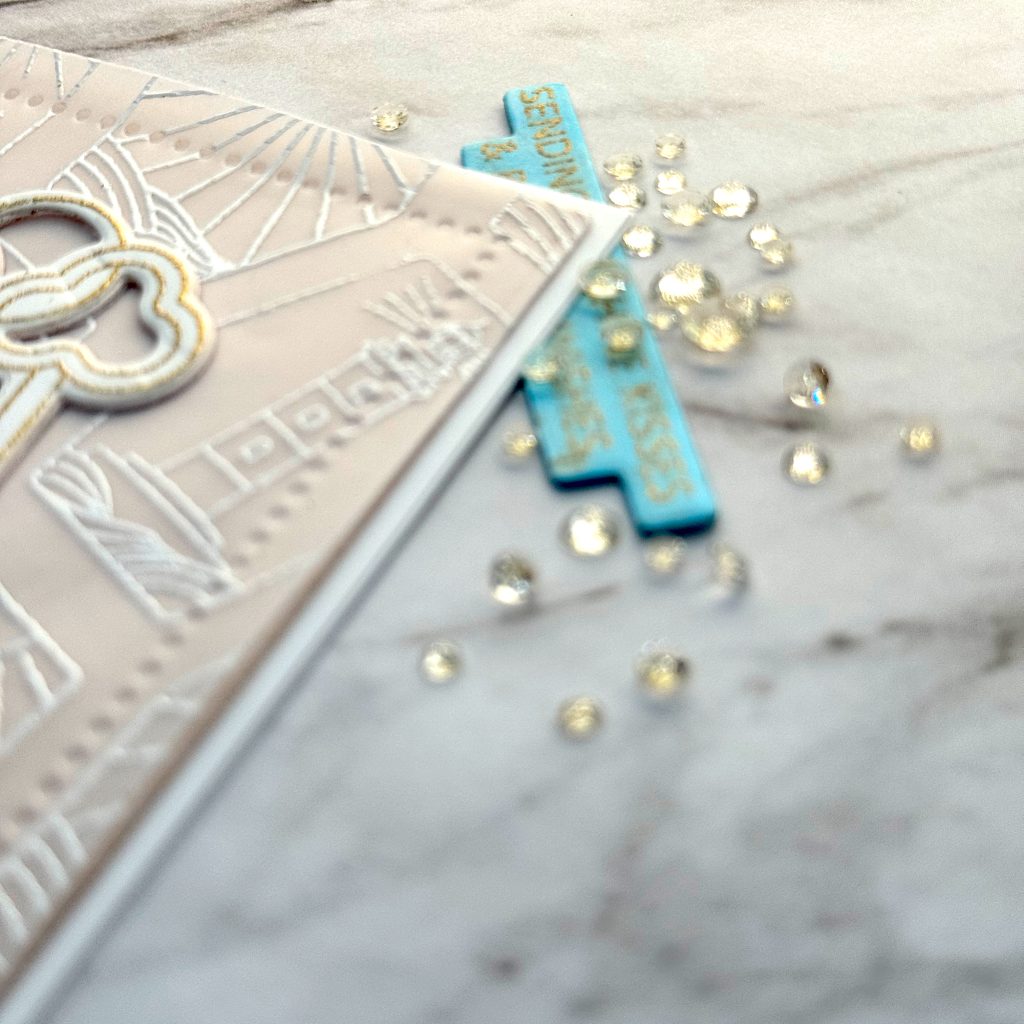
I added some Trinity Stamps Champagne Twinkle Gems to the card. And that’s the finished card. I love the crisp white heat embossing on vellum and the pop of color of the whale tail. Isn’t it pretty? I love it!
Supplies Used
- Spellbinders Paradise Resort Stamp Set https://tinyurl.com/5642u929
- Spellbinders Paradise Resort Die Set https://tinyurl.com/y8t4ykms
- Spellbinders Essential Shapes Foil and Die Sets https://tinyurl.com/594pwk2p
- Spellbinders Scout in Lilac Shimmer https://tinyurl.com/558ud7p6
- Ohuhu Alcohol Markers https://amzn.to/3WilM5B
- Trinity Stamps Champagne Twinkle Rhinestone Stardust Embellishment Mix https://collabs.shop/k0gf12
- Ranger Super Fine Detail Gold Embossing Powder https://shrsl.com/42al8
- Ranger Super Fine Detail White Embossing Powder https://shrsl.com/4lroe
- Recollections Rose Petals 110 lbs Cardstock https://amzn.to/3xRx47k
- Ink on 3 Sharktooth White Pigment Ink https://inkon3.com/products/atelier-shark-tooth-white-artist-grade-fusion-ink-pad
- Wagner Heat Tool https://amzn.to/4bDFYTT
- Versamark https://amzn.to/3XXUgeN
- Tim Holtz Stamp Platform https://amzn.to/3xO1lUF
- Accent Opaque 100 lbs https://amzn.to/3zEjG7c
- Hammermill 100 lbs Premium Color Copy https://amzn.to/3VY2z7P