
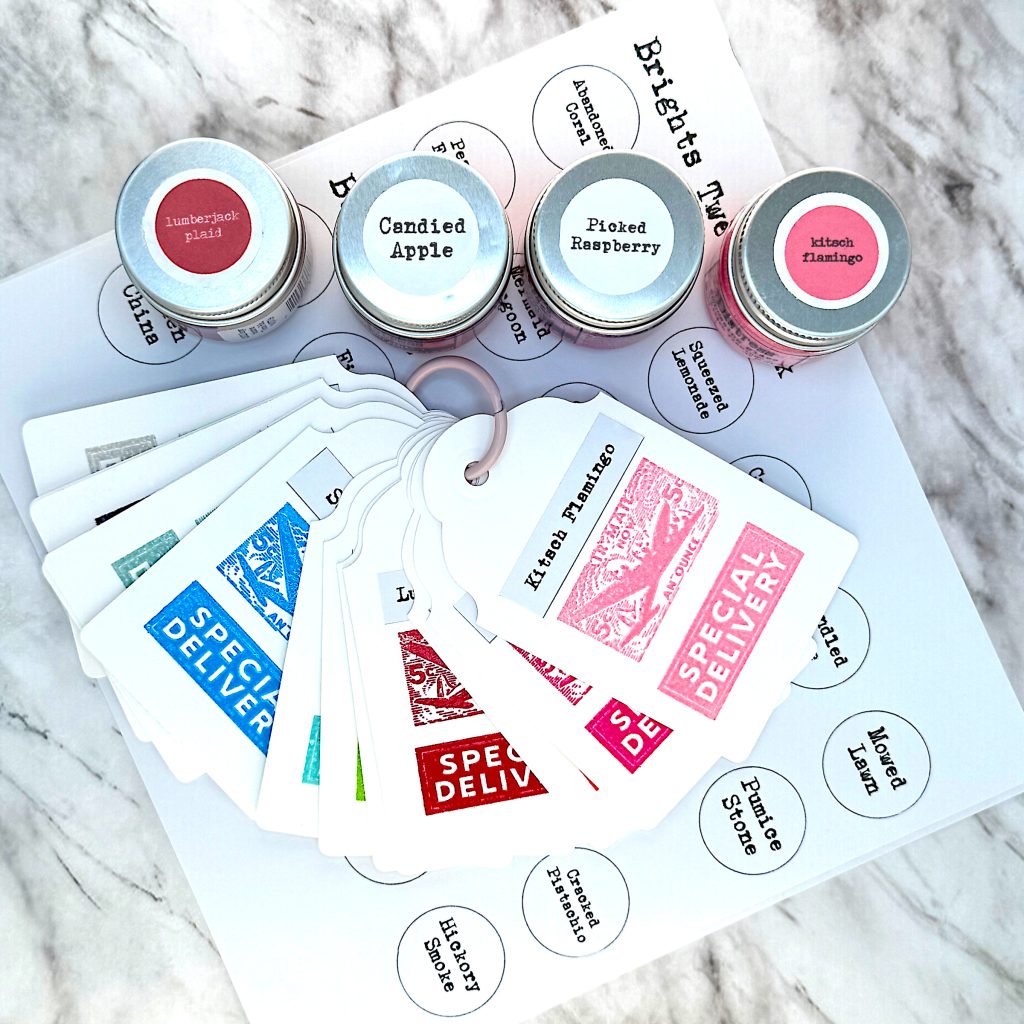
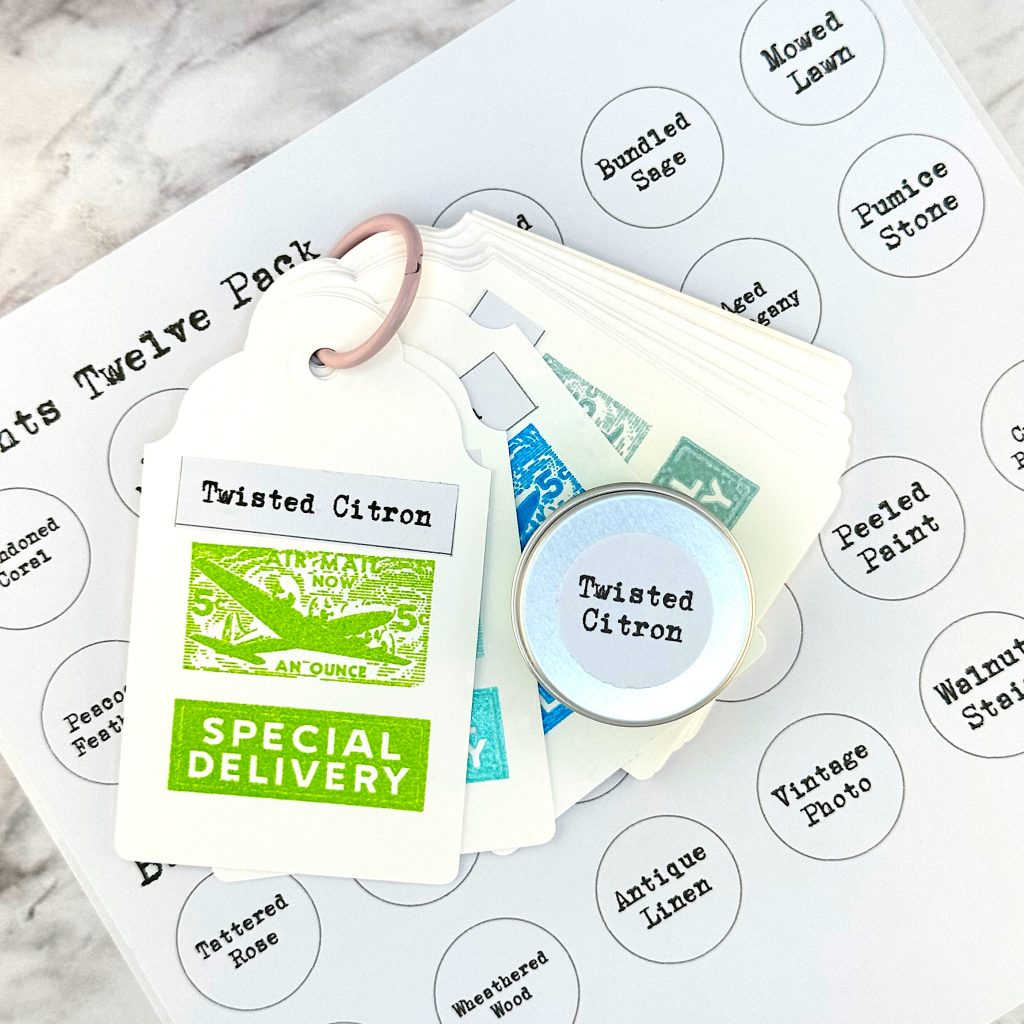
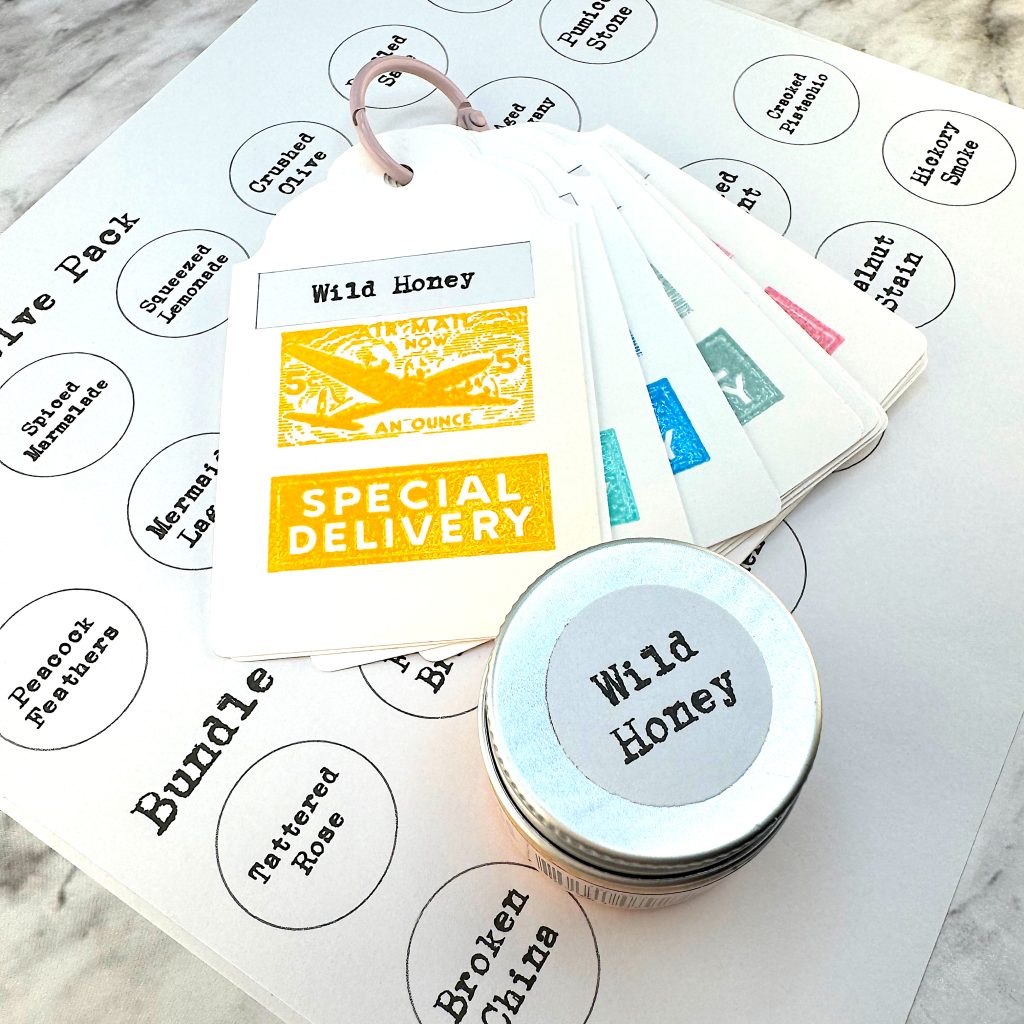
I got a set of six Distress Embossing Glazes, mostly to have more variety for sentiments. Previously I had 8 of the newer Distress Colors. So naturally I wanted to swatch and label them.
Labels — Free Download
Ranger have lots of labels for organizing their products on their web site. But they don’t have any round labels for the older Distress colors. So I made some.
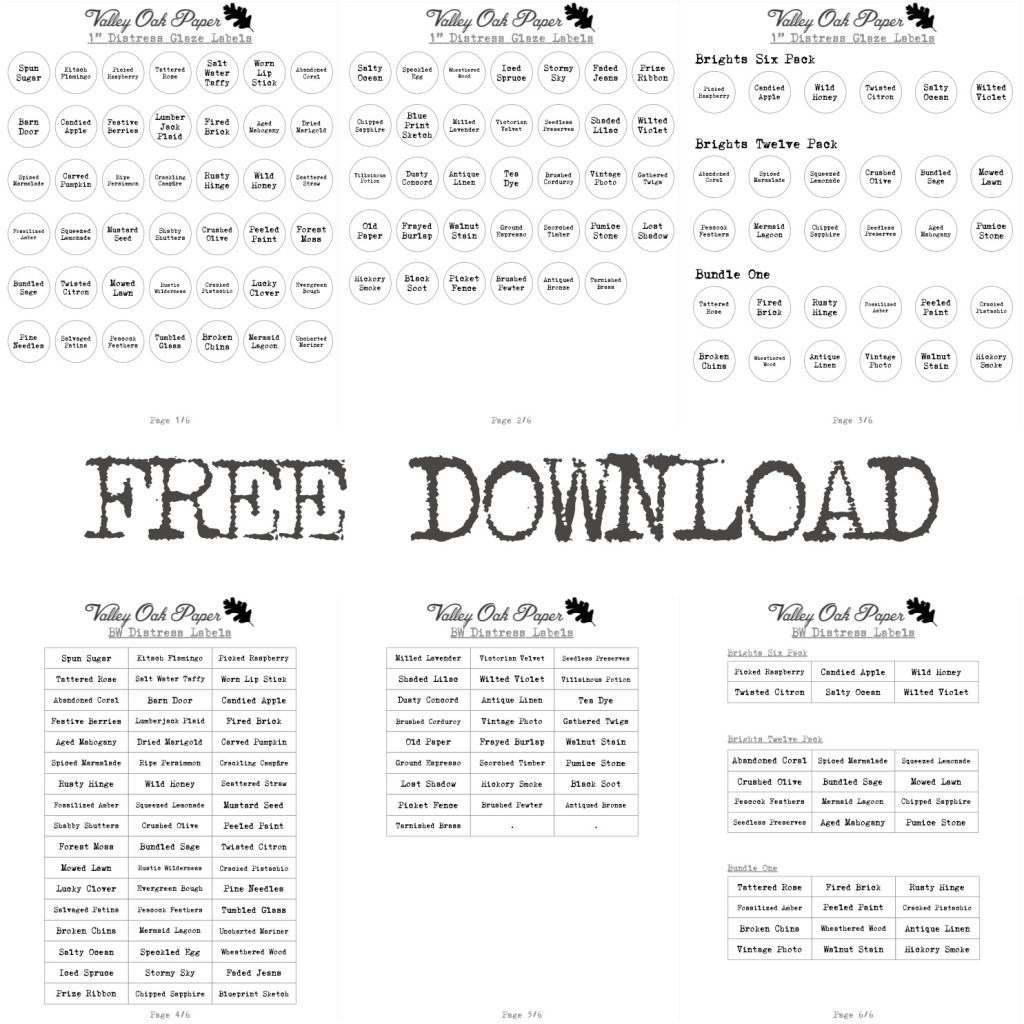
The PDF includes both 1” round labels and rectangular labels that are 2” by ½”. They’re black and white. The first two pages are all the Distress Colors and the third page includes these bundles:
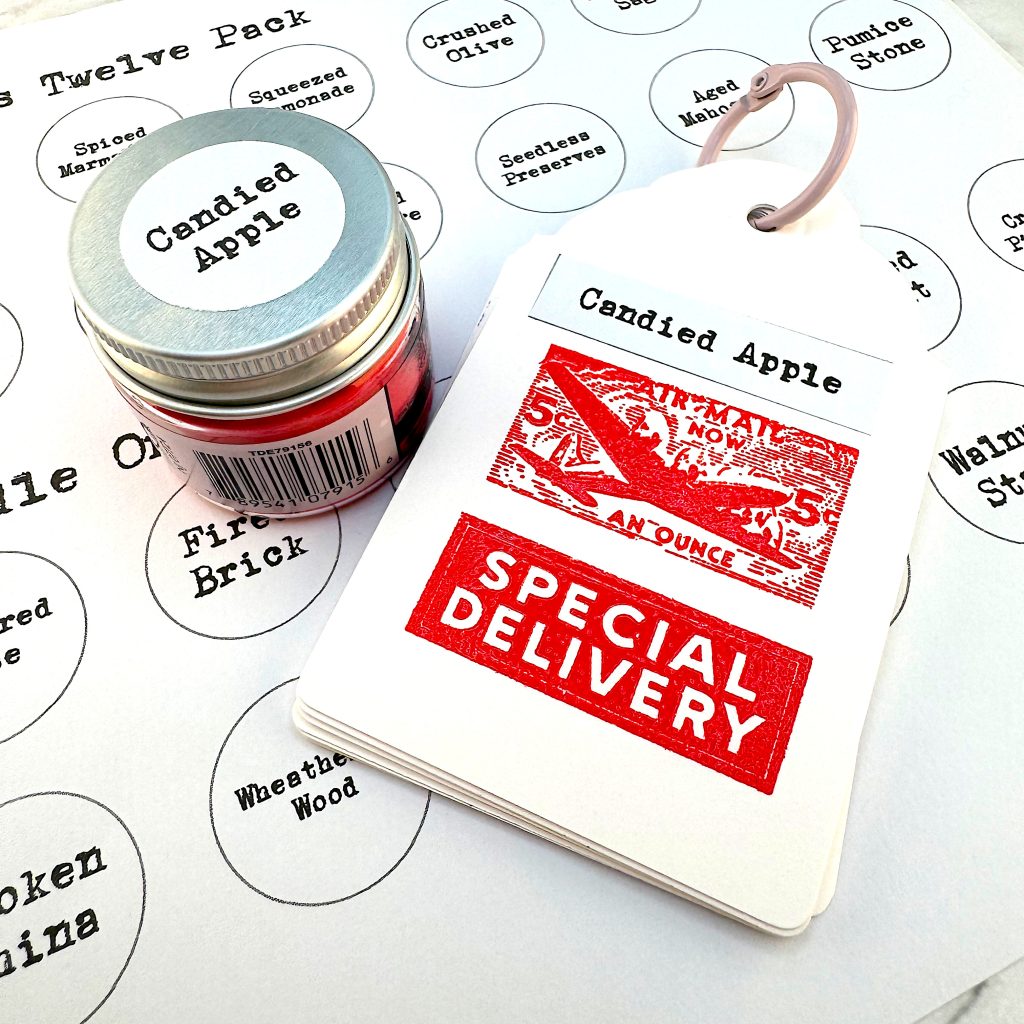
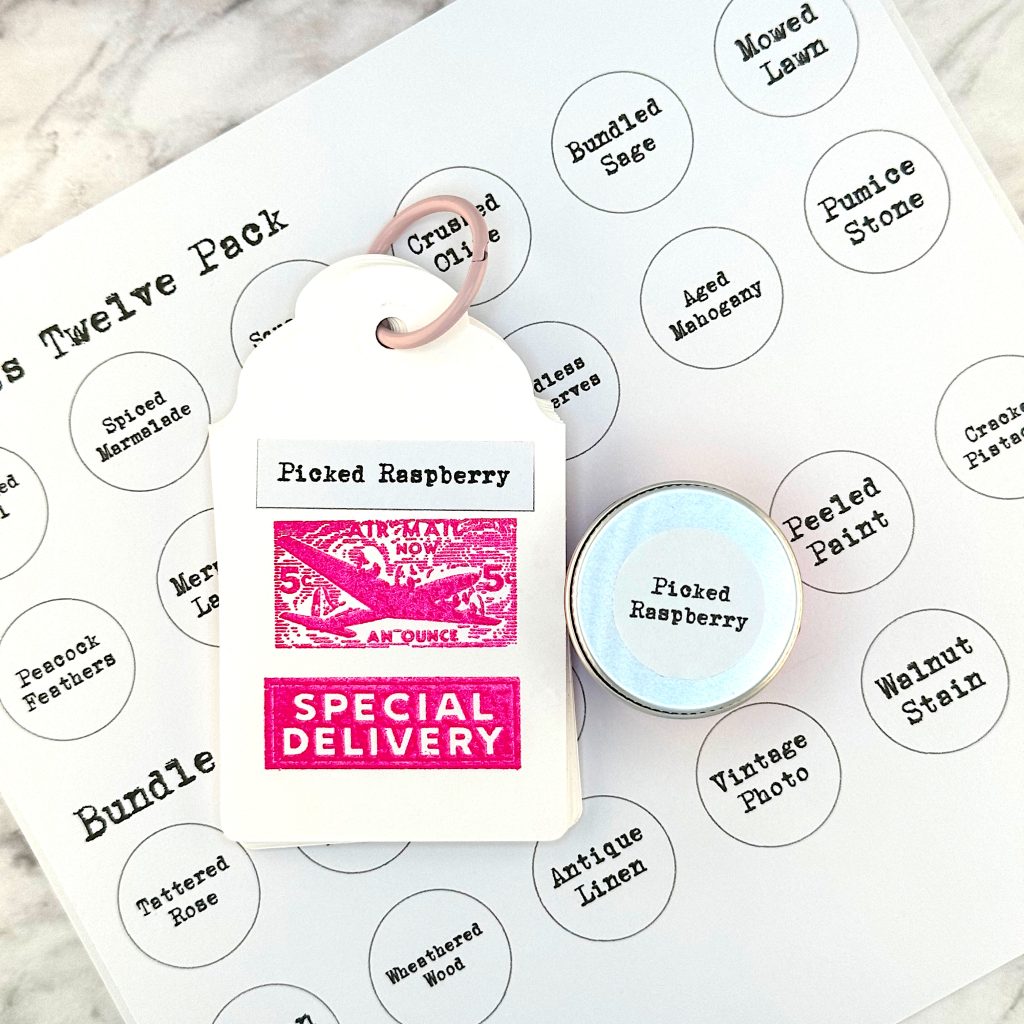
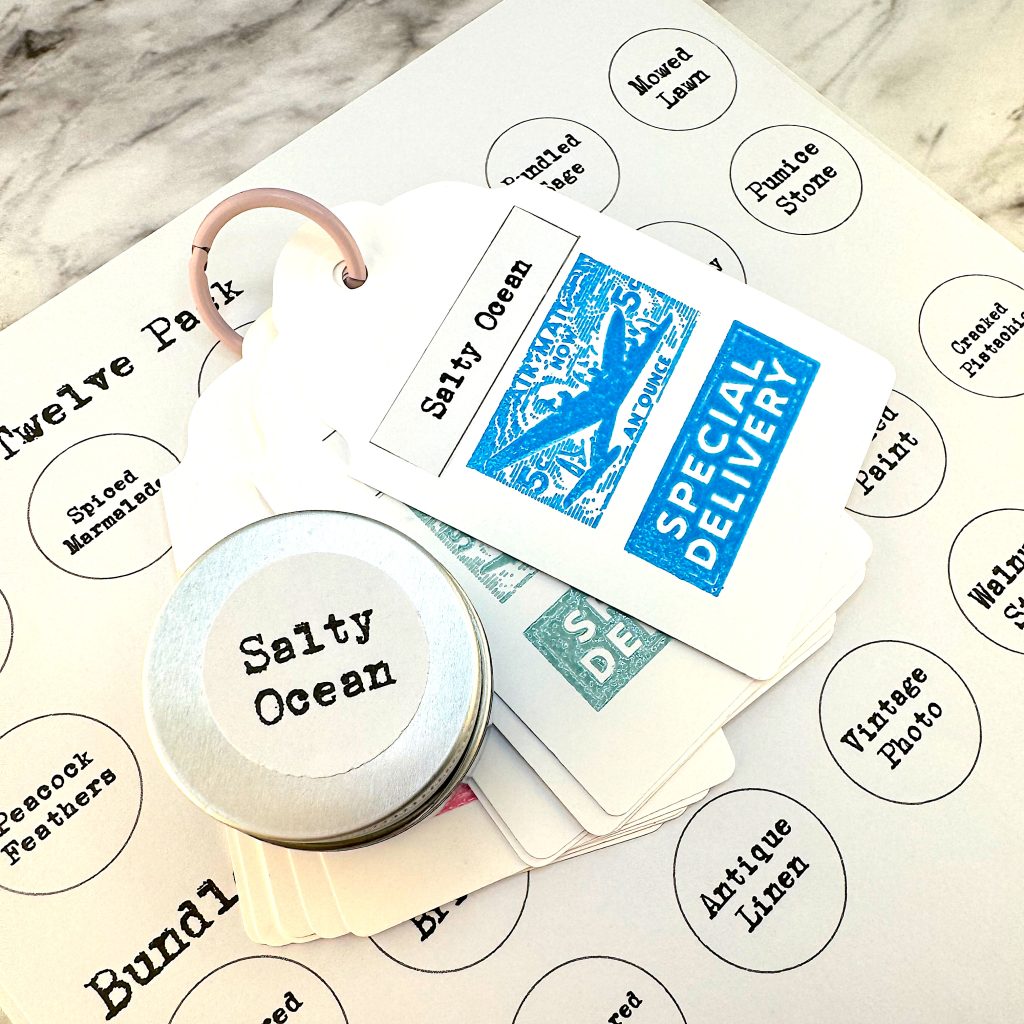
I printed my labels on inexpensive sticker paper and cut them out with a Fiskars 1” circle punch. Then I stuck them on the lids.
At some point in the future I may scribble some embossing pen on the labels and heat emboss them. But for now I’m happy to be able to tell the color name without having to pick up the little jars and squint at them.
Creating Swatches
My swatch tags are identical to the ones I created for my Pinkfresh Inks. I used a bookmark tag punch on Hammermill Cardstock that I cut into 2” by 4 ¼”” strips.
Next I selected two stamps from the Tim Holtz Correspondence Stamp Set. One that has lots of fine detail and the other one is mostly a solid surface.

Then I got to stamping! For this I used my brand new Misti stamp platform. The hinges on my Tim Holtz platform broke, so I’ve retired it. 😭
I understand that the Misti hinges are also prone to breaking. So I’m resigned to having to buy a new platform every couple of years or so. Given how much I stamp, I can live with that.
Corner chomping and labeling the swatches came next. For this I printed out the rectangular labels on the same inexpensive sticker paper I used previously and cut them out with my Tim Holtz trimmer.
Finally I threaded them all on a Pinkfresh book ring in the canonical Ranger order.