
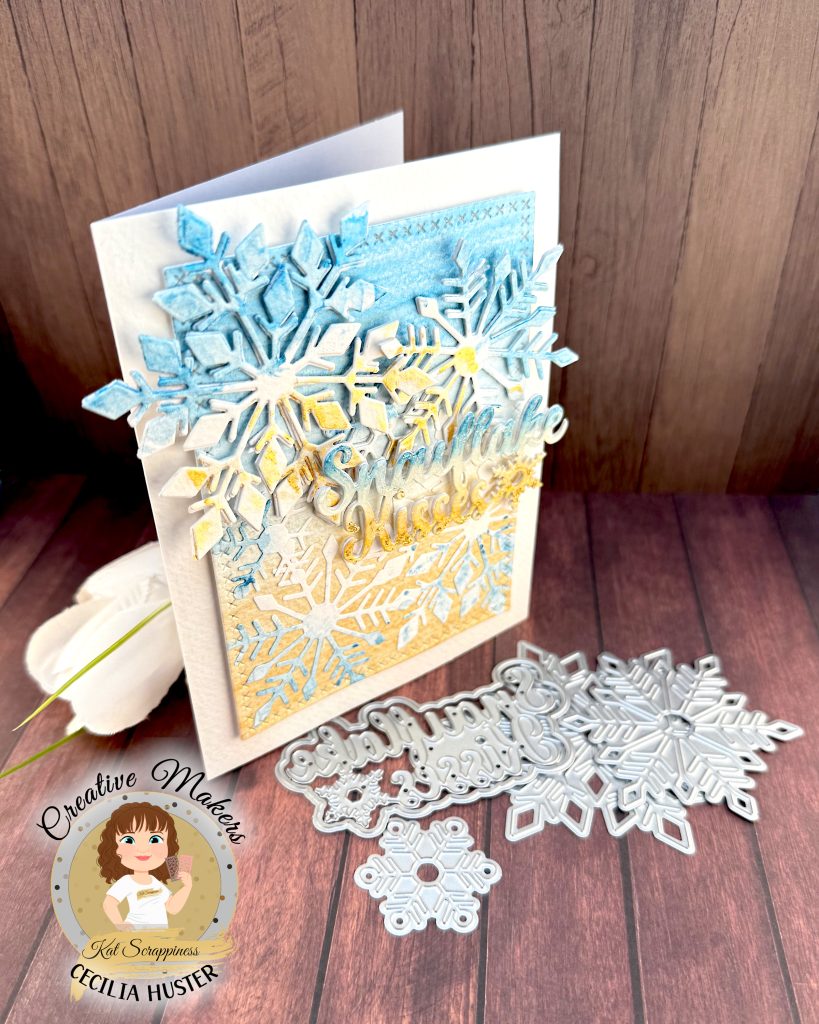
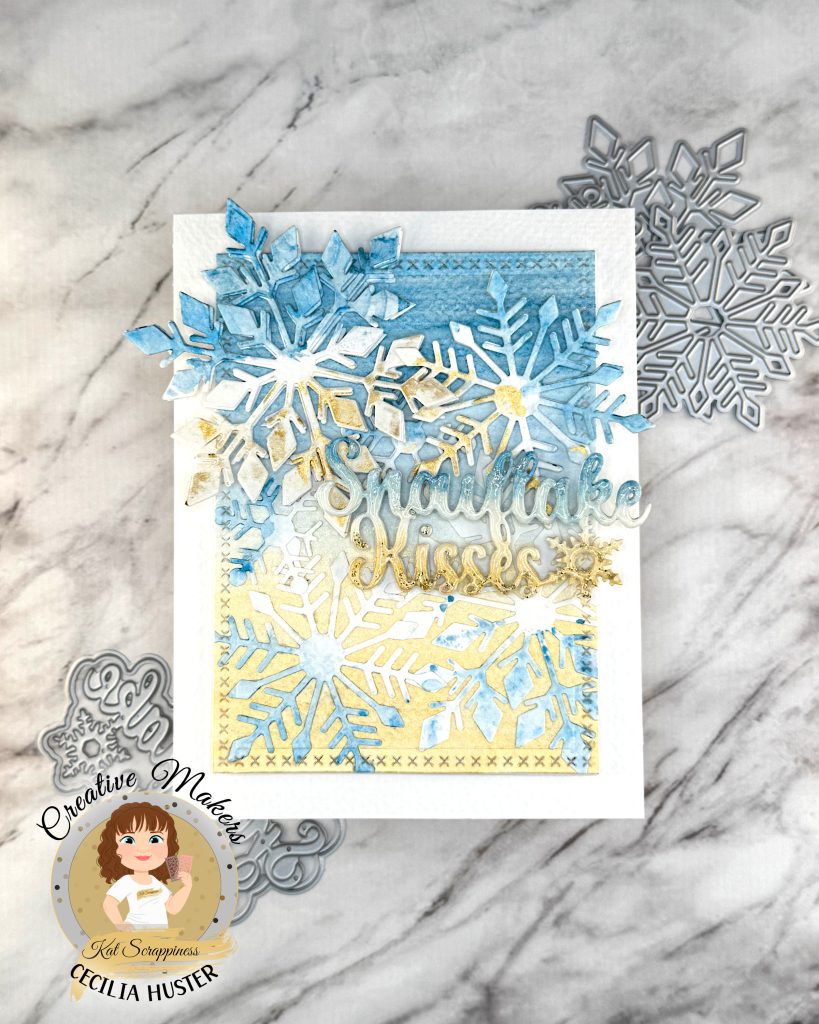
Snow Flakes
First I die cut two of each of the snowflakes from Kat Scrappiness Snowflake Trio Die Set from watercolor paper. Then I cut them two more time from Accent Opaque.
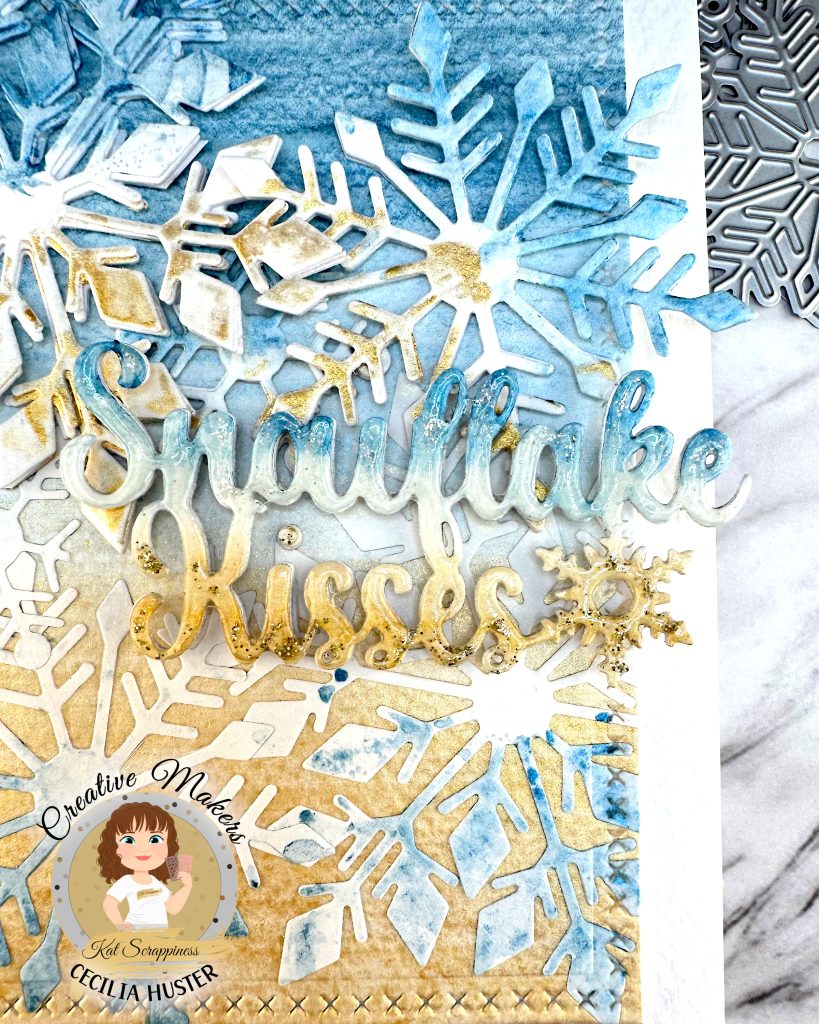
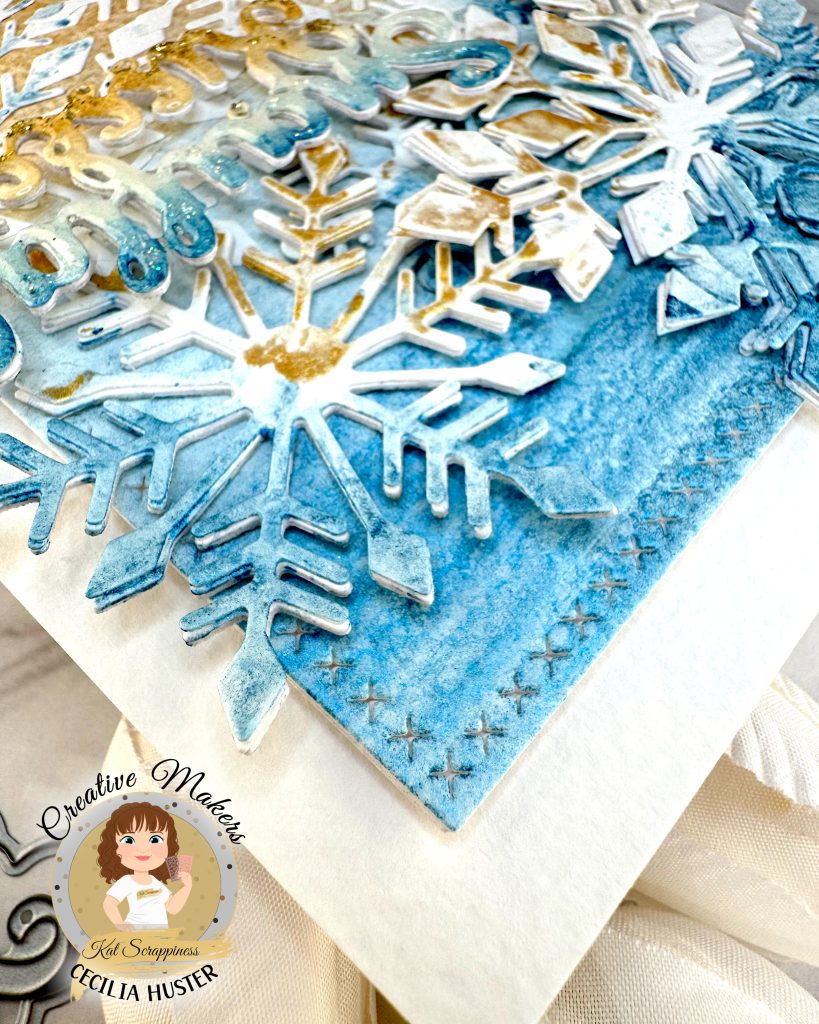
For one set of snowflakes, I watercolored Kat Scrappiness Pearl Powder in Blue onto them. Then I set them aside.
The other set of snowflakes I stacked with Accent Opaque. Then I watercolored them half and half with Kat Scrappiness Pearl Powder in Blue and Gold.
Background
To create my background, I watercolored Kat Scrappiness Pearl Powders in Gold and Blue on a watercolor panel. When it was dry, I glued the blue snowflake set to the bottom of the panel. Then I die cut it with Kat Scrappiness Cross Stitched Rectangle Die Set.
I cut another of the same rectangle size from Accent Opaque and stacked it behind the watercolor panel. Then I added some thin foam from the Dollar Store behind that.
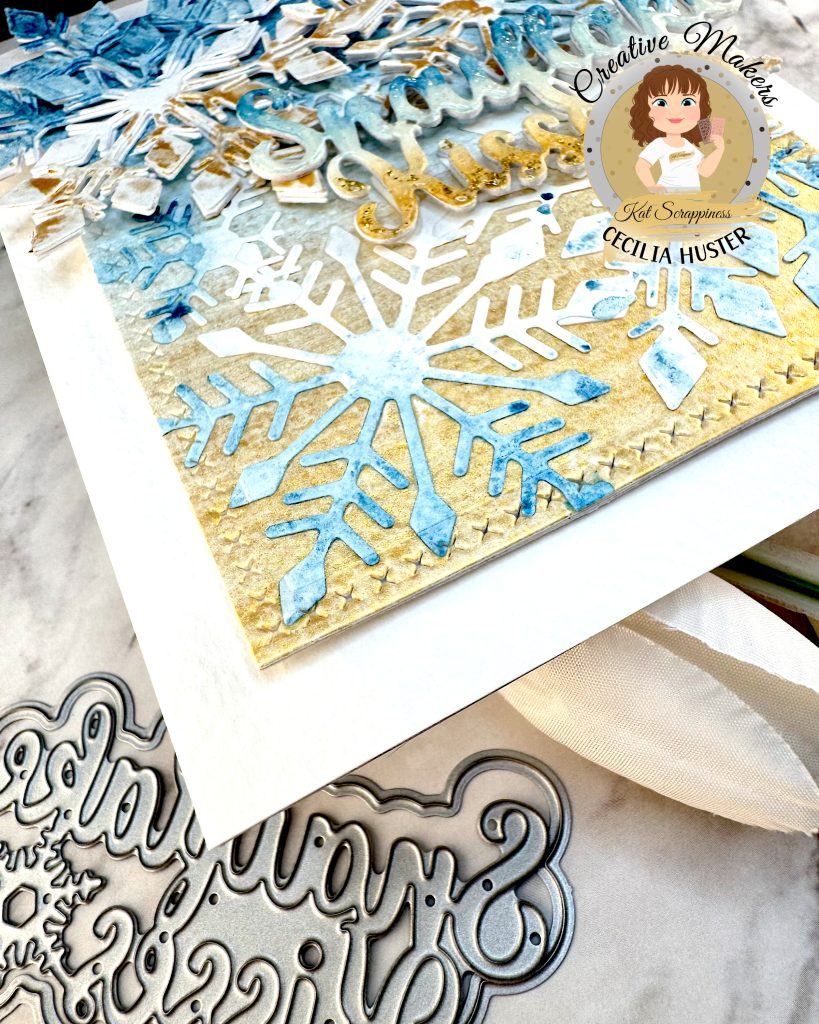

Sentiment
I created a smaller watercolor panel in the same blue and gold colors for the sentiment. When it was dry, I die cut it using Kat Scrappiness Snowflake Kisses Shadow Sentiment Die Set. I also cut two more with the same die set from Accent Opaque.
This die set includes a shadow layer, but I didn’t use it for this card.
Assembly
First I covered the front of my A2 notecard with watercolor paper. Then I glued the background panel to it.
Next I glued the stacked snow flake trio to the upper half of the panel, taking care to make the larger snowflakes stick out beyond it.
I added super skinny bits of foam tape to the back of the sentiment and adhered it to the center right.
To further emphasize the sentiment, I added Glossy Accents to it. On the tops of the “snowflake” letters I mixed in some Ranger Stickles in Star Dust. On the bottom letters I included some Ranger Stickles in Gold. When that was dry, I added a second layer of Glossy Accents on top.