
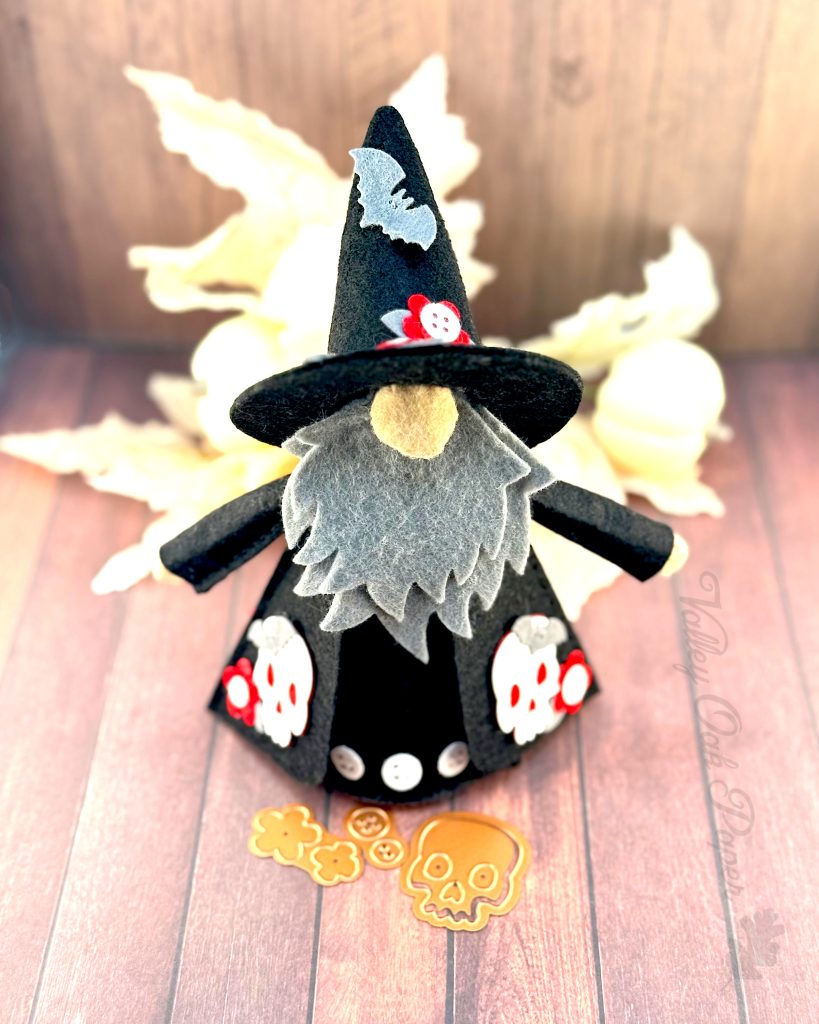
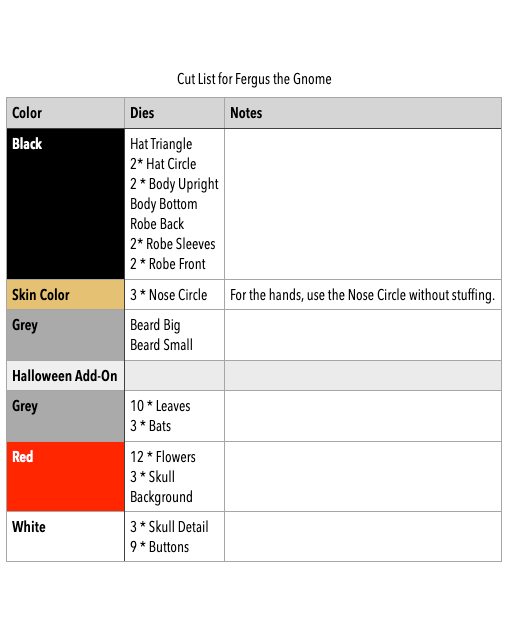
Fergus is a gnome. But unlike other gnomes I’ve shown, he’s designed in 3D for felt. Sandi McIver designed him for Spellbinders. Here he is all dressed up for Halloween. I kept him monochromatic, except for the pops of red of the flowers and skulls.
Sandi has created a series of videos that go through how to construct both the body, the hat and the robes.
Nose
For me the nose was the hardest. Mine could definitely be rounder. Next time I’m going to use even less stuffing to hopefully achieve a more circular nose.
The nose/hands die is a circle. You baste around the circle and then you pull on the thread to create a little pouch. Then you stitch the nose to the top of the beard die cuts and to the top of the body.
Hands
The hands were not easy either. Sandi said that they get easier if you cut off about ¼” from the edge of the circle. I’m going to try that next time. They’re not nearly as visible as the nose, so it’s more forgiving.
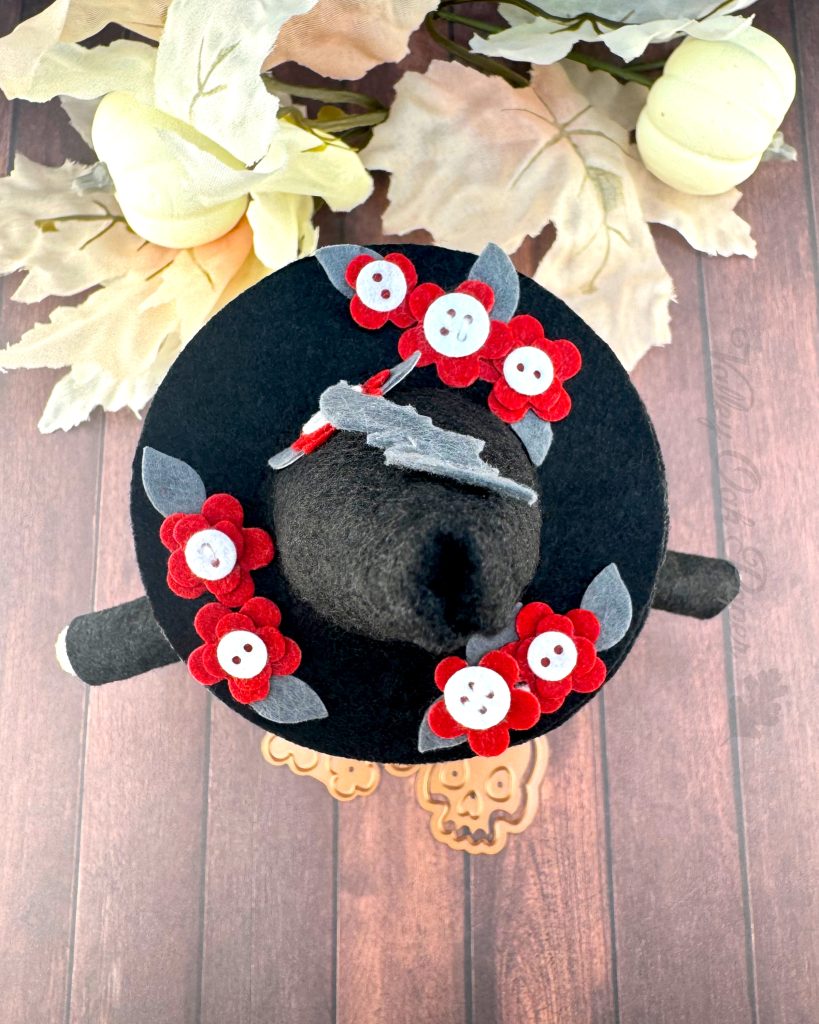
Decorations
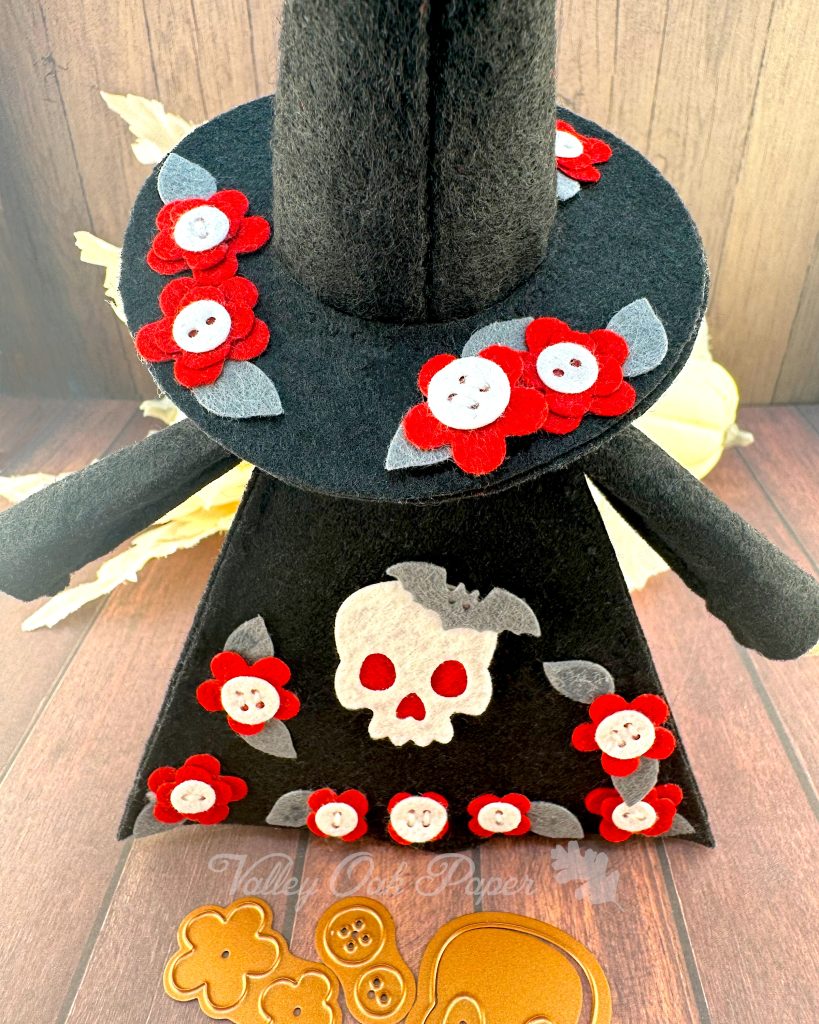
I started out gluing everything but got frustrated. It could be that I used Art Glitter Glue, but honestly I’ve never been particularly happy with fabric glue either. The problem with glue is that it doesn’t necessarily stick. So then I use more but then the glue shows.
Stitching is faster and more reliable. Unfortunately stitching through glue is very hard. Next time I’ll stitch as much as possible.
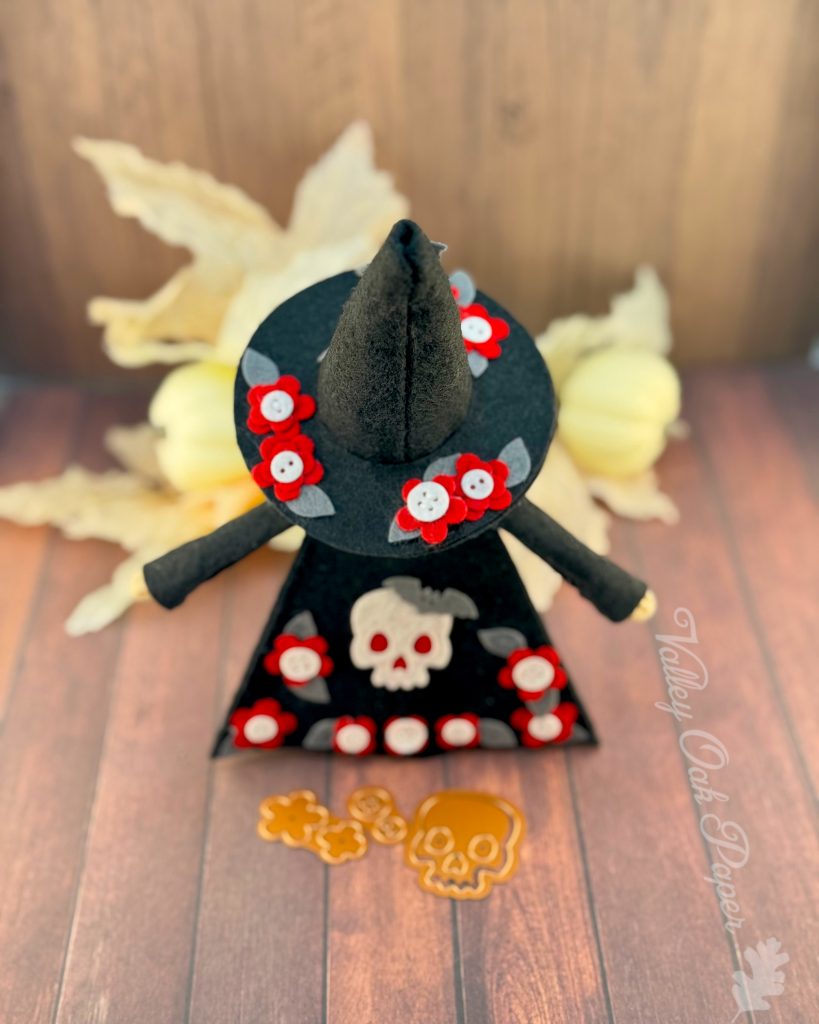
That means planning out decorations on the hat before putting it together. It was fine to stitch the bat to the peak of the hat. But for the brim it would be best to stitch the decorations to one of the layers and then glue them together. That way you don’t see the stitches on the underside of the brim. In fact I could add some decorations on the underside too.
Stitching on the robes is easy, because you don’t see the insides.
Next time I also want to create a staff for Fergus. Sandi has some really cute ideas for that. I’ve got lots of orange sticks.
