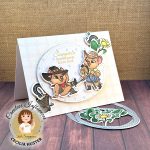
A magnet in the top right corner holds watercolor paper in place while I stamp it with photo polymer stamps of fairies
These fairy birthday cards are currently available in my Etsy shop. Here’s how you can make your own.
Fairies
The fairies and sentiment are from a Hero Arts stamp set that’s still available even though it’s three years old now. I started out by stamping both fairies on a piece of watercolor paper in Ranger’s Archival ink in Coffee. I was planning on cutting out the fairies, using the die set that you can purchase separately. If a stamp set has a matching die set, I always buy both. The few times I cheaped out and didn’t buy the die set, I always regretted it later. YMMV
The way the fairies are posed, it’s natural to place them facing each other. I wanted the light source to be between them to further draw the viewer’s attention to the sentiment that I was going to place in the middle. When coloring stamped images, I often draw a little arrow outside the image to remind myself of the direction of the light. The end result looks so much more realistic if the source of the light is clear.
Watercoloring
For watercoloring I used the recently-released Distress watercolor pencils. I watched the YouTube live with Tim Holtz when Ranger released the pencils, and I bought all three sets during the live. Watching the chat it was clear to me that they would sell out. They are so much better than any other watercolor pencils I’ve tried. Unlike other watercolor pencils, they do not mar your paper and they dissolve completely. That they come in colors that match the Distress Oxide ink pads I have is a welcome bonus. Keep in mind that these are really gouache pencils. In other words, the results are not as translucent as regular watercolor. Particularly the lighter colors have quite a lot of white in them.
I wanted the two fairies to look like they belonged together, so I kept the lightest color the same for both and kept them in the same color family. That also made it easier to find backgrounds that worked later.
When I had watercolored my fairies, I cut them out with the matching dies. Then I cut out a piece of heavy cardstock with the same dies and adhered my watercolor cardstock to it. This makes the fairies much sturdier and easier to work with.
Backgrounds
My box of backgrounds
I have a box of backgrounds that I’ve made during cardmaking classes or when I wanted to explore a specific technique or product. That’s where I found all the backgrounds I used for my fairies.
Many of them are heat embossed on scrapbook paper. The red fairies found a home on some burgundy cardstock that I had heat embossed with a silver mandala. The neutral fairies ended up on a grey background with blue birds sitting in gold tree branches.
Heat embossing
Heat embossing is a pretty simple process but it requires some specialized tools. The first step is to prep the surface you want to emboss on with an anti-static powder tool. This helps get a clearer impression. Then you stamp the pattern you want to emboss with a sticky, glycerin-based ink. Pretty much everybody in the industry uses Vesamark for that purpose. Then you need an embossing powder. These come in all the colors of the rainbow. Gold, silver and white are most popular and versatile. Embossing powder is basically finely milled plastic. You put a generous amount of it on the stamped surface and gently let it slide off onto a piece of clean copy paper. The embossing powder sticks to the glycerin ink. Make a funnel of the copy paper and pour the remaining embossing powder back into the jar. Embossing powders will last you many years, if not decades. Then you use a heat tool to melt the powder that stuck to your image. Here’s a video by Amy at Prairie Paper & Ink that goes through the basics of heat embossing. It’s mesmerizing to watch the embossing powder melt into a shiny metallic finish. Skip to the 7:47 mark in Amy’s video to see what I mean.
I cut my backgrounds to be 4” by 5.25” and laid out my fairies on them to decide where I wanted to place the sentiment. Some backgrounds were too busy or dark to show my sentiment. So I stamped the sentiment on white cardstock that I colored so it would match the background or the fairies.
Finally I adhered the finished card fronts to my Ohuhu white card bases. I really like these card bases because they’re sturdy and stand up nicely.


