Emboss resist is a staple of cardmaking. Look around the shops of most stamp manufacturers and you’ll notice how many of them are outlines of things. Everything from adorable critters to elegant florals.
You’re meant to stamp and heat emboss the outline. Then you color the image. The smooth, raised heat embossing creates a natural resist. It makes coloring with any water-based medium very easy.
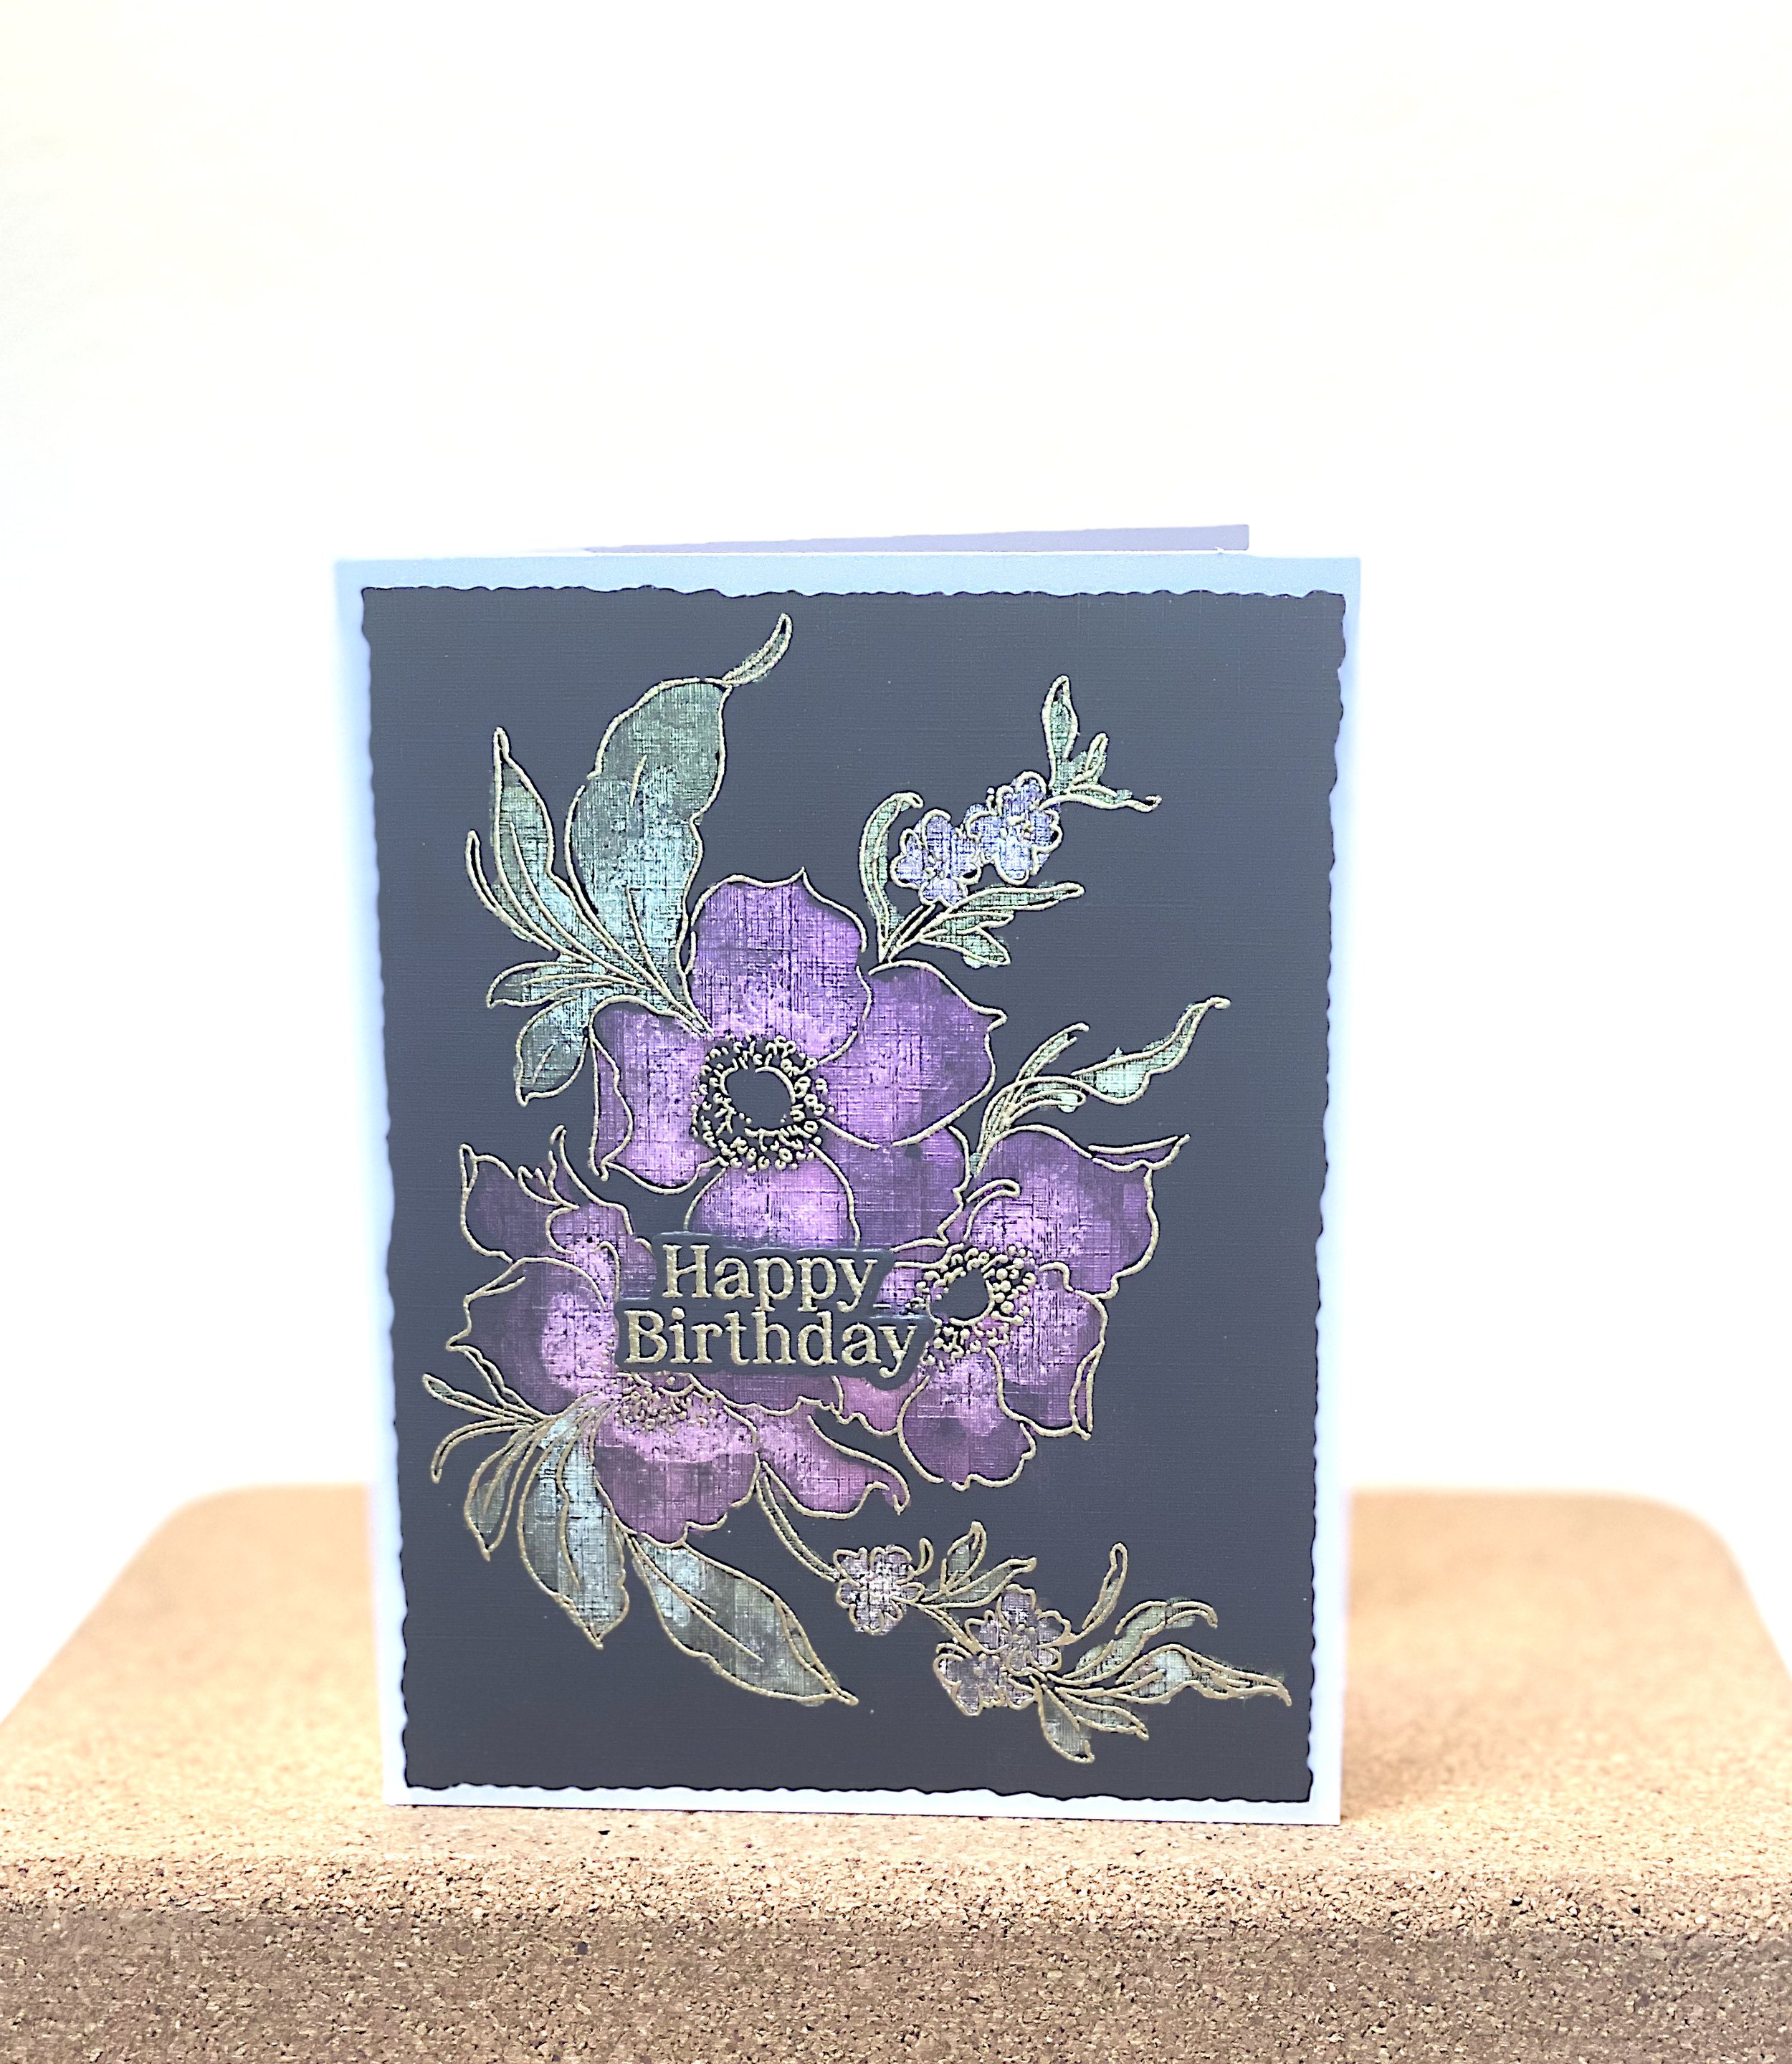
I went back to the still-unreleased Nothing But the Best stamp set and embossed it with three different embossing powders: silver, gold and clear on black cardstock.
Clear heat embossing
Clear heat embossing will make medium to dark cardstock colors look more saturated. So when you do it on black cardstock, it looks like a blacker outline.
I don’t own any black heat embossing powder. Many crafters don’t. The reason is that heat embossing powder has a tendency to get everywhere and when it’s black, it makes everything look grimy. Black heat embossing powder is a bear to get out of light carpet, too.
Besides, you can easily achieve black heat embossing by stamping with either an oil-based ink like Ranger’s Archival or a black pigment ink and then heat emboss with clear powder. This method has the advantage of making the stamping smudge proof.
On white or almost-white cardstock, clear heat embossing can be near-impossible to see. Often you have to tilt the cardstock in the light, so you can see the sheen. Because the clear embossing resists any water-based medium, you can produce a white outline this way. It’s counterintuitive, but clear heat embossing often stays whiter than white heat embossing when you color or ink blend over it. White heat embossing can tend to stain.
These are all great reasons for why I recommend getting a clear heat embossing powder when you first start out with heat embossing. It’s even better than gold and silver. Always get the super fine version for embossing outlines or sentiments.
Coloring
For the coloring I used seasonal Distress Mica Spray Stains and Crayons. If you like the shine these give, make sure you stock up when they become available in August or September. The manufacturer, Ranger Ink, sell out of them within a couple of weeks.
To watercolor with the spray stains, I made sure I shook the bottles until there was no mica sludge left at the bottom. Then I unscrewed the spray mechanism and touched the stem where I wanted the color. I used brushes to push the paint where I wanted it. The first layer was very blotchy, so I followed up with a second layer. I wanted still more shine, so I scribbled crayons in the same colors on top of the spray stain. I wet a finger with a baby wipe and moved the crayon around until I was happy.
On the clear embossed image, I used mainly crayons and smudged it out quite a lot. I wanted it to go outside the lines, so the lines became more emphasized. When the crayon was dry, I buffed the clear embossing with a microfiber cloth to remove any crayon left on top.
Sentiment
When I stamped the outline image, I also stamped the Happy Birthday sentiment that’s part of this stamp set. I used the same treatment for the sentiments as for the main image. Then I cut it out with the coordinating die and popped it up foam tape.
Final touches
To give this very simple card design a bit more interest, I cut out the black cardstock with my deckle edge trimmer at 5.25” and 4”. I love the wavy edge it gives to cardstock. It looks quite dramatic against my favorite white pre-fab card base.


