
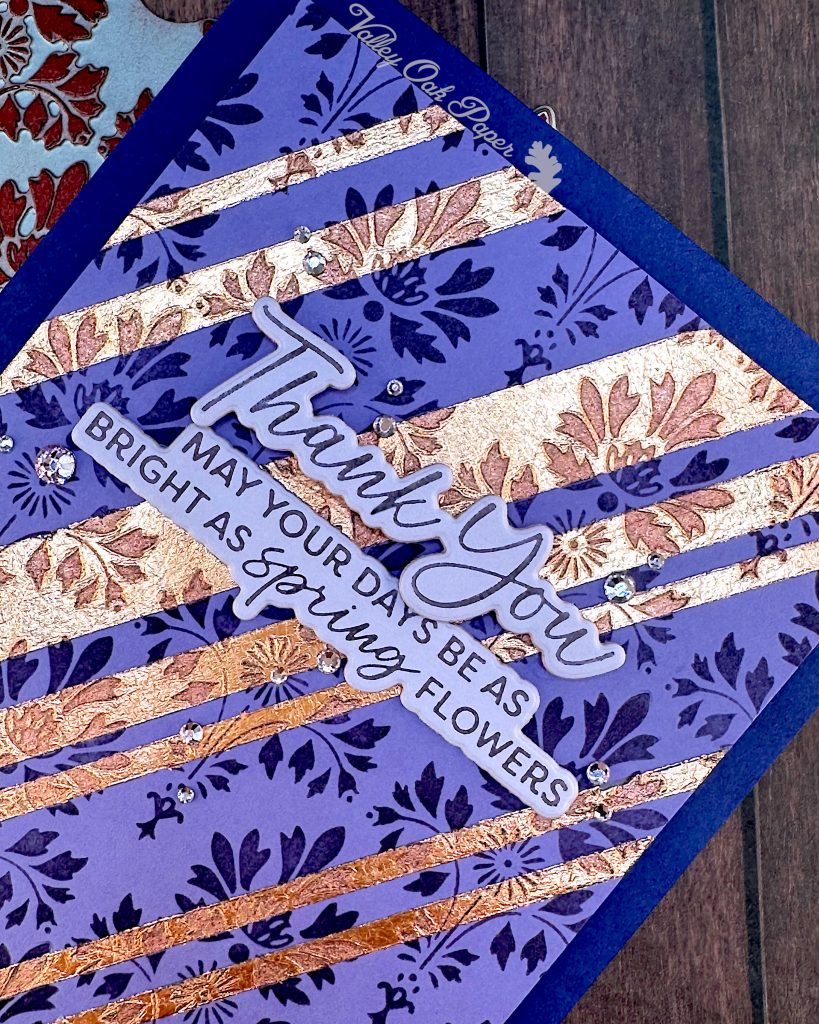
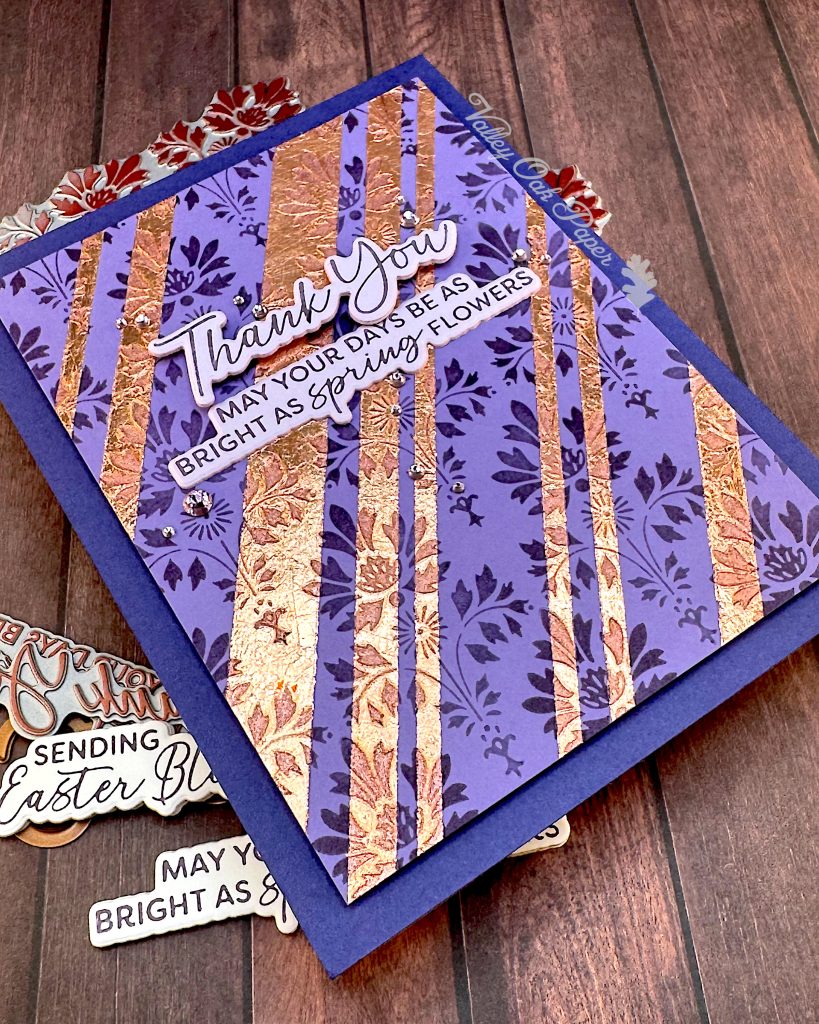
Gilding Flakes
I started with a medium purple A2-sized piece of cardstock and drew a line diagonally across it. Then I placed a piece of double-sided tape along the line. I continued placing more tape of different widths parallel to the first piece until I felt I had enough. I erased the line and then I ran my panel through my die cutting machine without die. That helped to press the double-sided tape into the cardstock.
I removed the backing paper and added gilding flakes until all the adhesive was covered. The gilding flakes I used are by Nuvo and the color is called Sunkissed Copper. I rubbed the gilding flakes with the smooth side of a microfiber towel until all the flakes that weren’t stuck had come off. Then I rubbed the remaining gilding with my fingers, so they’d be nice and shiny.
BetterPress
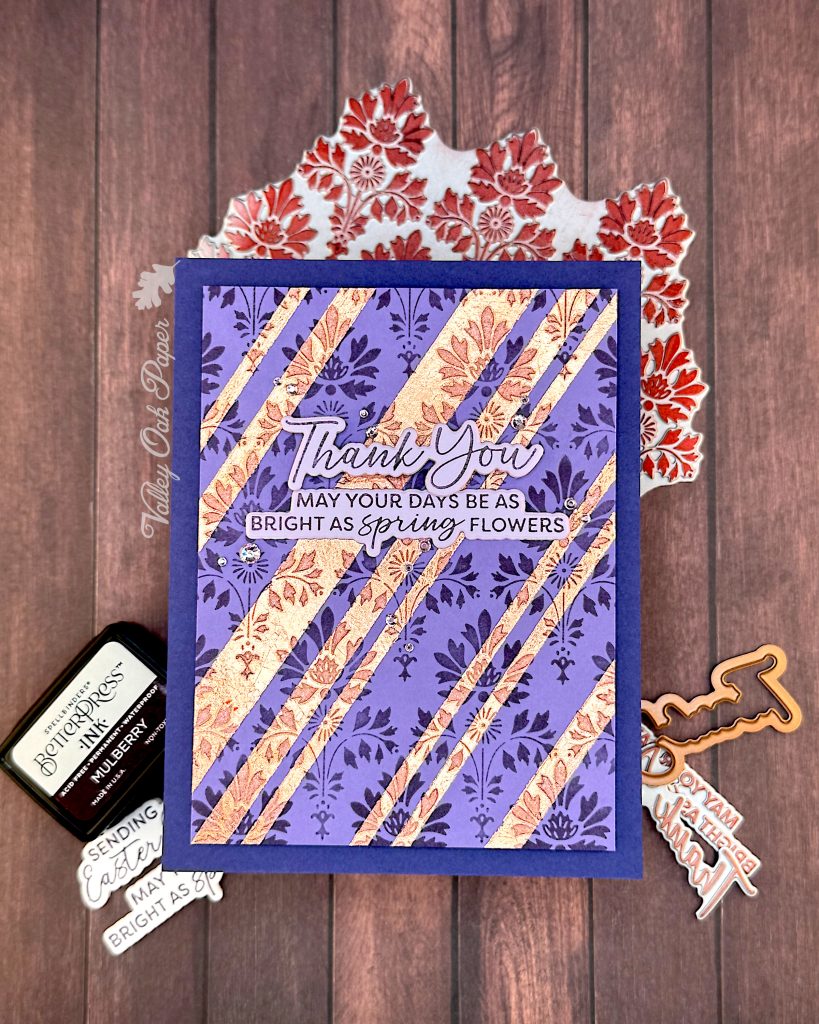
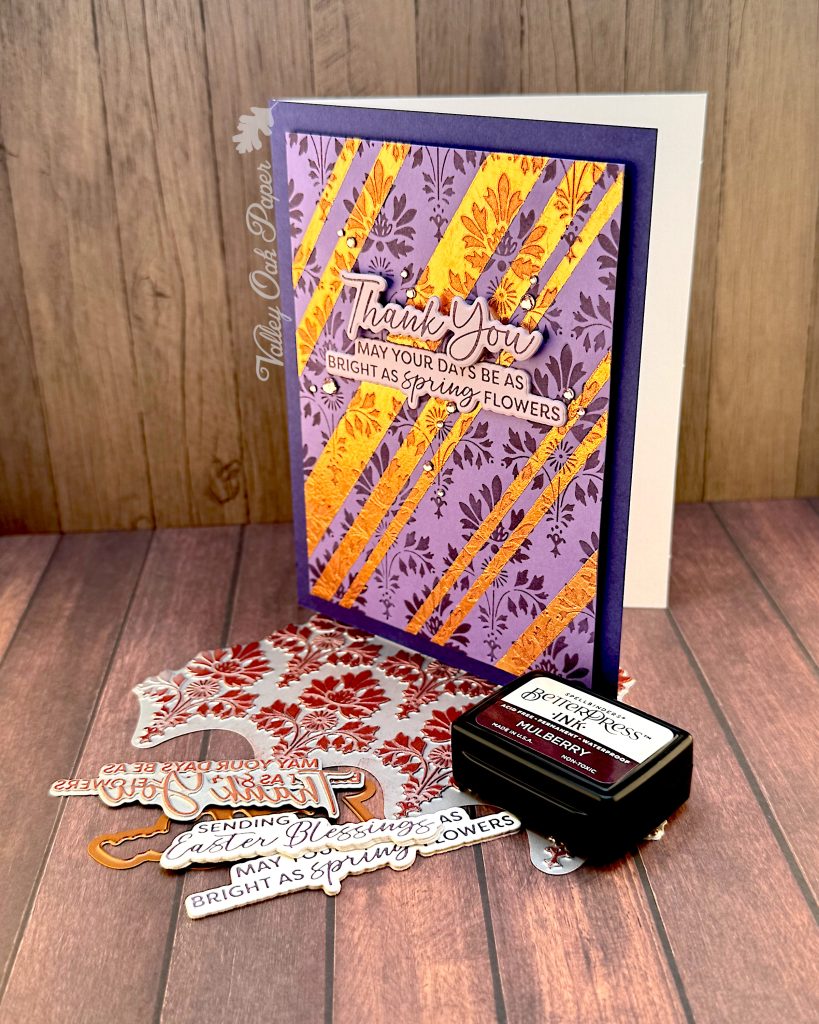
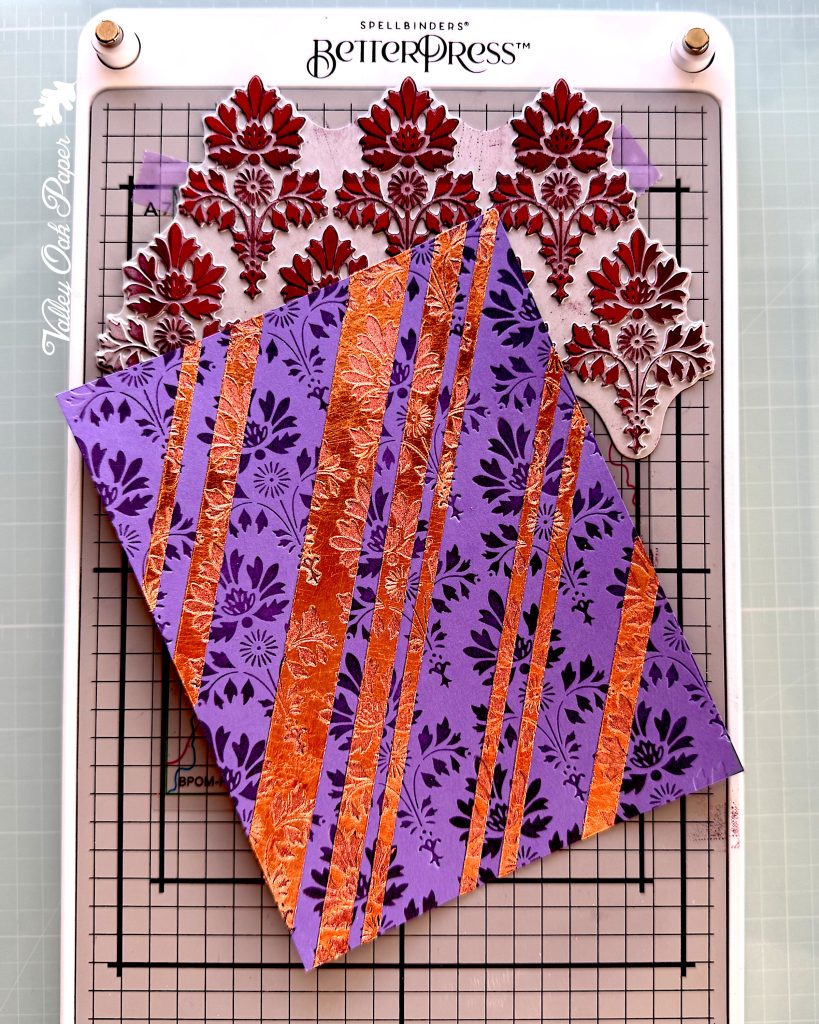
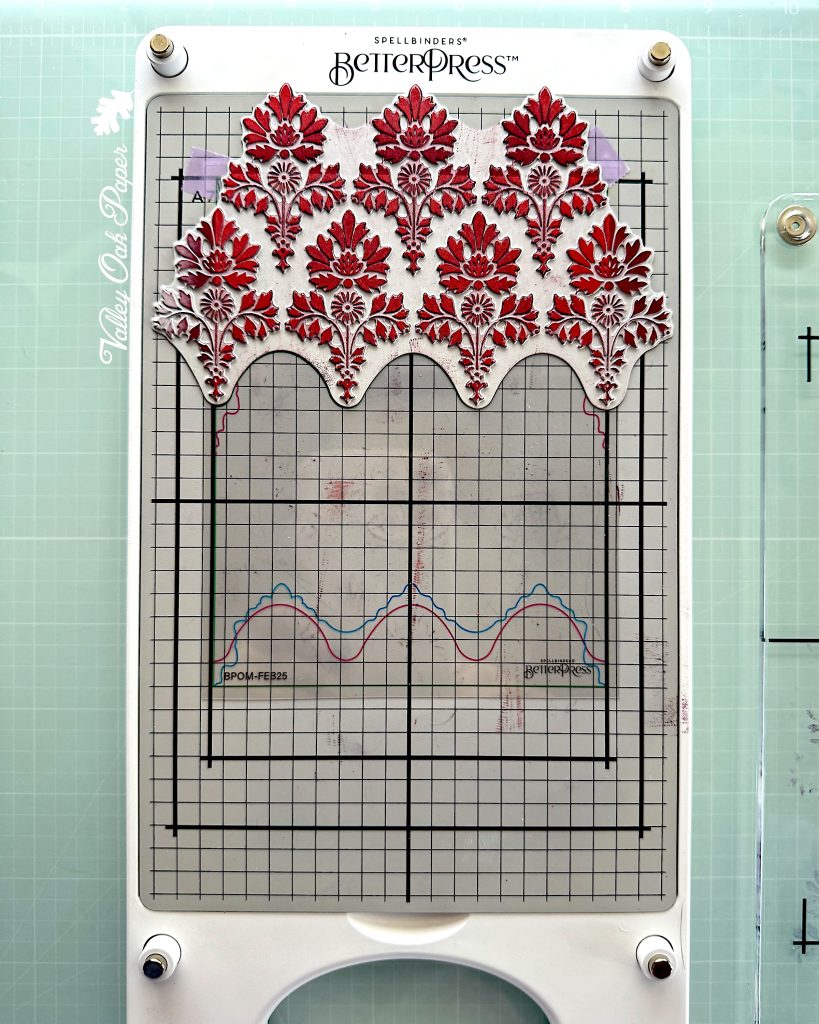
Luxe Damask is the name of the BetterPress of the Month for February 2025. It comes with an A2-sized placement guide that helps you cover your cardstock with the damask pattern. You need to run the cardstock through the die cutting machine three times to cover it.
As you can see above, I moved the placement guide up to the A7 line. If you do that, you only need to move the press plate. The cardstock and placement guide stay in place. In fact, I taped down the placement guide, so it wouldn’t shift on me. The ink color I chose was Mulberry, from the Regal Set.
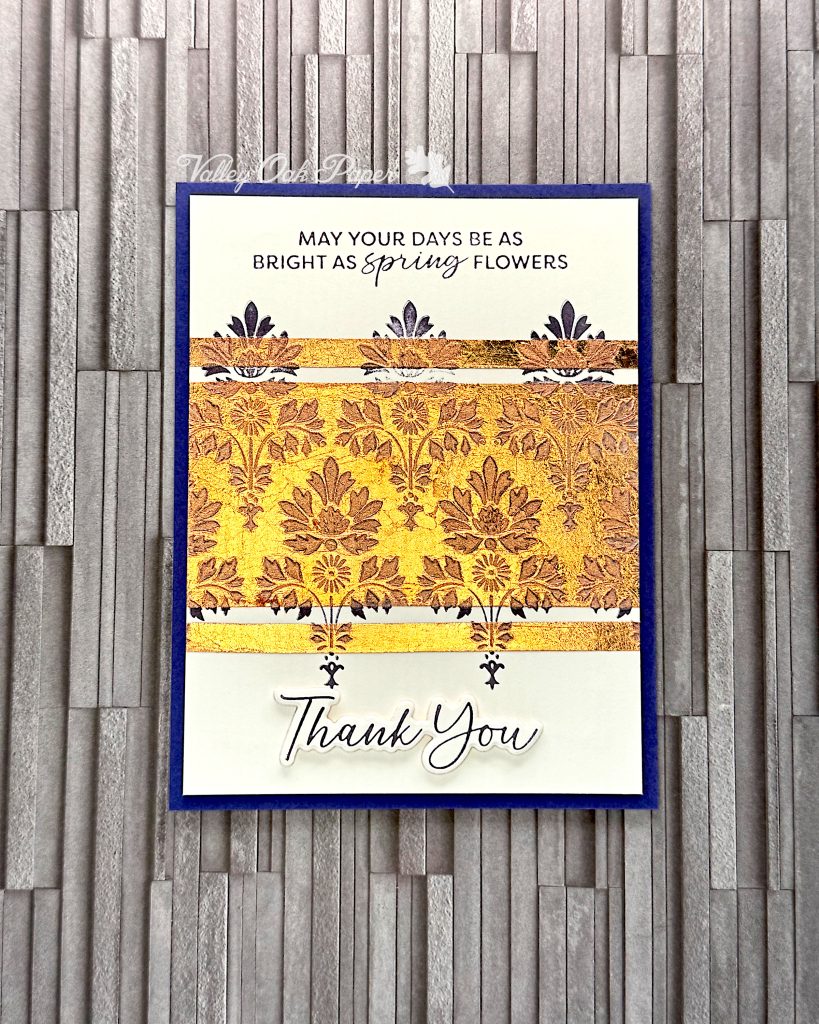
To get enough pressure, I had to add the shim from the Universal Plate System, plus one piece of cardstock. If the ink color is faint in the middle of the pattern, you need to add another thin shim. You can see what that looks like on the white card above. Right under the word “spring” the pattern is lighter than on the left and right of it.

Sentiment
The Luxe Damask Press Plate Set comes with three sentiments: Thank You, Sending Easter Blessings and May Your Days Be As Bright as Spring Flowers. I placed all three sentiments on the top half of the A2 square on the platform and inked them up with Mulberry BetterPress Ink. Then I taped an A2-sized panel of pale purple to the chase and ran it through my Platinum 6 die cutting machine. I turned the chase 180 degrees, and repeated the process.
I cut out the sentiments with the coordinating dies and stacked the better version of each on top of the less stellar one.
Assembly
I started by gluing a piece of dark purple cardstock to the front of my A2-sized notecard. Next I cut down the decorative panel to 3 ¾” by 5″. I mounted it with thin foam on the dark purple matte.
I added foam tape to the back of the Thank You Sentiment and placed it in the top center of the card. Then I nestled the subsentiment in under it.
Finally I added a generous amount of pink Color Essentials Gems around the sentiments.