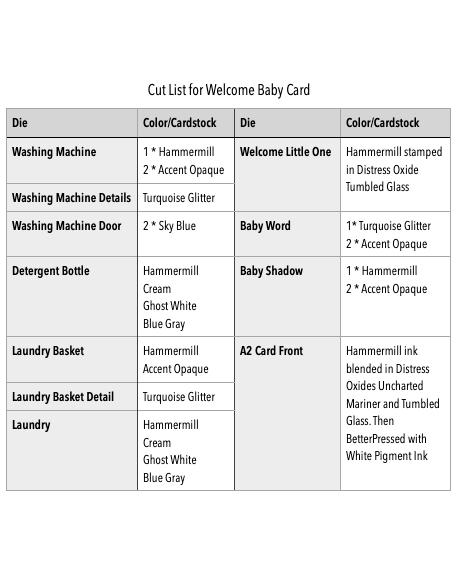
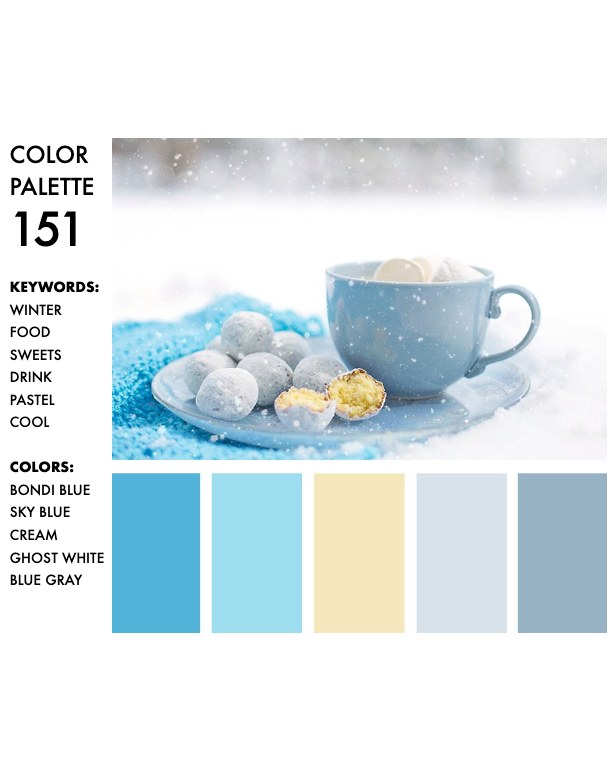
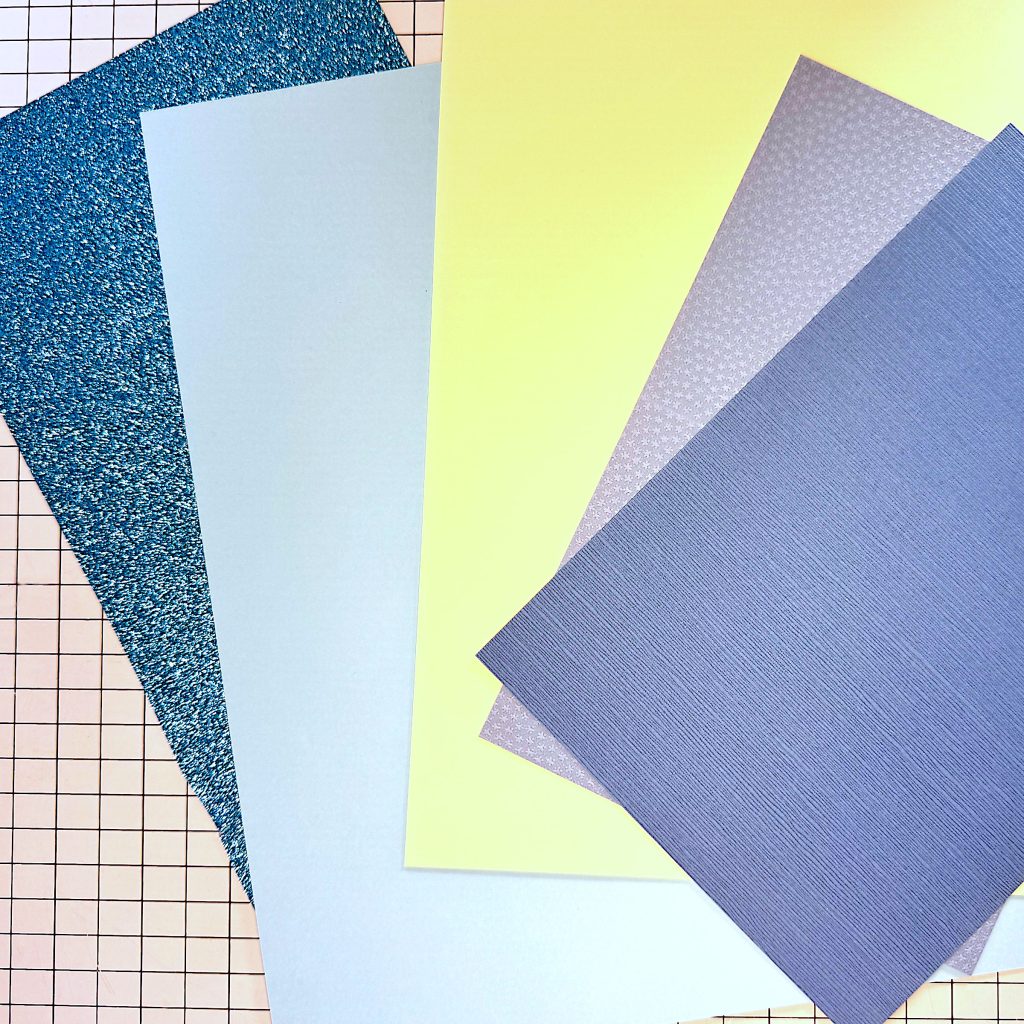
Most of the elements in today’s card will be die cut and I’ve selected four blue cardstocks and a cream. I’m also using white Hammermill cardstock. The colors are based on palette 151 in the Color Catalog volume 1.
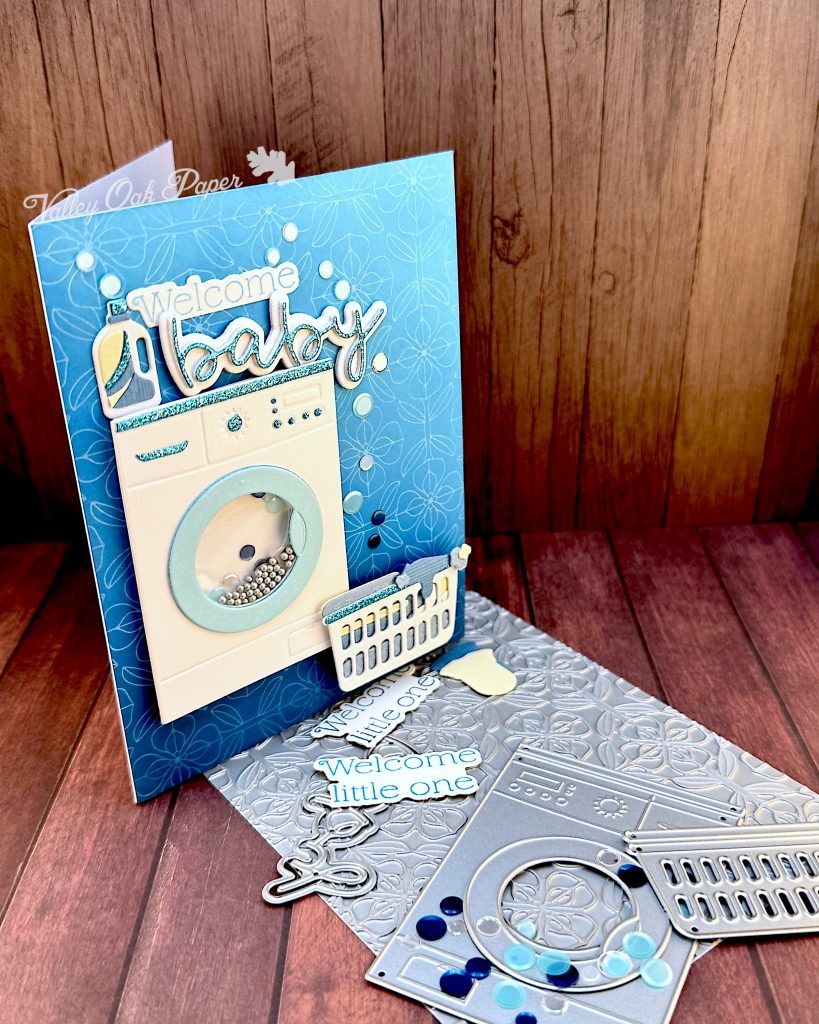
The main die set I’m going to use is Trinity Stamps Spin Cycle. Dies that cut out everyday objects, like washing machines, are so cute! This one has the added advantage that I can turn the washing machine door into a shaker window. For the sentiment I’m going to use Trinity Stamps Simply Sentimental Baby. I love that I have six different fonts to choose from!
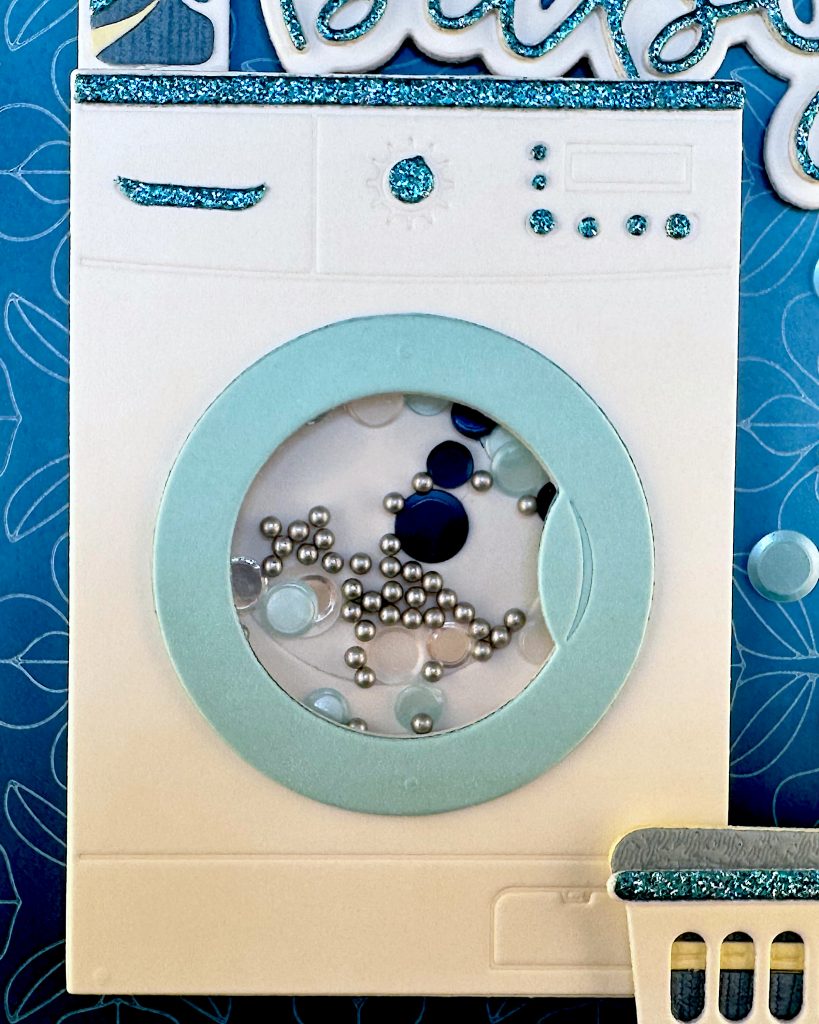
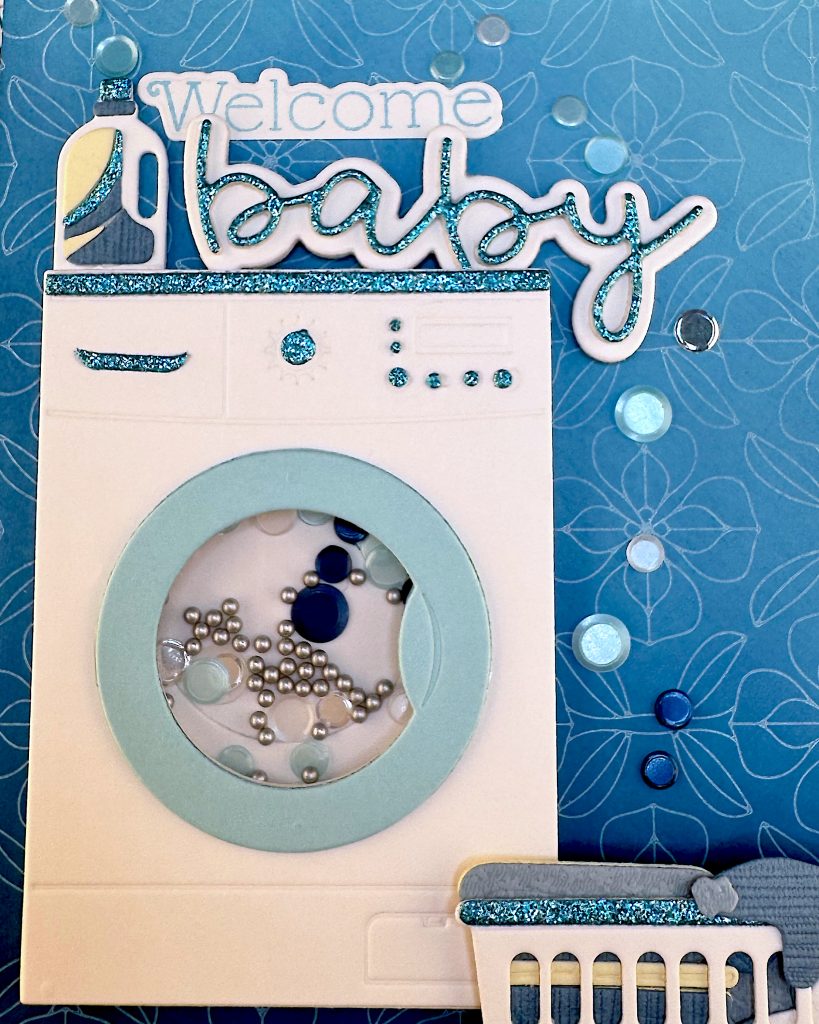
Once I’ve die cut all the bits, I’m starting on the washing machine with its shaker window. First I’m doubling up the main body of the machine for stability. Next I’m tracing the washing machine door and cutting out a piece of acetate. This will be the shaker window. Then I’m sandwiching the acetate between two light blue doors.
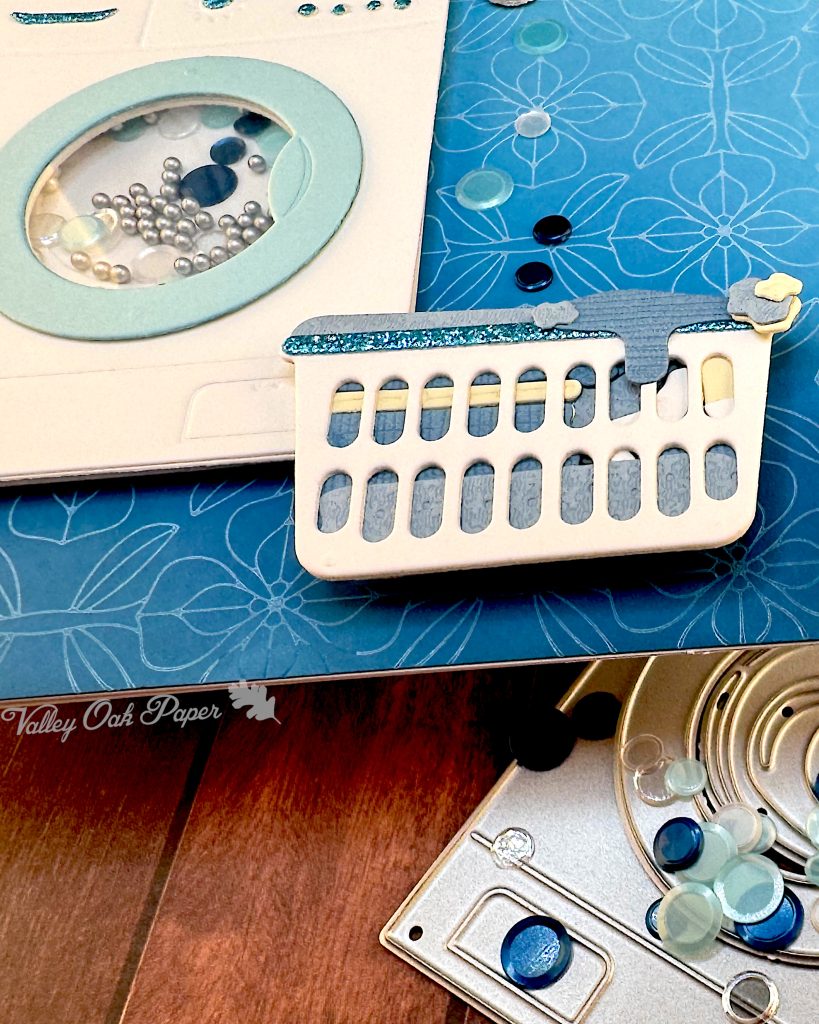
While the shaker window dries, I’m turning to the laundry basket. First I double it up. Then I glue the trim onto the top.
Back to the washing machine and I adhere the trim at the top first. Then I’m adding the detergent drawer handle and the various knobs and lights.
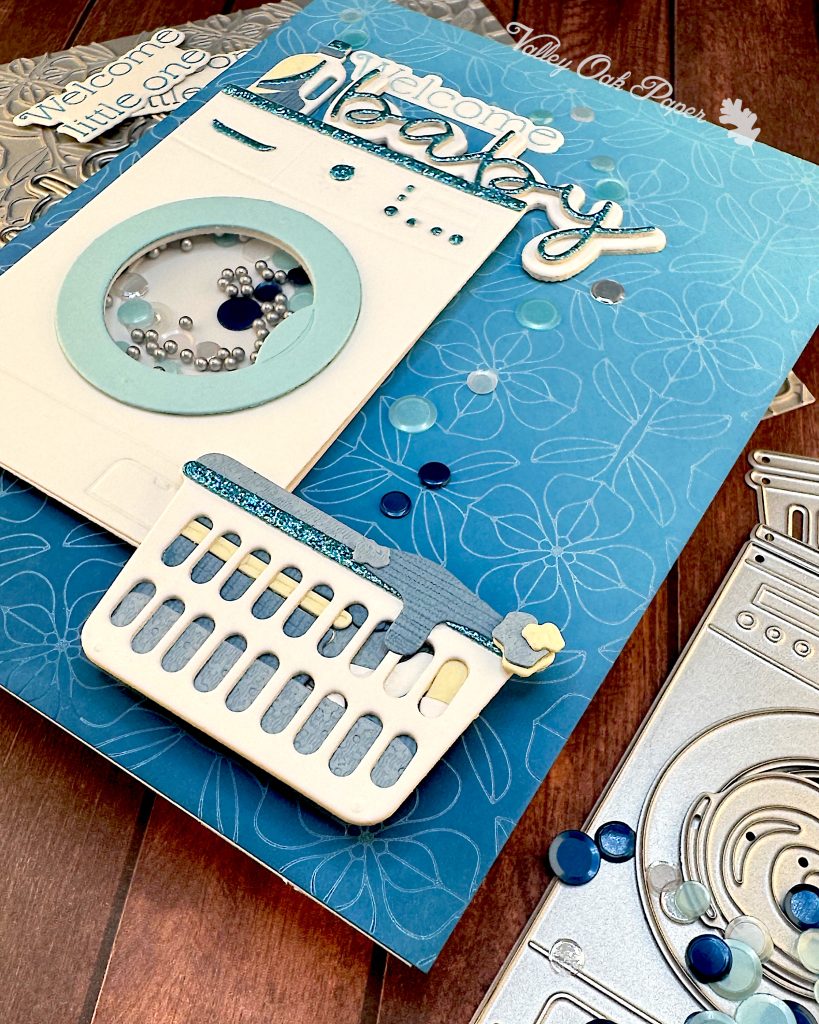
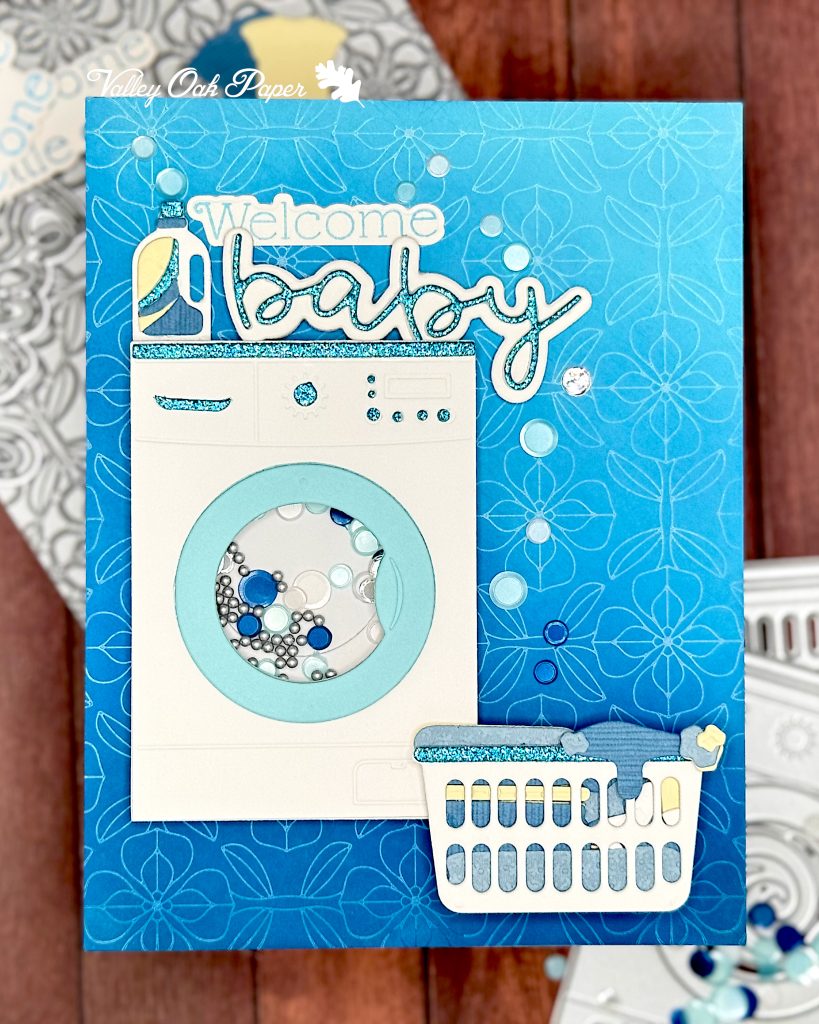
Moving onto the detergent bottle, I’m starting by doubling it up. I’ve die cut the decorative label from three different cardstocks. I placed the first part, the yellow one, too high up. The next part, a turquoise glitter stripe still fits. But the third part doesn’t. So I end up creating one more stripe out of blue cardstock. Then I place the last piece. And I fill in the gap with a piece of cream cardstock that I cut to size. Finally I add the lid.
Shaker Window
Here I’m gluing the shaker window to the front of the washing machine. Time to create the shaker well with some foam tape. I’m adding some old sequins by Studio Katia that match my color scheme. I’m also adding a good amount of Silver Bullet Shaker Dots from Kat Scrappiness. They’re heavy, so they keep the shaker bits moving.
I almost created a leaky shaker window. But I caught myself in time. So I added some more foam tape in the corners. Those will ensure that no silver bullets escape. Not that I have any experience with that.
Now I can remove the backing paper from all pieces of foam tape, add glue and adhere the back panel.
While the shaker dries, I’m turning back to the laundry basket and all the little die cuts that go inside and outside it. I’m stacking some of the die cuts. Then I add the big, fluffy blanket to the bottom of the basket. On the left side of the basket I’m adding shirts in a neat pile. On the right side, I start off with some socks and add a jumble of other laundry.
I finish the left side with a fluffy blue towel. The right side I’m finishing with a sweatshirt and some smalls.
Background
Here are all the parts we have so far, including a Hammermill panel that I’ve ink blended in Uncharted Mariner and Tumbled Glass. For my background I’m going to use the Spellbinders BetterPress Plate of the Month for March and some white pigment ink. It’s called Quilted Memories, so I felt it would be great for a baby card.
I’m placing the press plate on my Better Press platform and inking it up with white pigment ink. It’s important not to press the ink pad into the press plate. Gently patting and short swiping motions will give crisp coverage.
Next I tape the ink blended background to the bottom of the BetterPress lid. Then I place the lid on the magnets and run the whole thing through my Platinum 6. When I return from the die cutting machine, I lift the lid off the platform and we can see the beautiful impression! It’s such a pretty plate!
I remove the tape from the lid so I can use my background. I was sure I was going to cut down the background but I really like the way it looks when it covers the whole card front. I’ll just have to live with the bits that are missing ink at the top and bottom. So I glue the better press panel to the card front.
Sentiment
Time for some stamping. Here’s my Misti and here is the stamp set I’m going to use. It’s called Baby Bunny and it’s from Trinity Stamps. I used it at the beginning of this year for a Bunny Birthday card.
This time I just want part of the sentiment. The Welcome is the part I want. First I stamp it in Uncharted Mariner. Then I clean off the stamp and move the cardstock and then stamp in Mermaid Lagoon. Finally I move the cardstock all the way up and stamp in Tumbled Glass. It was a bit faint, so I stamped again.
The nice thing about the coordinating die set for the Baby Bunny Stamp Set is that it cuts out all the sentiments. So I cut out the three sentiments I just stamped.
While I was die cutting, I also cut the Baby word and its shadow. I selected a script font this time. For the shadow layer, I stacked two Accent Opaque die cuts behind a Hammermill die cut. That’s going to be nice and sturdy. I’ve cut the word baby twice from Accent Opaque and once from turquoise glitter paper. Now I’m stacking them. Then I glue the word to the shadow layer.
Assembly
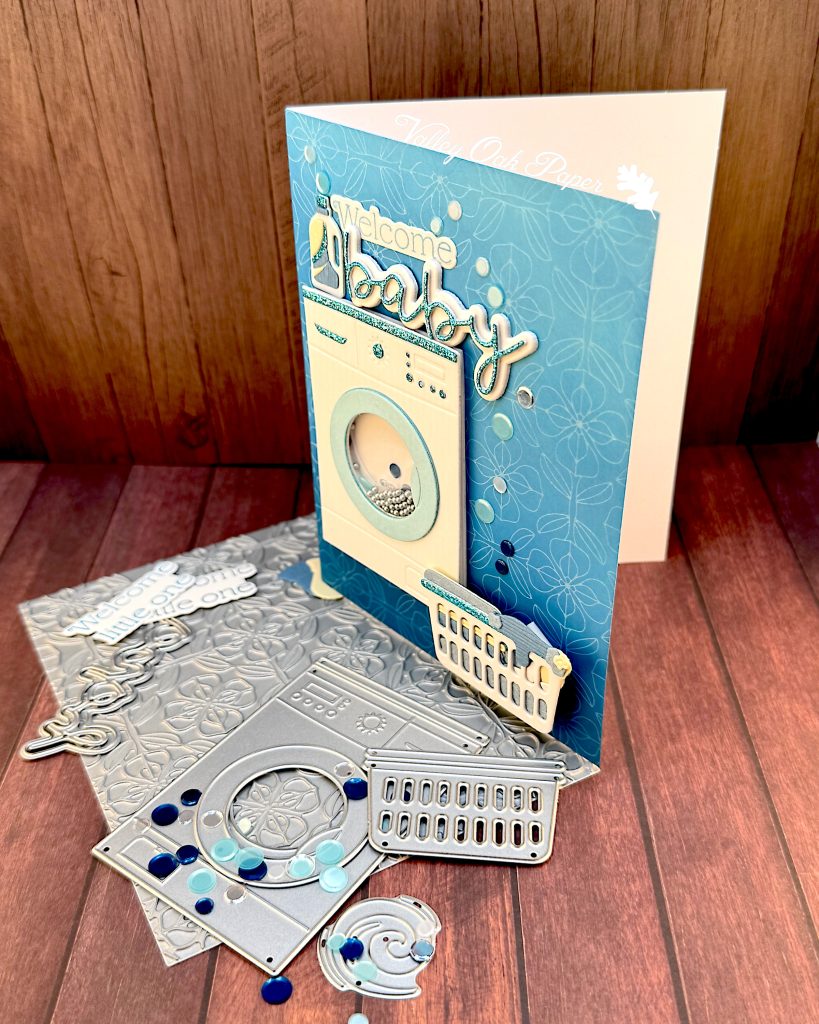
Time to assemble the card. I start by gluing down the washing machine on the left side. Then I use double foam tape to adhere the laundry basket on the right side.
I’ve chosen the sentiment stamped with Tumbled Glass. Here I’m trimming off the part I don’t need with my Tim Holtz trimmer. I’m terrible at cutting straight, so I use my trimmer whenever possible. Now I can glue down the Welcome part of the sentiment.
Next I’m gluing down the Baby sentiment on top of the washing machine. It’s nice and sturdy, like chipboard. Finally I’m adding the detergent bottle.
Off camera I added a bunch of sequins to the card. I was going for a bubble look.
I’m really happy with how this card turned out. I don’t make baby cards often, but I think the washing machine is so cute and I just love the delicate BetterPress background. The shaker element and accents in glitter paper also add some glam and playfulness. Do you make baby cards often? Let me know your tips in the comments!