
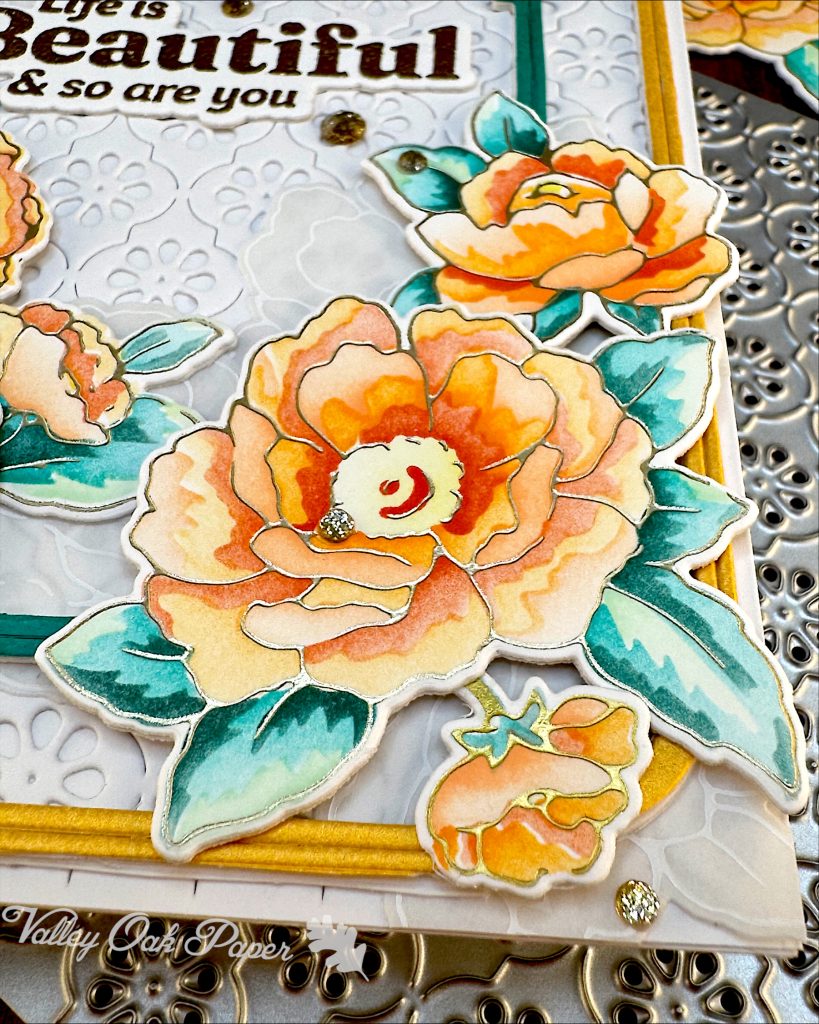
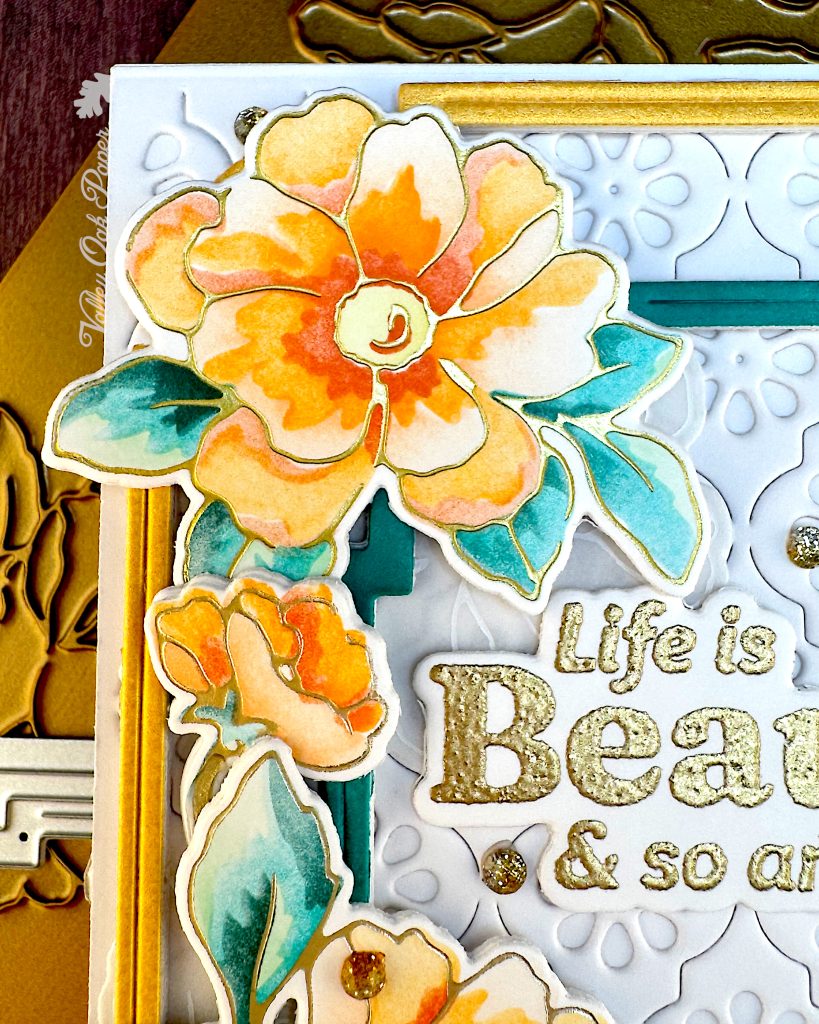
The theme of my monthly video hop for May is Flower Power. Naturally I’ve chosen to use Pinkfresh Studio floral products, specifically the Peony Fantasy Product Suite. Yesterday I spent an enjoyable half hour with the beautiful hot foil plate. I foiled it on vellum in two different white Glimmer foils and on Hammermill with two different gold foils. Then I foiled the negatives too. For this card I’m using the Gold Satin Metallic, Satin Champagne and White Glimmer Foil Roll impressions.
Stencil Palette
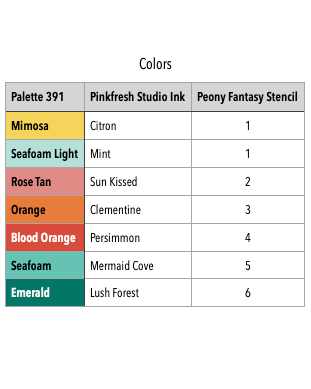
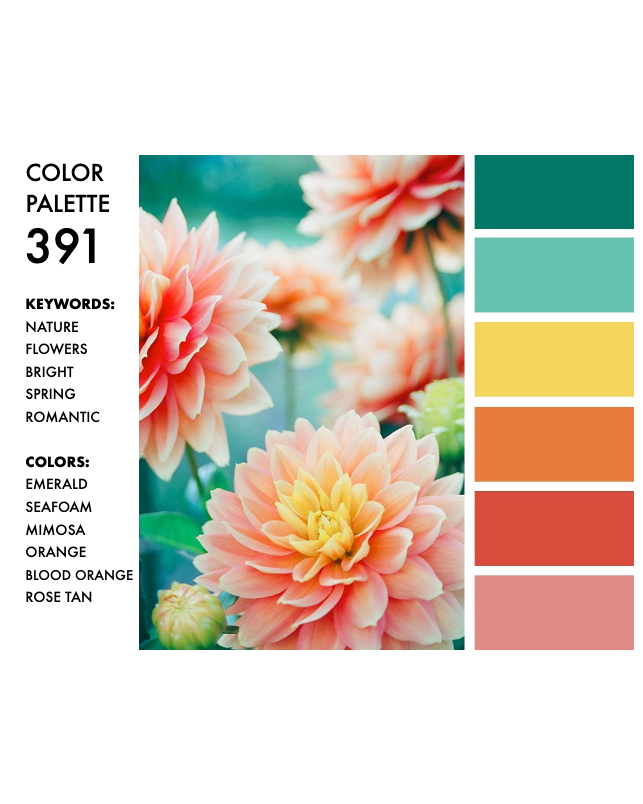
I’ve chosen Palette 391 from the Color Cube for stenciling the scrumptious peonies. It’s actually pretty close to the colors used on the Pinkfresh Peony Fantasy packaging. I’m using my Pinkfresh inks.

There are six stencils in the Peony Fantasy Layering Stencils Set, but I want to use two different colors for stencil 1. Stencil 1 has openings for coloring the flower centers, as well as the lightest color on the leaves. For the flower centers, I can use the yellow in the palette. But I want a light green for the leaves. Given that the darkest green color corresponds to Lush Forest (darkest in the Green Gables family) and the medium green color in palette 391 corresponds to Mermaid Cove (second darkest in the Island Oasis family), I’m choosing Mint for the lightest green. It’s the palest shade in the Garden Stroll family.
- See above for the colors and stencil numbers.
- I’m starting with the color Citron in the flower centers on Stencil 1.
- Staying with Stencil 1, I blend Mint onto the leaves.
- Stencil 2 colors in the lightest color on the peonies. I’m using Sun Kissed for them.
- Even for this light color, I’m trying to concentrate the color near the center of the flowers, rather than blend them uniformly. That makes a surprisingly big difference in how lifelike the flowers appear in the end.
- Stencil 3 fills in the midtones and I’m using Clementine ink.
- The darkest flower ink is Persimmon. That’s what I’m using for stencil 4.
- My favorite green, Mermaid Cove, is what I’m using for stencil 5. That’s the midtone for the foliage.
- Finally the darkest foliage color I’m blending in Lush Forest.
With the ink blending done, I’m using the coordinating die to cut out all the peonies at once. I’m also cutting out some Accent Opaque and stacking behind my stenciled flowers. Then I’m cutting out one set of vellum flowers as well.
Sentiment
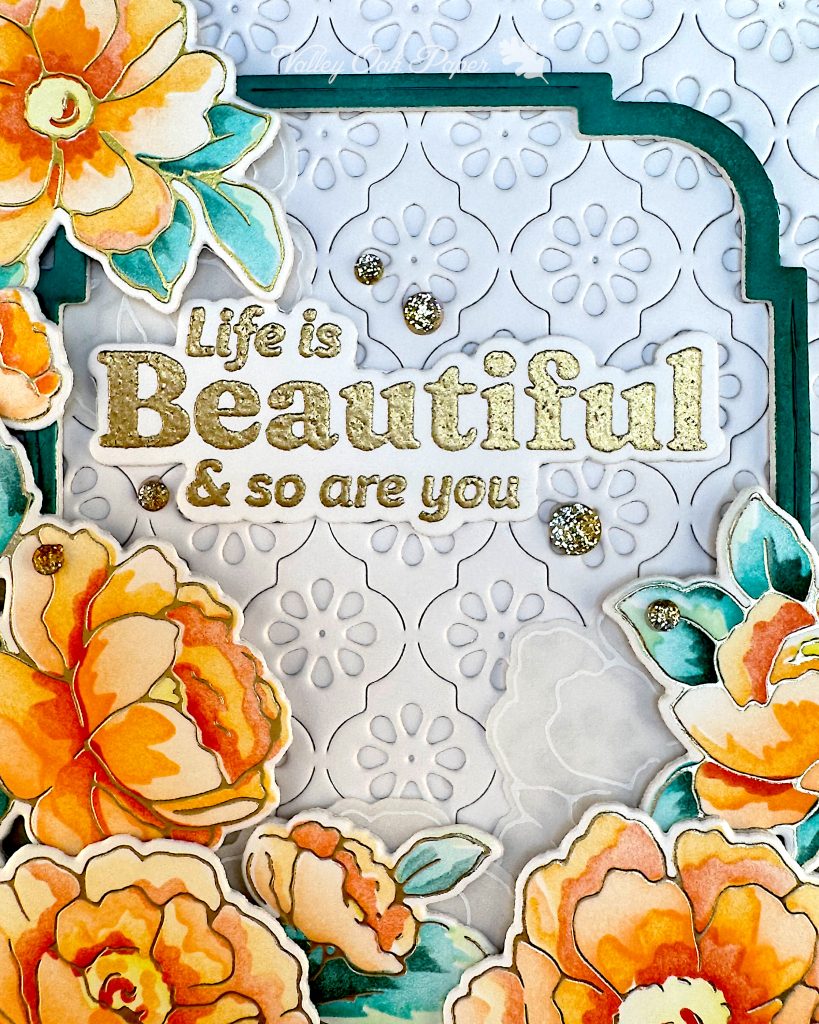
For my sentiment I’ve selected a few stamps from Kaitlin Shaeffer’s Beyond Happy Stamp Set, also from Pinkfresh. To give myself options, I’m stamping them first with Versamark and heat embossing them in gold. Then I’m stamping them with Mermaid Cove ink. Finally I’m using the coordinating dies to cut them out. I also cut out 2 sets from Accent Opaque and layered them.
Background
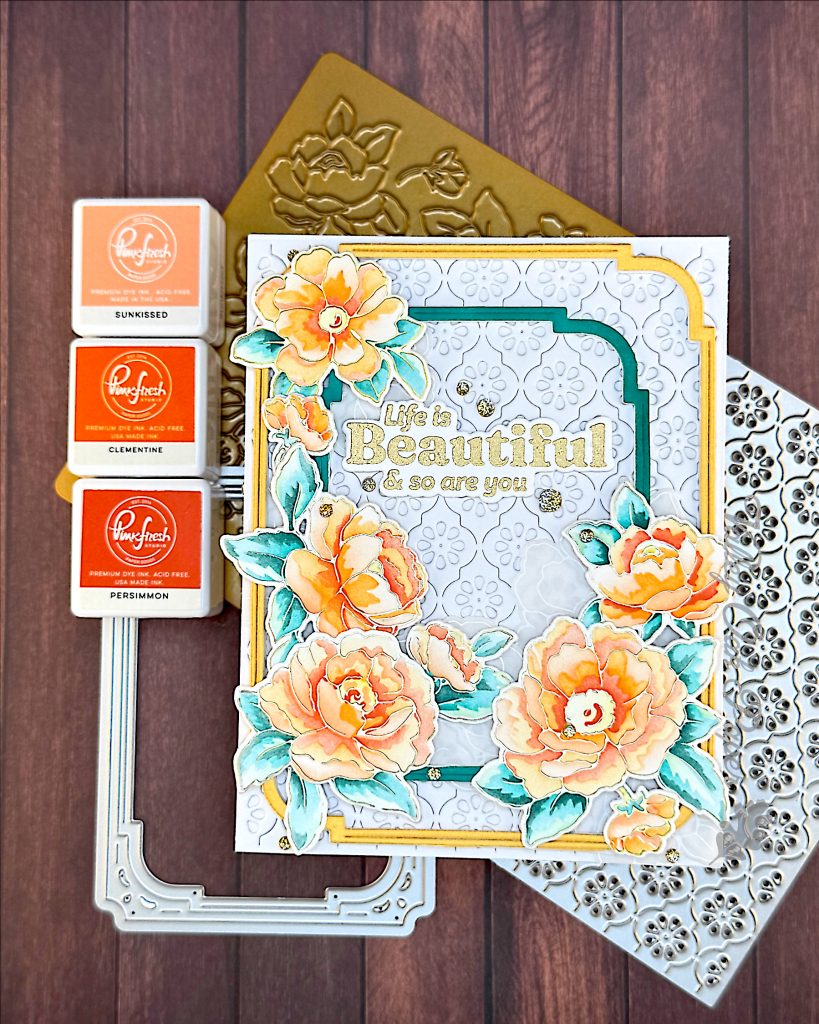
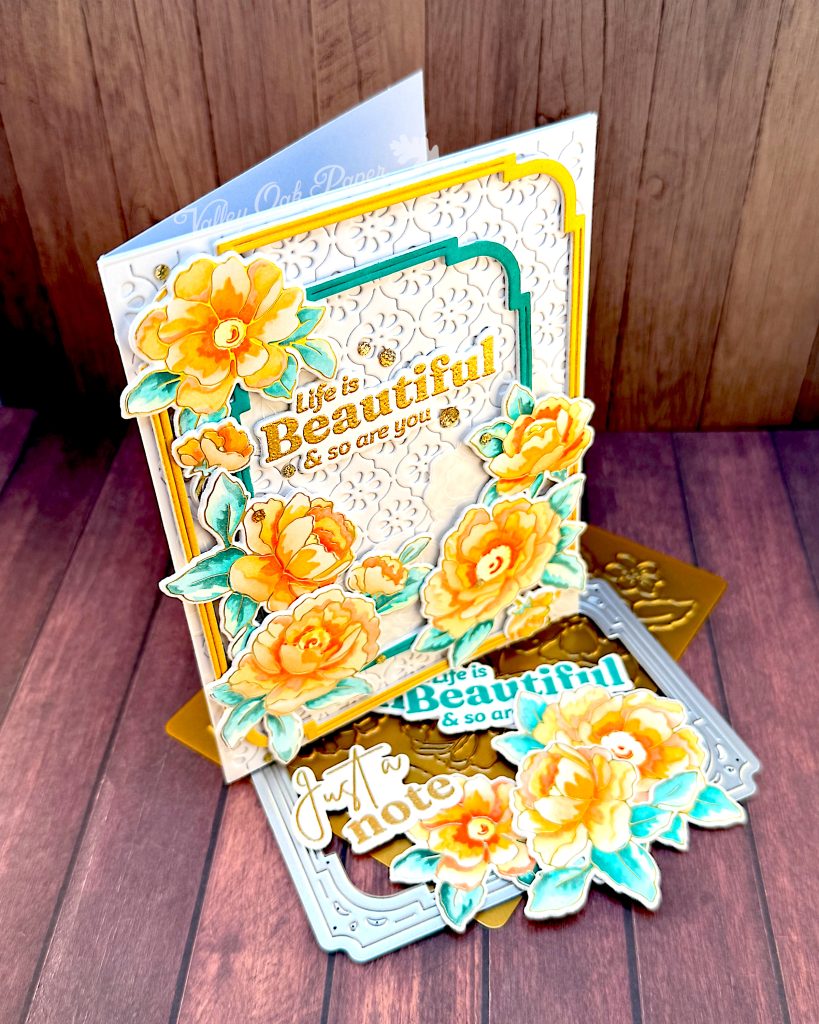
I’ve die cut the cover plate Pinkfresh Studio Daisy Chain to use as my background. And now I’m adhering it to a piece of Hammermill for a low key textured background. When it’s dry, I’m gluing it to the front of my white card base.
The theme for Pinkfresh Studio’s May 2025 Challenge is Frames, so I’m die cutting both frames from the Pinkfresh Studio Ornate Rectangles Frame Die Set.
They each create two frames. I’m using the inner frame, because I like the simplicity of it. I stacked four layers of each. For the outer frame I used a brushed gold cardstock and for the inner frame I colored the surface with Mermaid Cove ink.
Final Assembly
Now we have all the pieces we need to put together the card. I’m starting by gluing some of the vellum flowers to the background to soften it a bit. Then I’m gluing the outer, gold frame on top of them. I continue to fill in the background with vellum flowers. Then I glue the inner, green frame on top.
I really like the effect of the nested frames. Before deciding on gold and green, I tried out having them both white, both gold or both green. But I like this combination the best. The white frames got lost against the background, the green frames were too severe and the gold frames were kind of mid.
I love the flowers, but I also want the frames to show. So I’m starting by placing three flowers in the lower left. Then I’m auditioning different sentiments, first at the bottom of the card, then toward the top.
By now I’m pretty sure that I want the big flowers in the lower left corners, with the upper right corner left free. So I’ve added foam tape to the backs and now I’m gluing them down. Here I’m adding more flowers on the left and right sides.
I’m gluing down the sentiment in the top center of the card. I filled in with a few more flowers and off camera I added some Ombre Glitter Drops to finish up the card.
I’m really happy with how it turned out. The flowers are just gorgeous and the nested frames really pull it all together.
