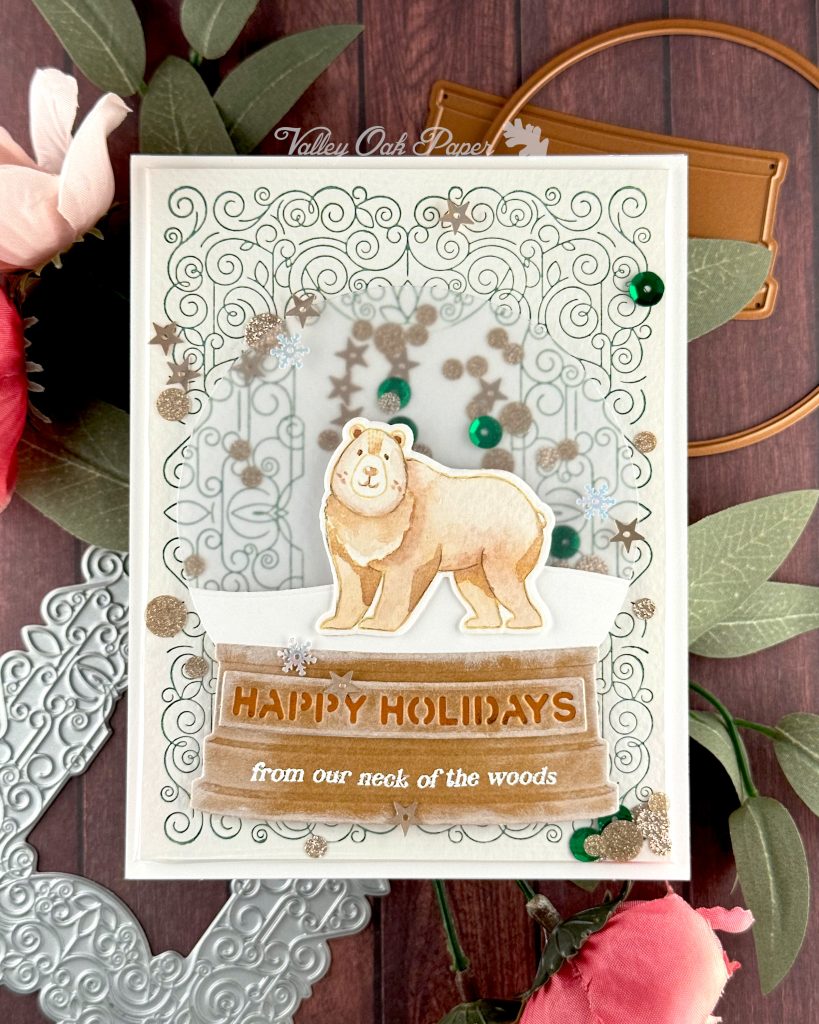
These cards were based on Jaycee Gaspar‘s lesson on Day 1 of Online Card Classes So Very Merry 2025.
Animals
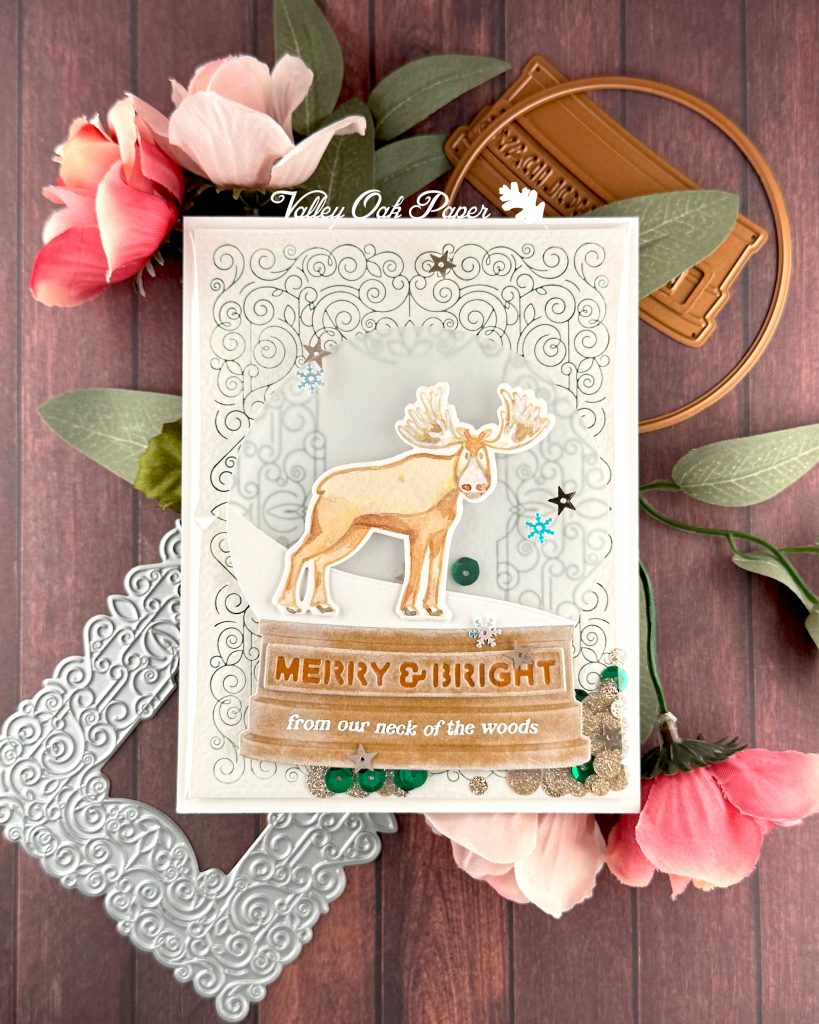
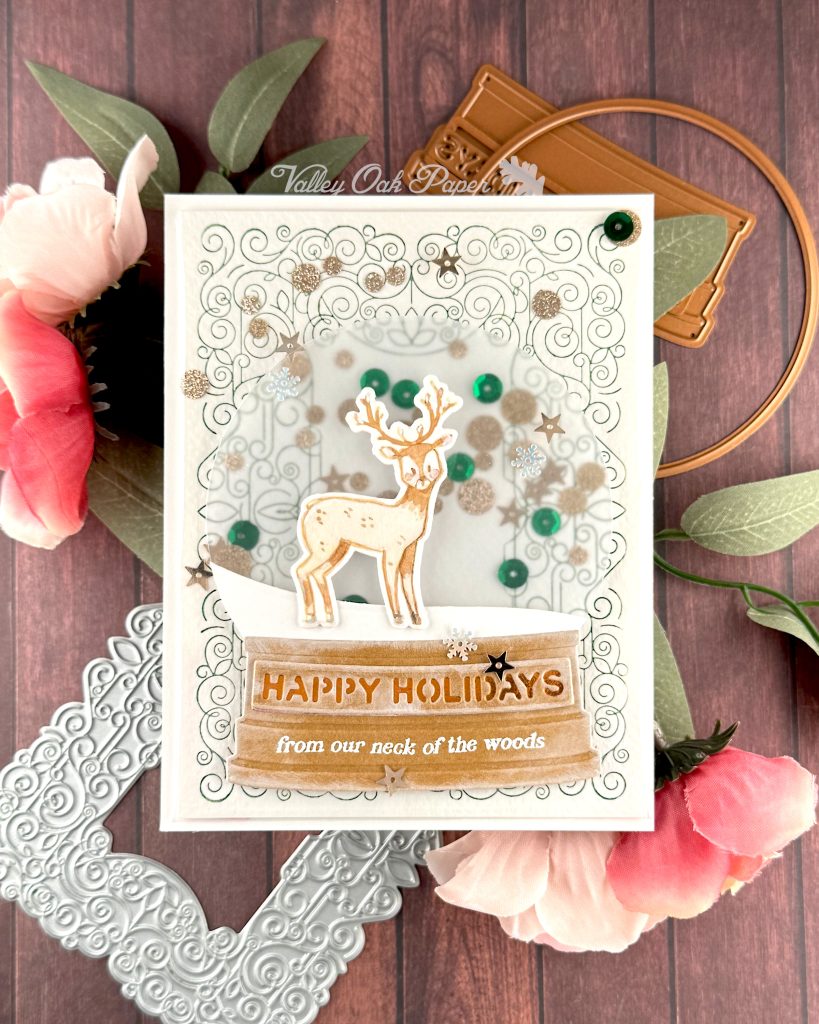
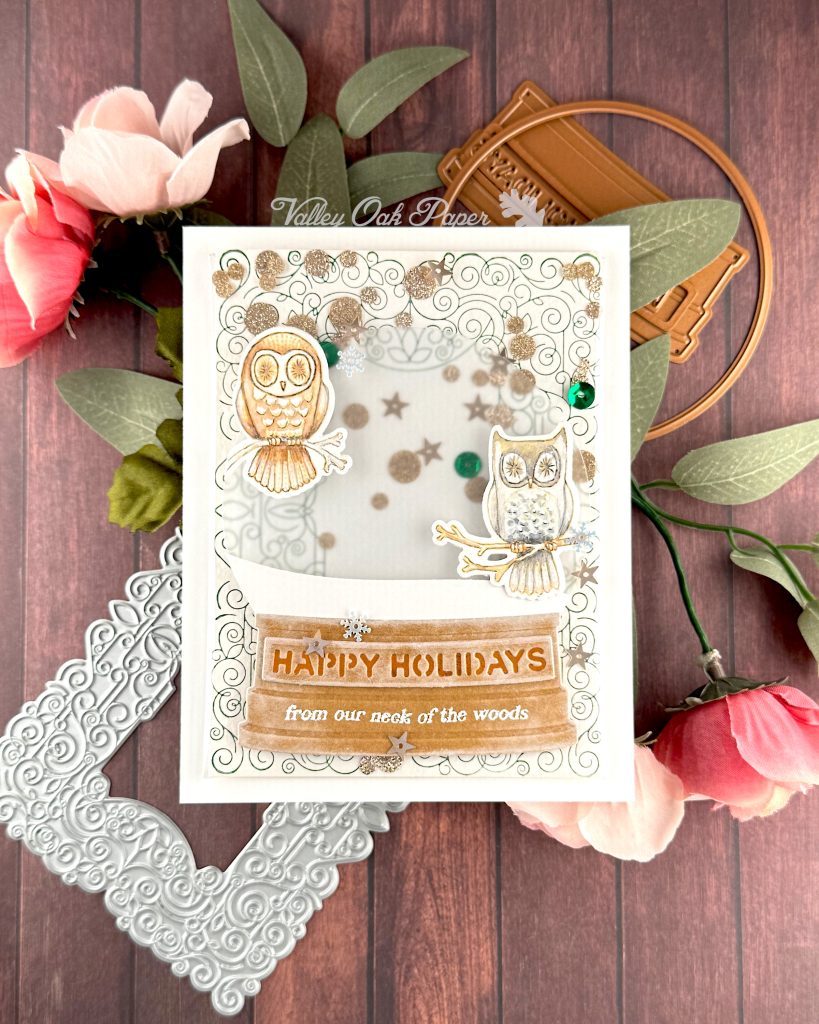
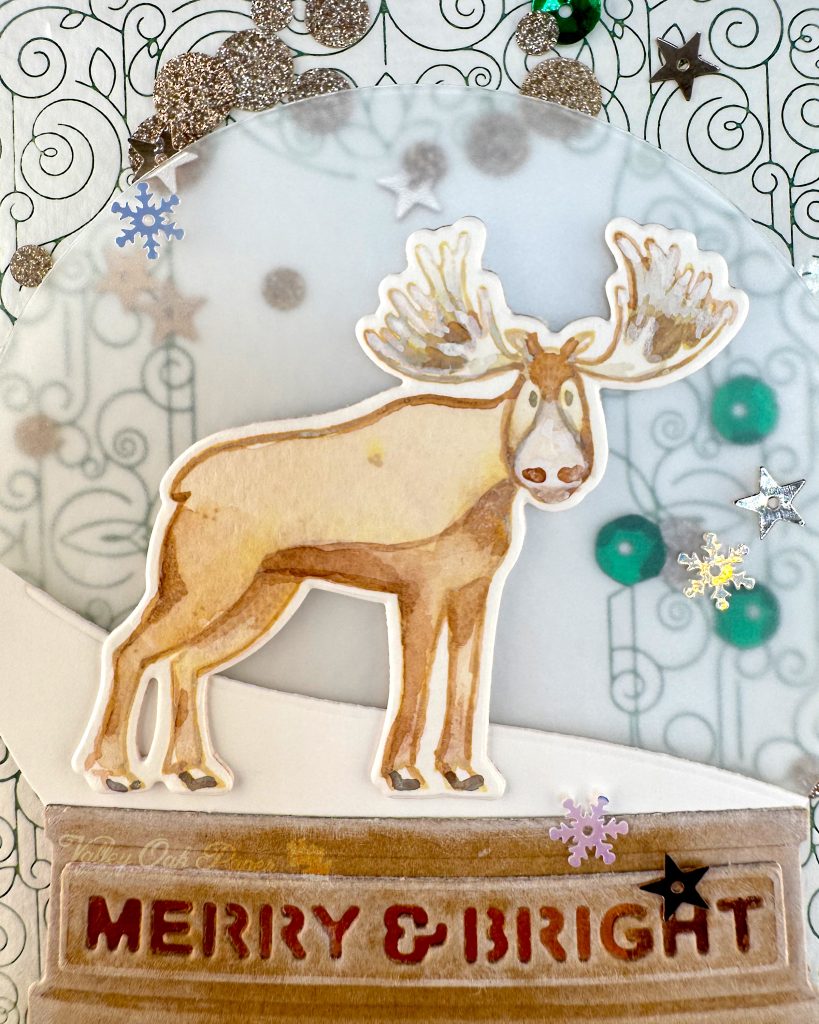
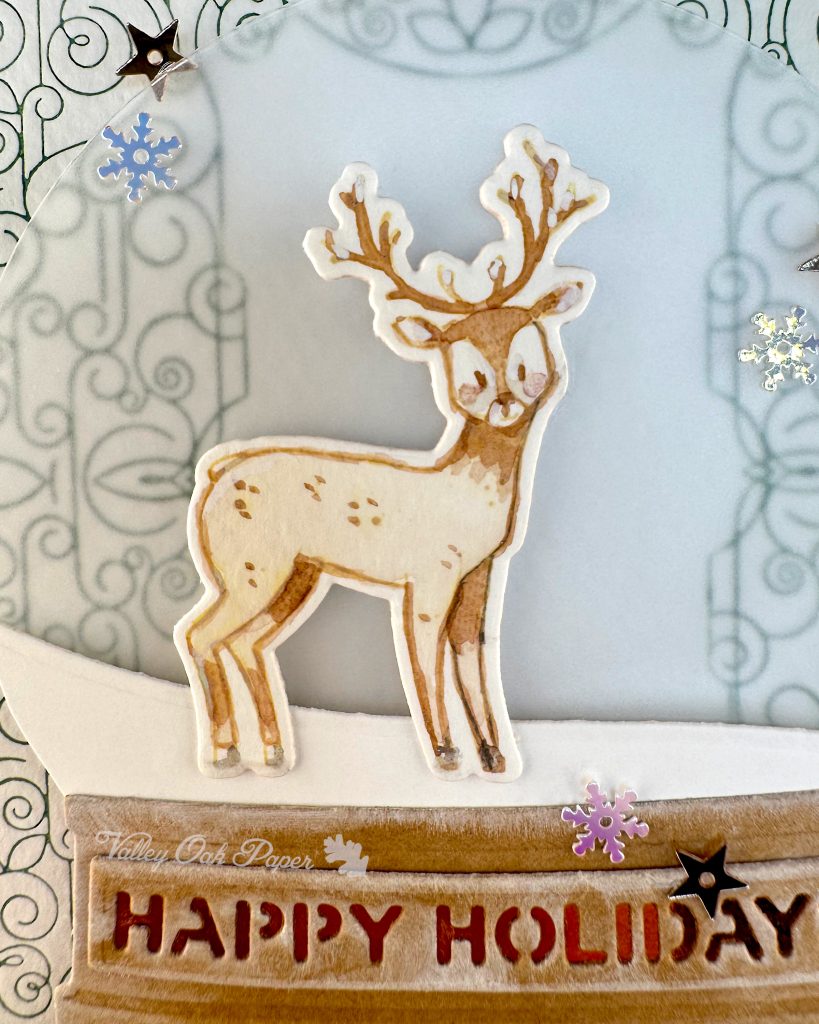
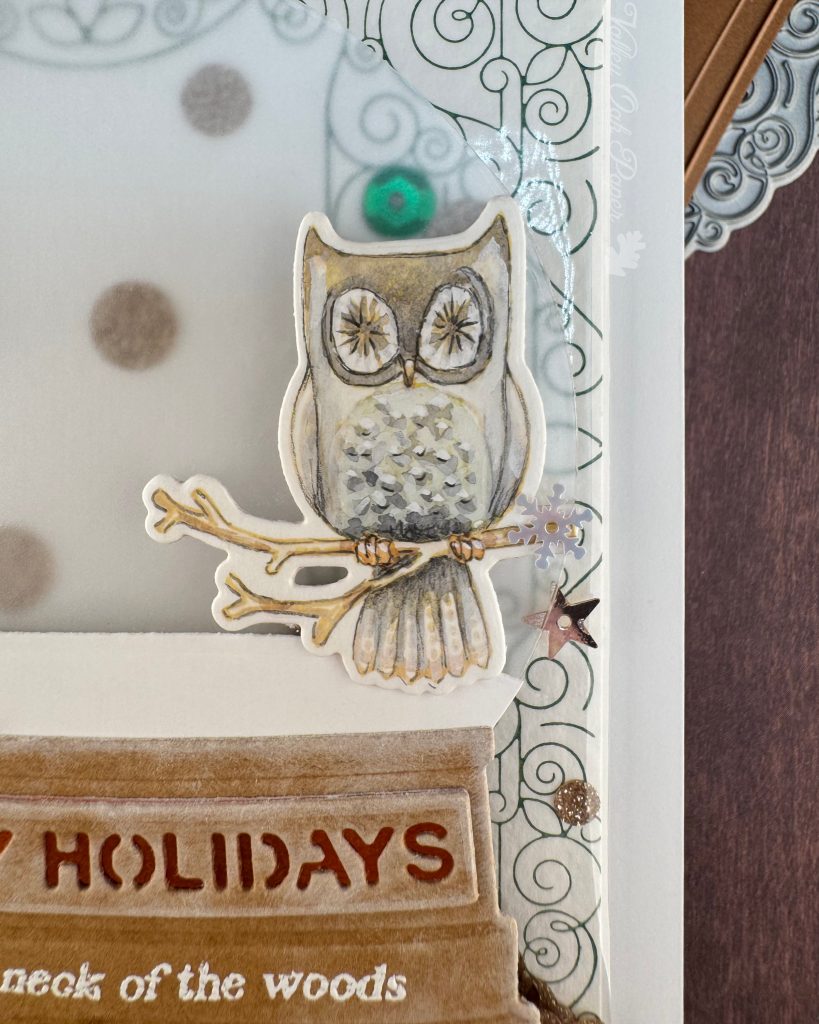
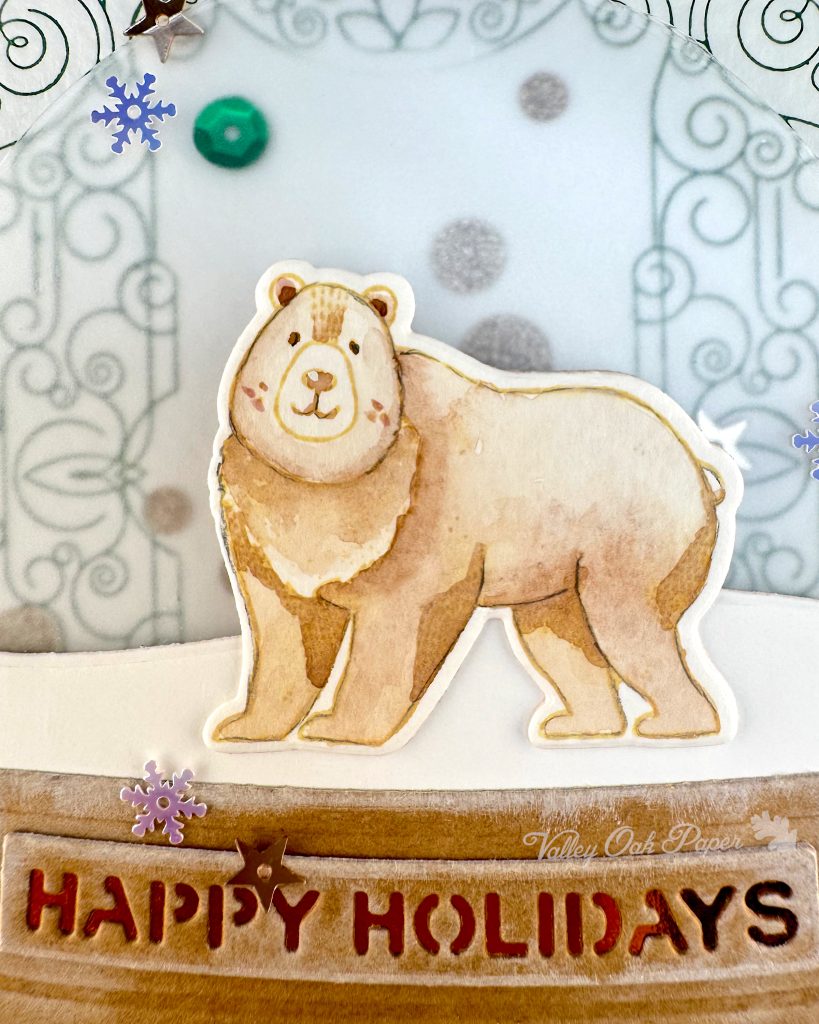
I started by stamping the larger animals from Simon Hurley’s Woodland Wildlife Stamp Set on watercolor paper with Distress Oxide in Antique Linen. I was going to do no-line watercoloring. This is the first time and I think Antique Linen was a bit too yellow. I might try Lost Shadows next time.
I watercolored the animals with my artist grade watercolors and detail brushes. I ended up reinforcing the lines with both paint and pencil any way.
Then I cut them out with the coordinating die set and stacked a layer of Accent Opaque behind them for dimension.
Shaker Element
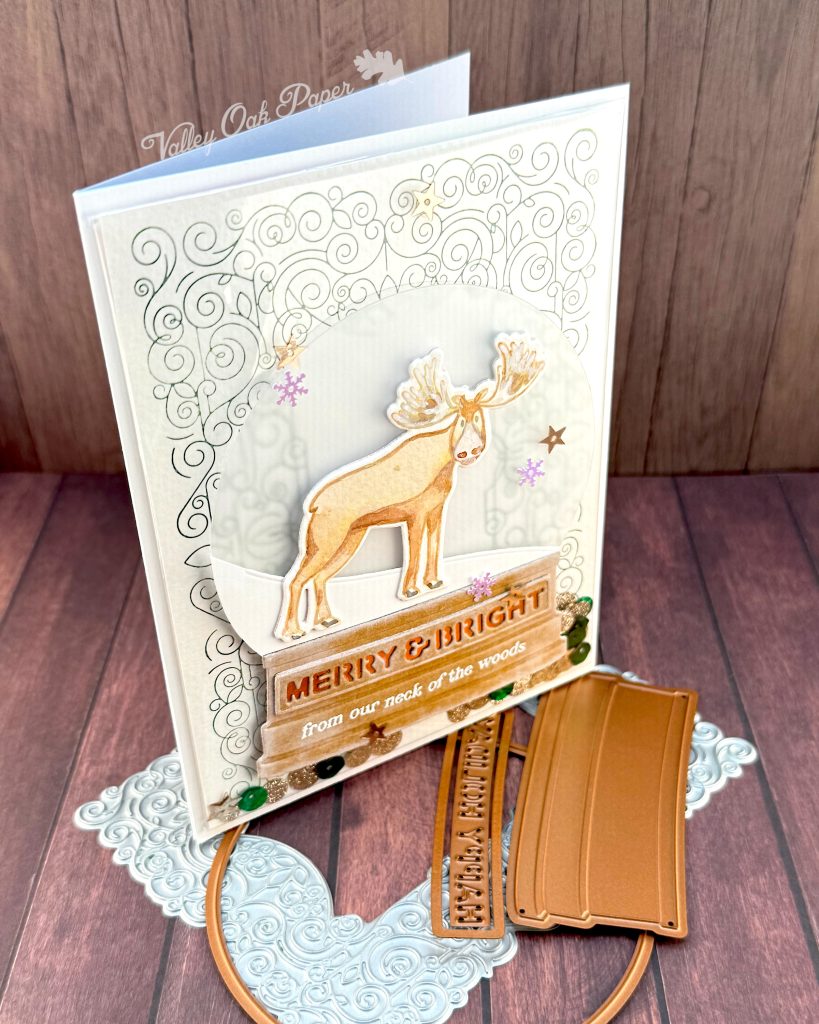
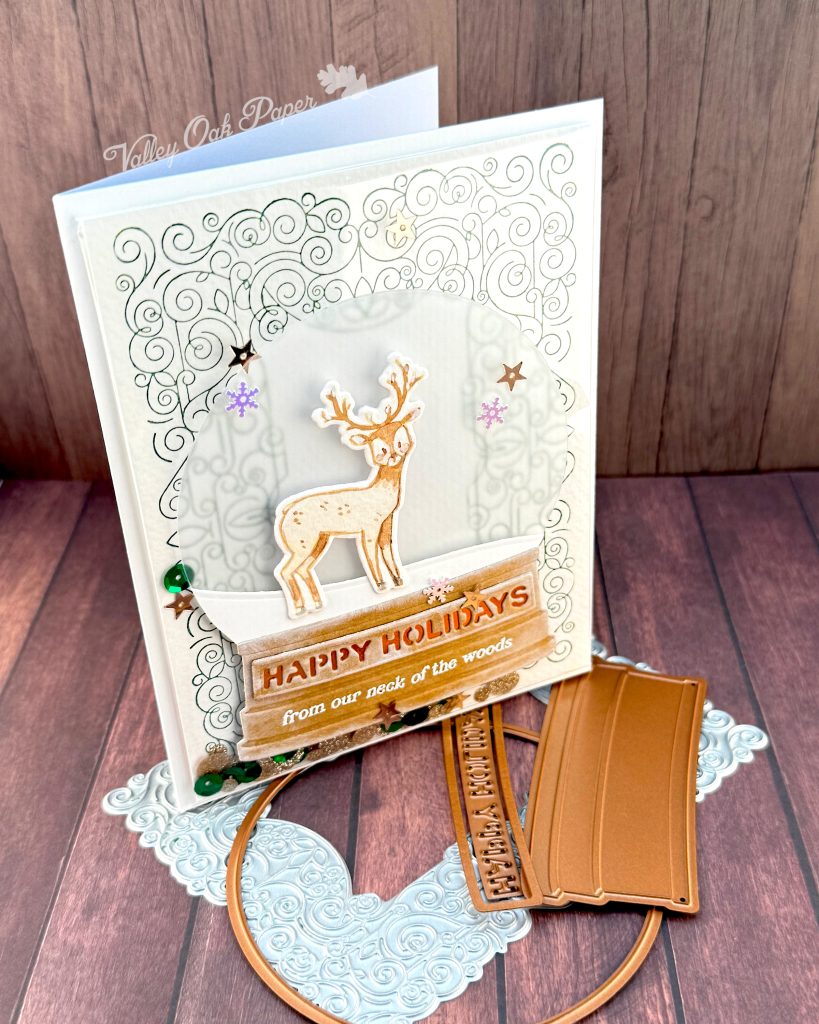
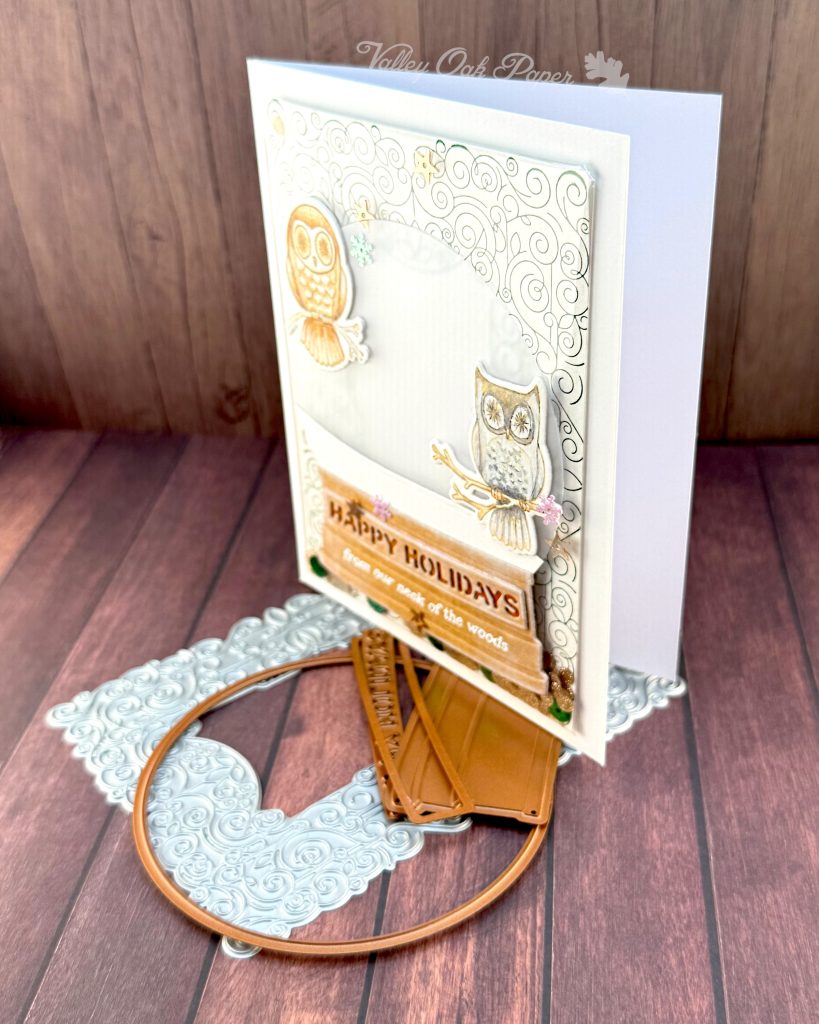
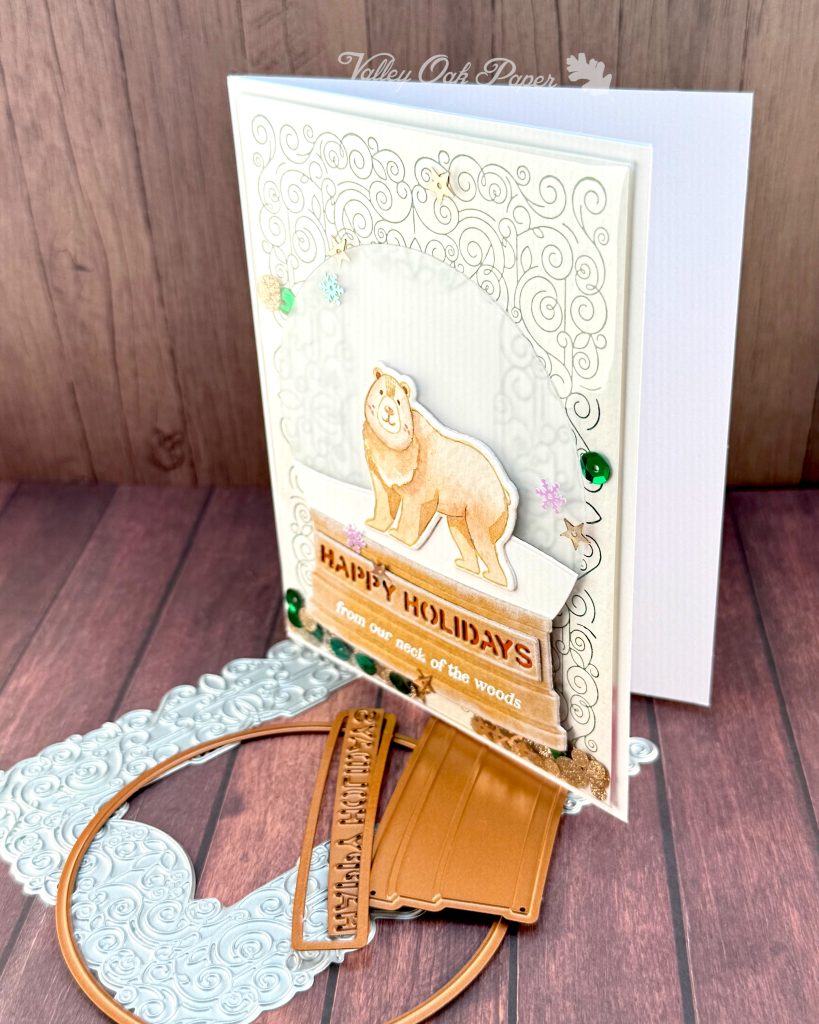
I betterpressed the A2 plate from Spellbinders Swirl Birthday Frame BetterPress Kit with Distress Oxide in Rustic Wilderness. I did thid four times on watercolor paper.
When the panels were dry, I cut them down to 4″ by 5 ¼”. Then I added skinny double-sided tape around the edges on the backsides. I used thin cellophane from stamp packaging to construct my shaker pockets. I added Trinity Stamps Champaign Sparkle Spots, as well as green sequins and rose gold stars to the shaker pockets before I sealed them up.
To help them sit flat on the card, I added a layer of Accent Opaque behind them with a mix of double sided tape and wet glue.
Snow Globe
For my snow globe I used Simon Hurley’s Snow Globe Die Set from Spellbinders. I cut the base and main sentiment from Kraft cardstock, the backing for the sentiment from Recollections Rose Gold Foil Cardstock, and the snow from Hammermill Cardstock. The globe I cut from Spellbinder’s translucent packaging plastic. The snow globe die set was packaged with enough of it for all four of my cards.
To glue the snow onto the globe, I used score tape again. Then I cut off the excess with scissors, following the curve of the globe.
I “frosted” the Kraft cardstock by applying some white pigment ink with a Ranger Mini Ink Blending Tool. Then I glued the sentiment onto its backer and that onto the base of the snow globe.
Then I realized that I wanted a subsentiment below the main sentiment, so I stamped “from our neck of the woods” with white pigment ink on the base. I had to adjust the straight stamp a little to make it fit better on the curved base. I added white Ranger Super Fine Detail Embossing Powder and melted it with my heat gun.
Then I glued the base onto the snow and placed my animals. I again used score tape to adhere them to the slippery plastic globe.
Assembly
With all the parts prepared, I was ready to assembly-line my four cards. I started by gluing the shaker panels to my card bases. Then I used score tape to adhere the snow globes to the shaker panels in the center bottom. I only placed tape behind the parts of the globe that were covered with cardstock.
Finally I glued some iridescent snowflakes and more rose gold star sequins to the front of the card.