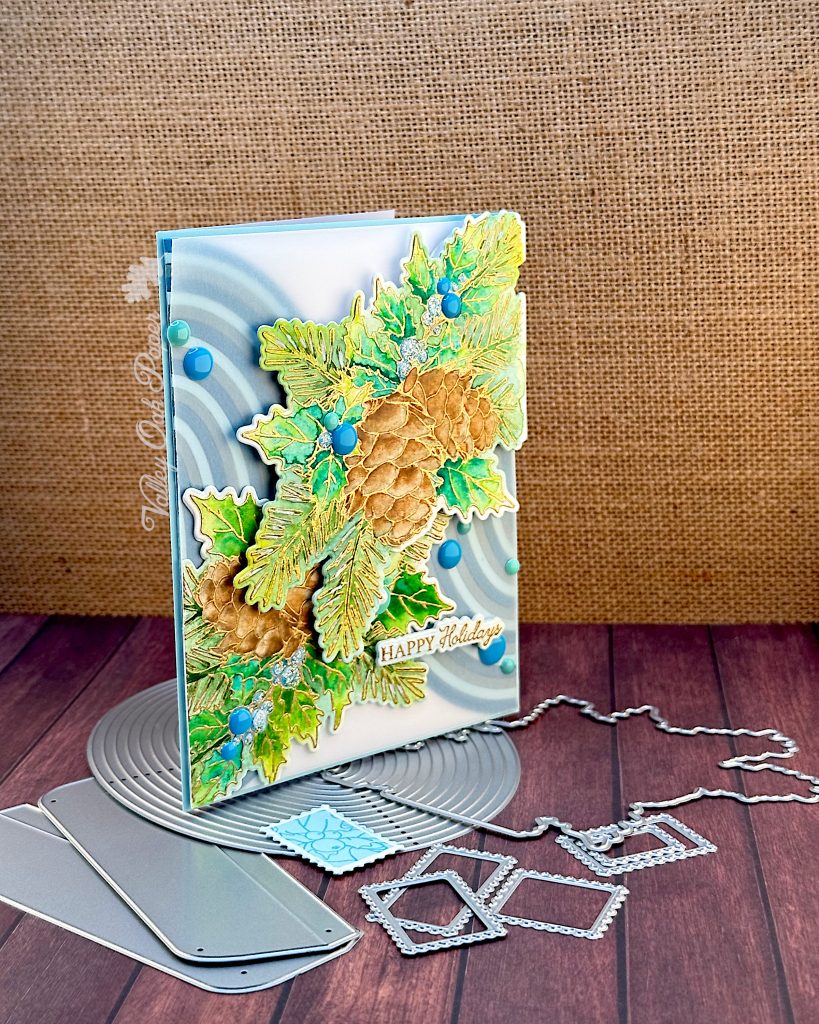
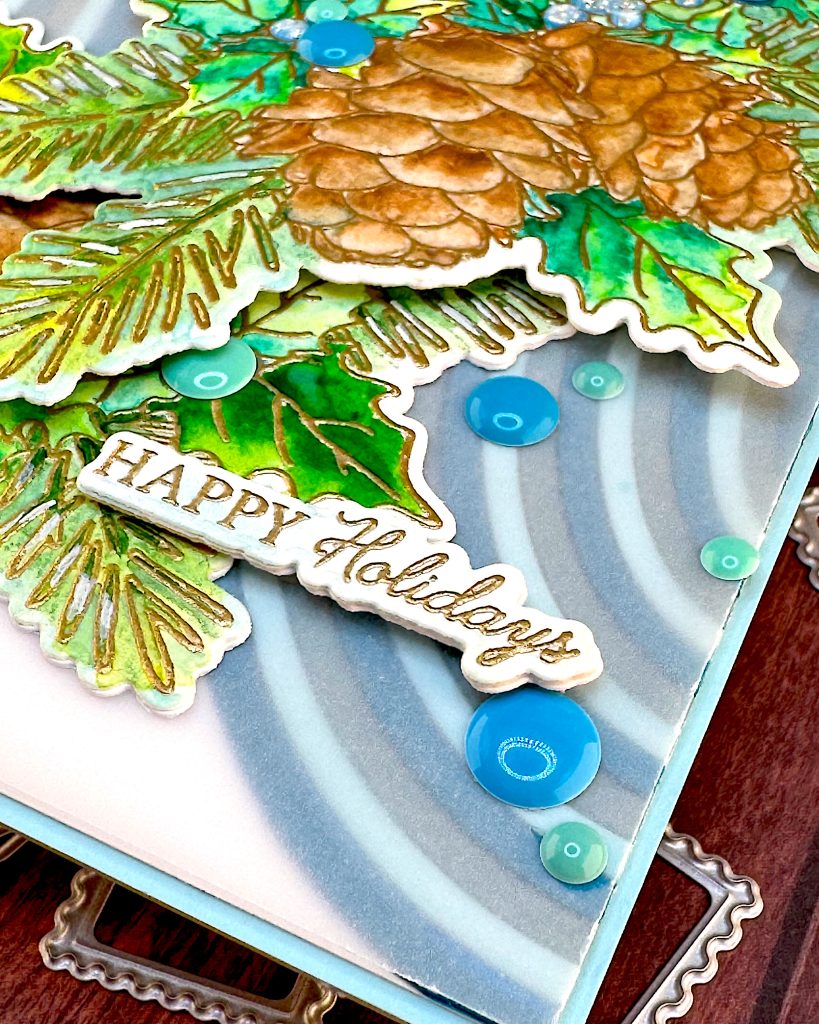
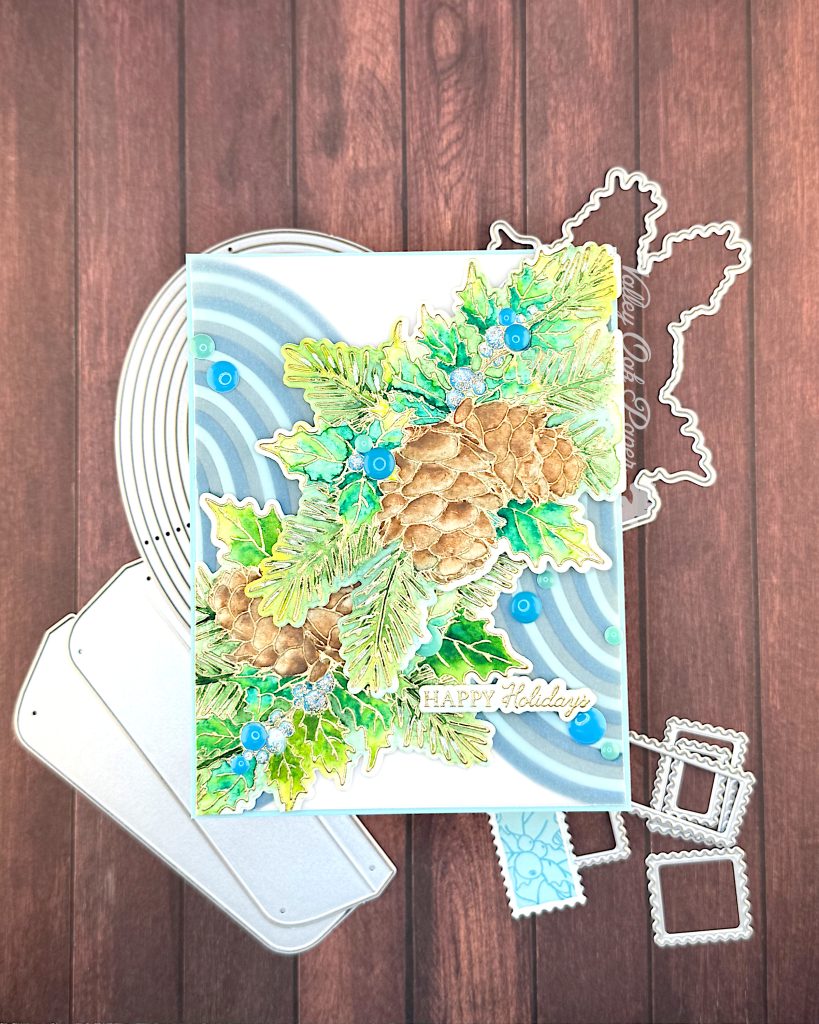
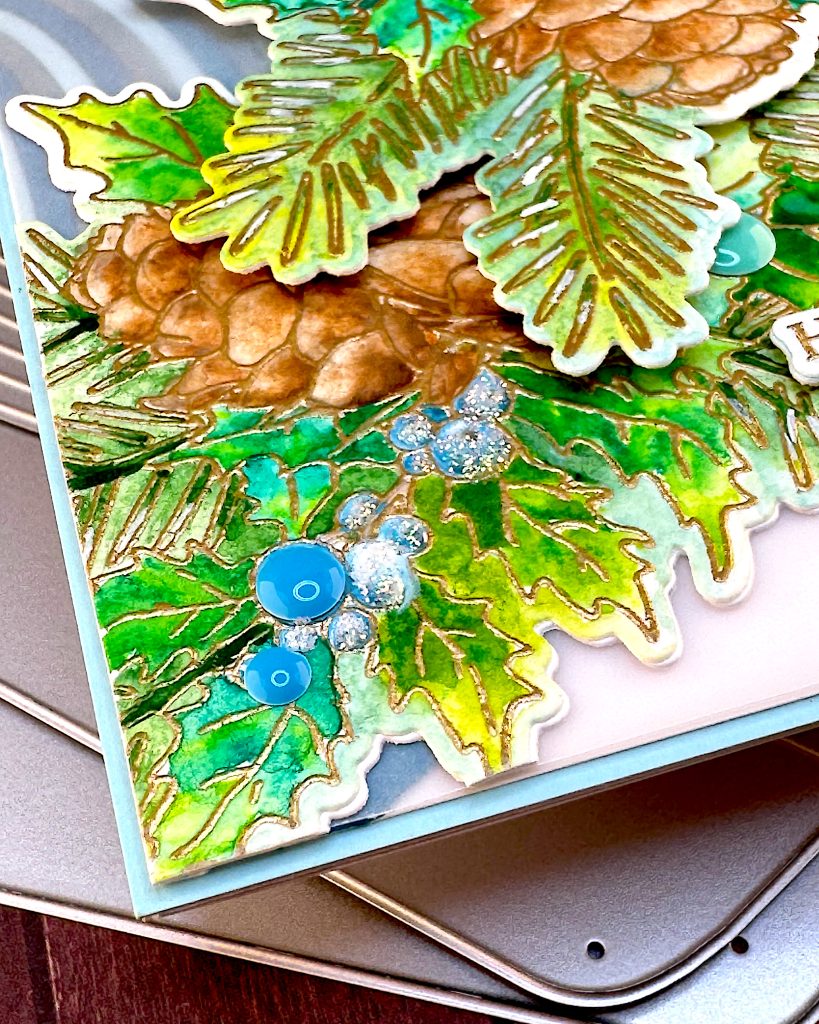
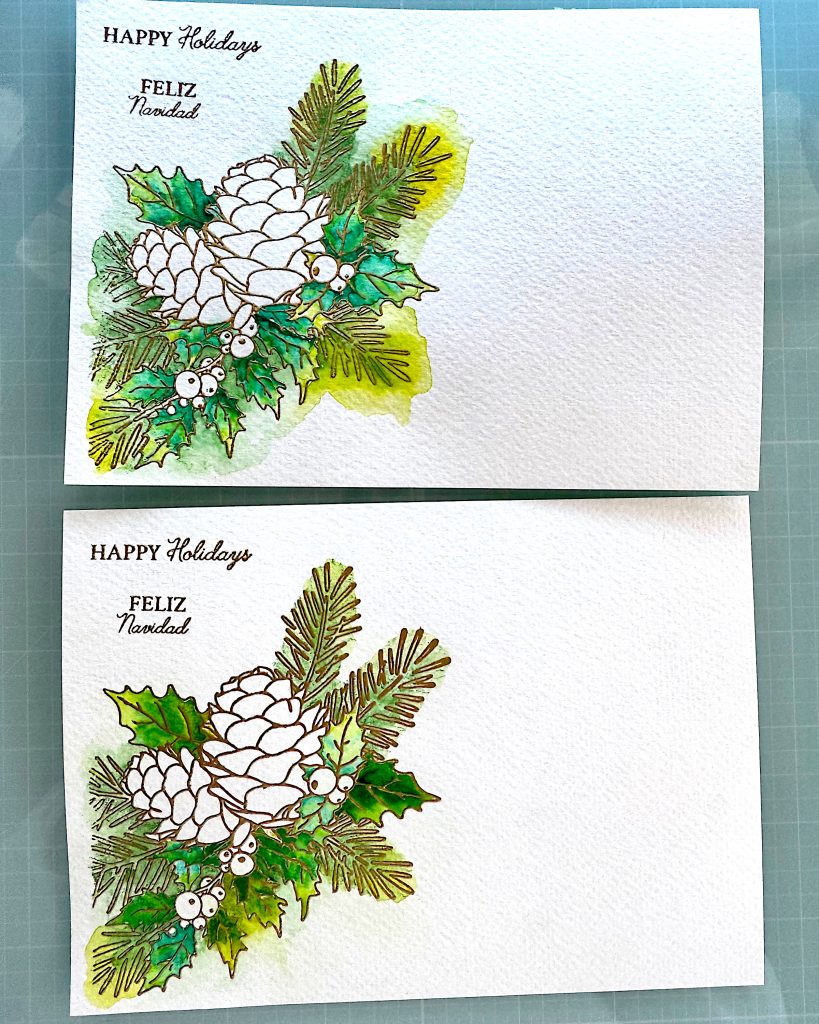
I started by stamping the botanicals and sentiment from the Honey Bee Good Tidings Stamp Set twice and heat embossing them with Ranger Super Fine Detail in Gold. Then I colored the images with my Distress Watercolor Pencils. For the conifer needles I used Twisted Citron and Rustic Wilderness. For the holly leaves I used Twisted Citron and Evergreen Bough. The pine cones I colored with Vintage Photo and Hickory Smoke. Finally I colored the berries with Broken China and Tumbled Glass. Although I covered them up later, so you can’t tell. Then I cut out the images and sentiment with the coordinating die set.
Background
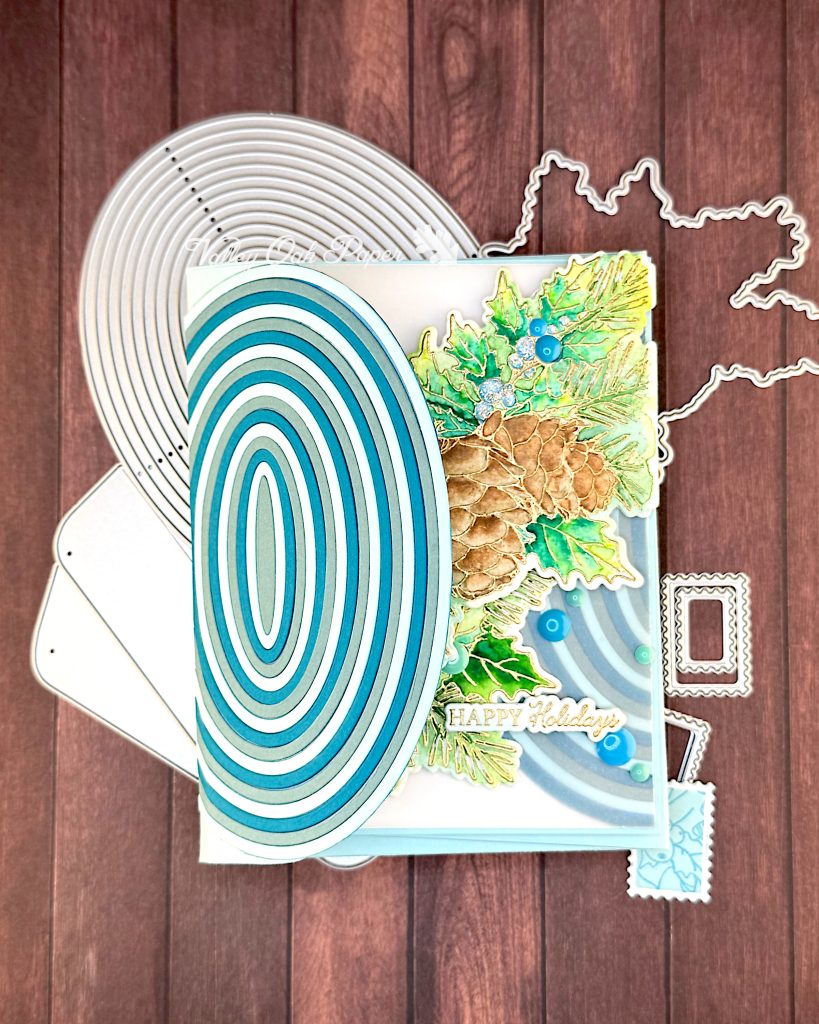
For my background I cut the Honey Bee Thin Oval Frames three times from different blue-green cardstocks. I also cut three piece of copy paper into A2-sized pieces and covered them with double-sided adhesive. Then I started paper piecing the die cuts starting from the center piece and alternating colors. When I was done, there were a few white gaps visible. So I colored the backside of the copy paper with an Ohuhu Alcohol Marker in PB8 Cerulean Blue. I cut out my ovals with scissors.
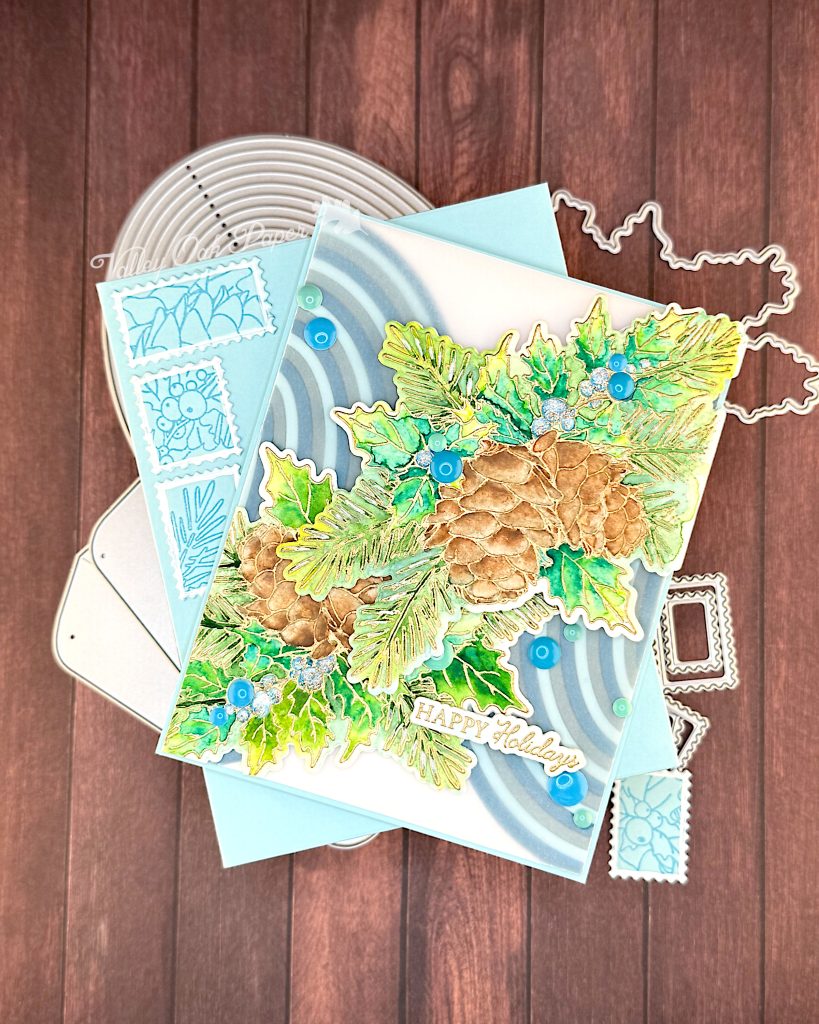
Then I cut one oval in half lengthwise using my Tim Holtz trimmer. I glued the left half to the right side of an A2-sized piece of Hammermill Cardstock and vice versa. This looks really cool and modern, but holding up my botanical die cuts to the cardbase made me realize that the background was way too attention grabbing.
So I glued a layer of vellum onto my paper-pieced background, taking care to only place glue where it would be hidden by the die cuts. Holding the die cuts over the vellum looked much better!
Assembly
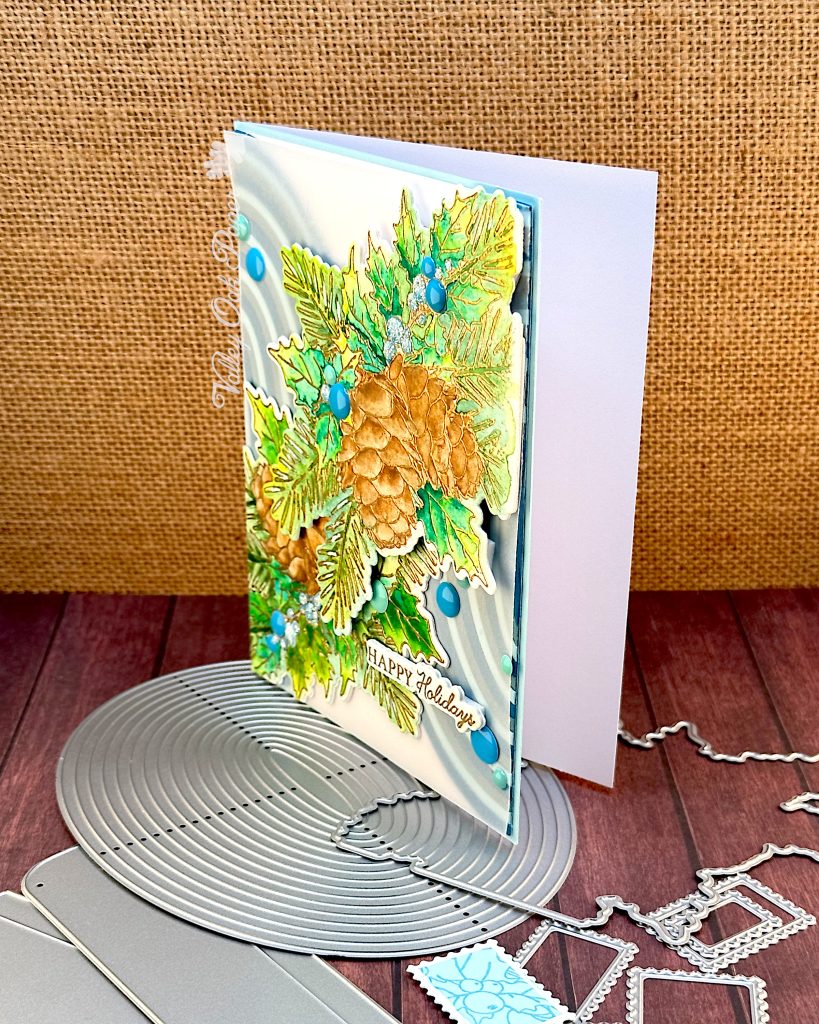
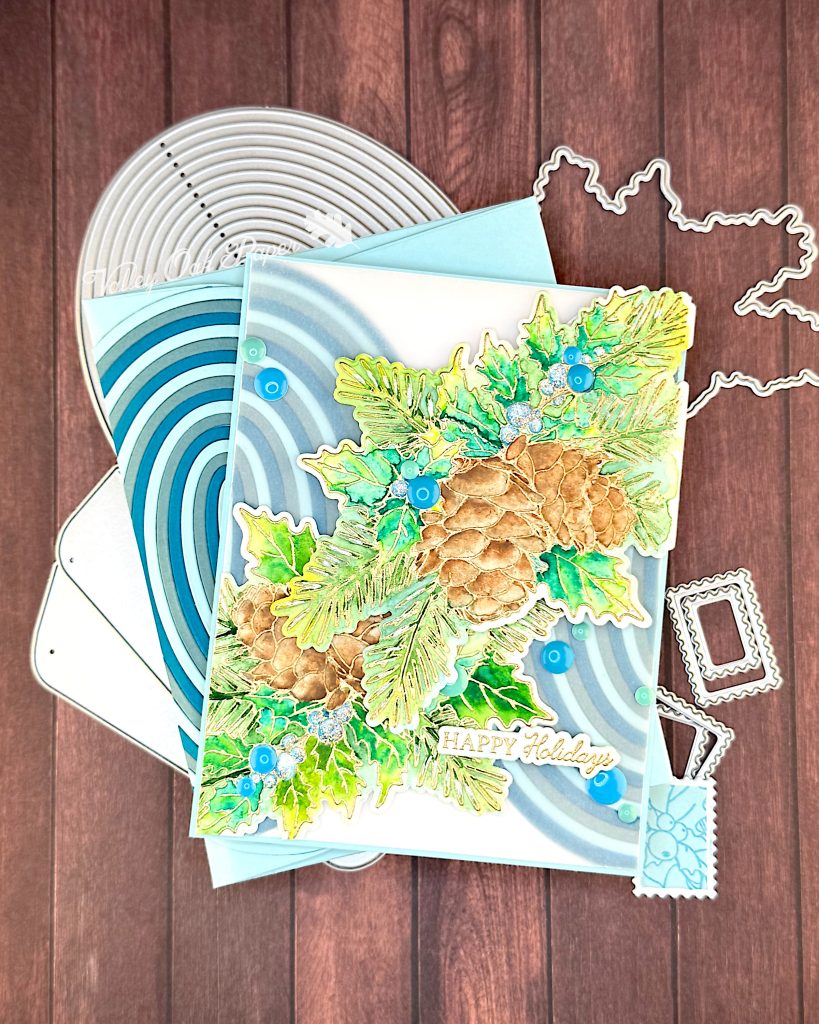
So I cut down my background panel by ¼” and glued one die cut in the lower left corner. Then I added foam tape to the back of the other die cut and placed it in the upper right corner. This creates a pleasing diagonal line across the card.
Next I glued a piece of pale turquoise cardstock to a white cardbase. Then I glued the card front onto the turquoise cardstock.
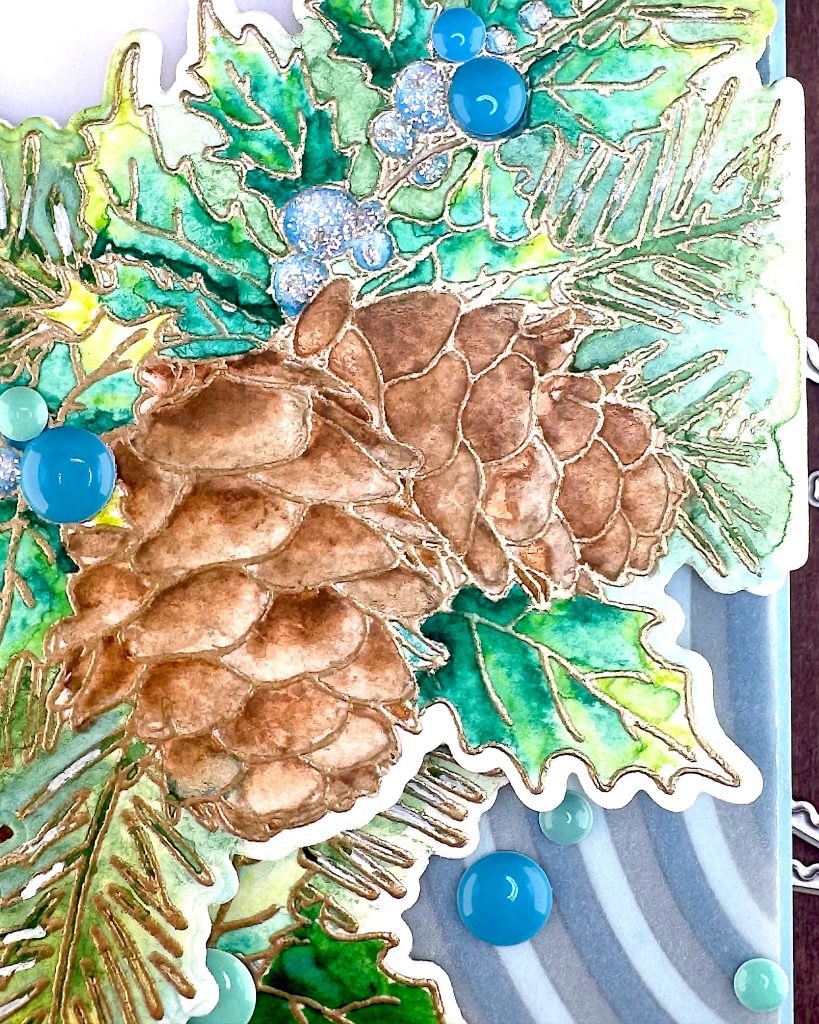
To embellish the card, I added blue and green Pinkfresh Studio Enamel Dots. I also covered the remaining berries with Stickles Glitter Glue in the color Icicle. Then I put aside the card to allow it to dry and turned to the envelope.
Envelope
For my envelope I used the Trinity Stamps A2 Envelope Builder Die Set. I like it because I can place a letter-sized piece of cardstock on my extended Anna Griffin Empress plates, plonk the three main envelope dies down and then I have all the bits for my envelope in a few seconds. Super easy!
For the body of the envelope I used the same pale turquoise Recollections cardstock I used for the matte on the card. This 110 lbs cardstock is a little bit too stiff for envelopes, in my opinion. Regular scrapbook paper is perfect, though! I scored and folded and glued until I had my envelope. I actually created a couple of different versions.
On one version I glued a second paper-pieced oval to the envelope flap and cut it off at the top. That’s the envelope in the photos.
On another I stamped the botanical motif on the flap. But I wasn’t happy with how I placed the stamp. So I used some of the postage stamp dies included in the Envelope Builder to cut out parts. To make them look more like postage stamps, I brushed some white acrylic paint onto the edges. Then I glued them to the front of the envelope with the paper-pieced-oval flap.