
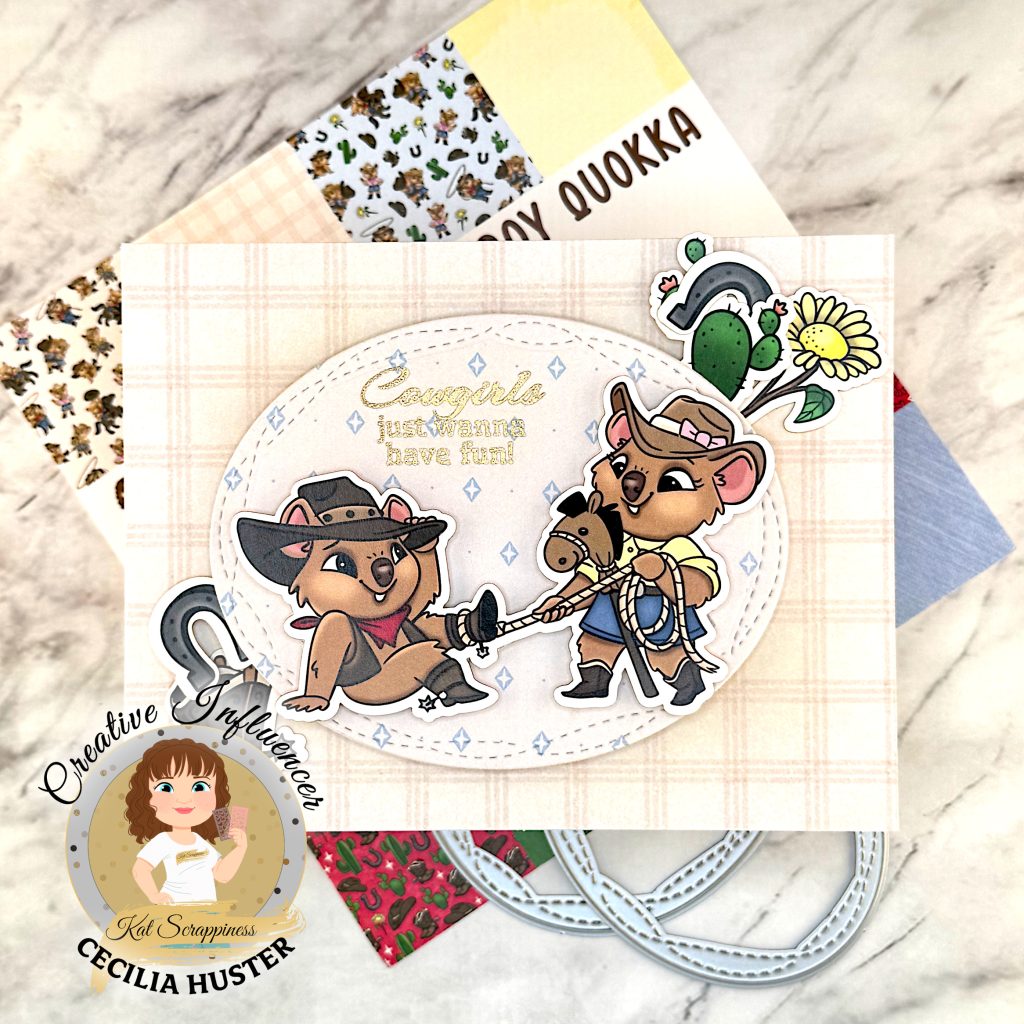
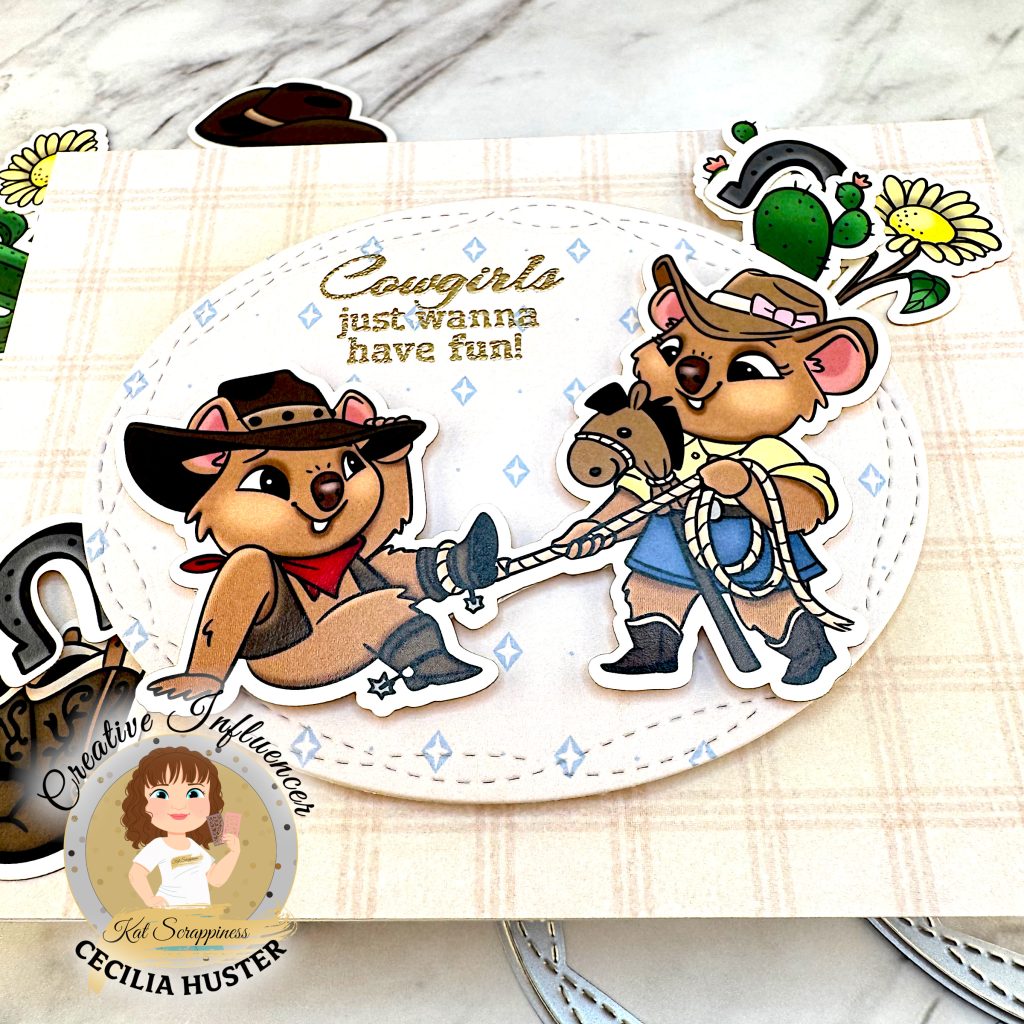
Using ephemera for cards is quick and easy! I started by tracing around my two quokkas and cutting out some heavy, white cardstock, so I could stack it under the die cut piece. Then I added foam tape behind it.
Sentiment
I selected one of the sentiments from the Cowboy Quokka Sentiment Stamp Set. Then I cut out an oval from a calm pattern in the Cowboy Quokka Paper Pad and another from heavy, white cardstock. I stacked them.
I placed the oval sideways in my Misti and placed the quokka couple on top, so I could figure out the placement of my sentiment. Then I stamped and heat-embossed it in gold.
Assembly
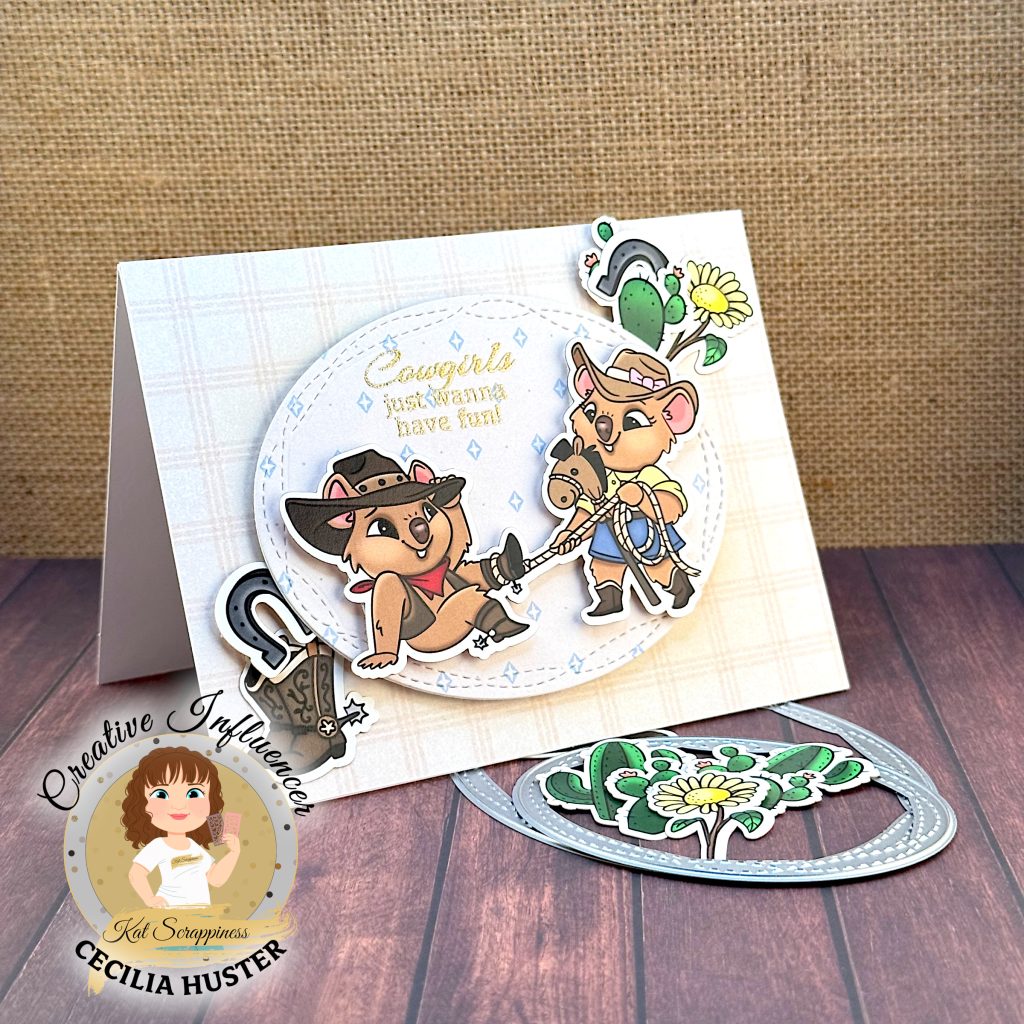
I glued the plaid pattern paper to my card base. Then I popped up the oval on foam tape in the center. Next I added the quokkas on top of the oval. I finished up by adding some smaller ephemera pieces in the bottom left and top right corner, to create a triangle.
Kat Scrappiness Supplies Used
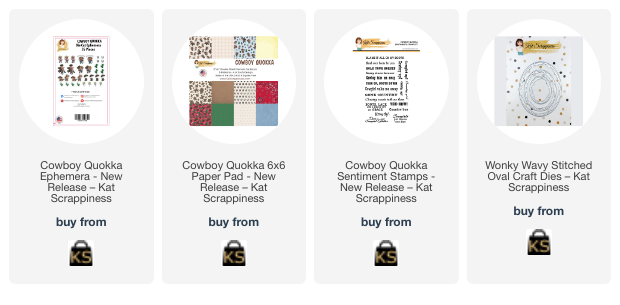
- Cowboy Quokka 6×6 Paper Pad
- Cowboy Quokka Sentiment Stamps
- Cowboy Quokka Ephemera
- Wonky Wavy Stitched Oval Craft Dies
Comments
One response to “Cowboy Quokkas”
[…] with the Kat Scrappiness Cowboy Quokka Ephemera Pack and 6 by 6″ Paper Pad. Just as in the first card, I started by tracing around my two quokkas. Then I cut out the silhouette from heavy, white […]