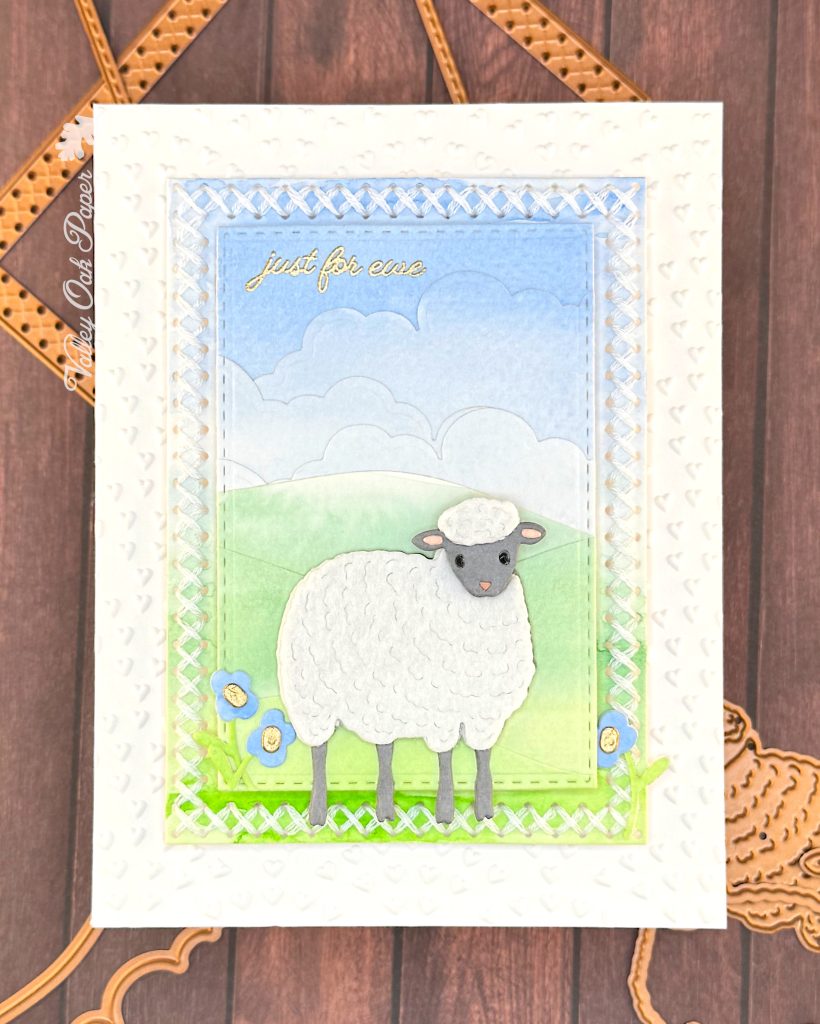
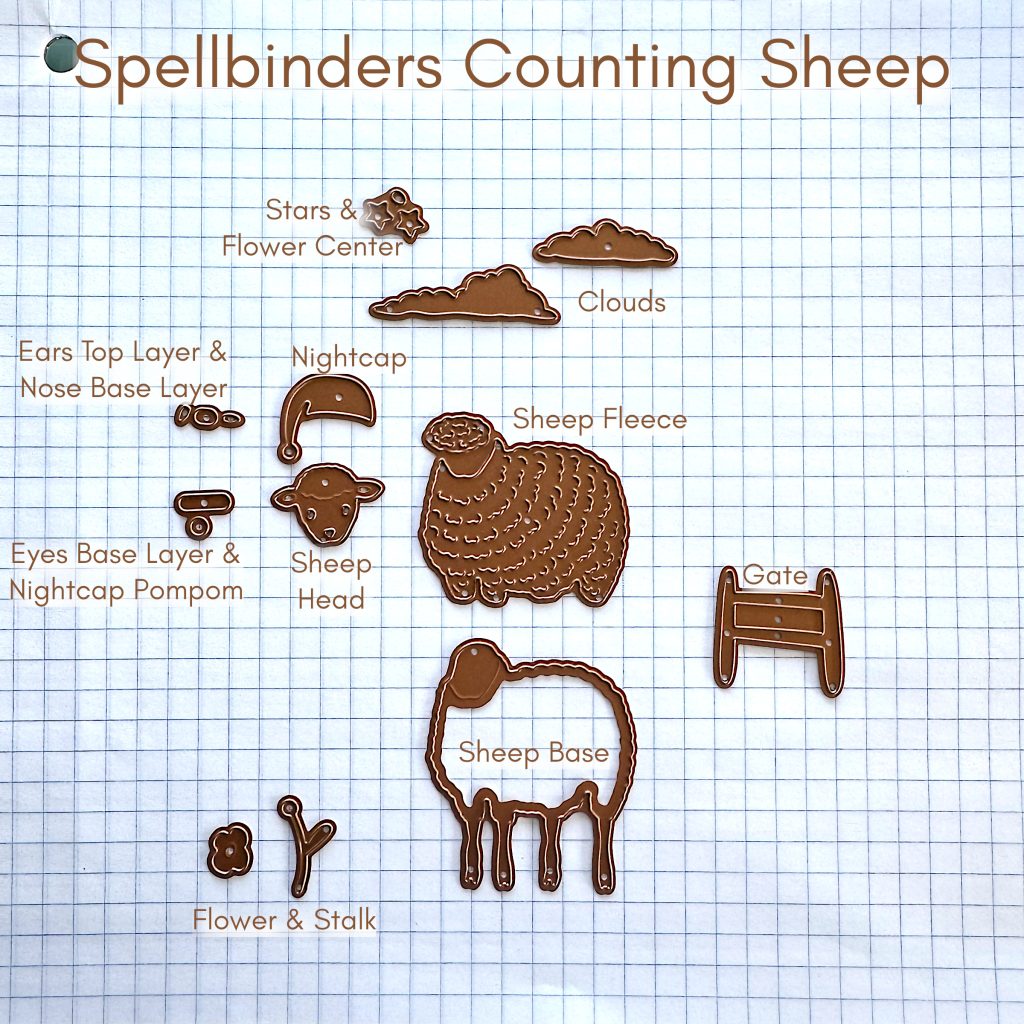
When I first saw the Spellbinders Counting Sheep Stamp & Die Set, I knew I wanted to make the sheep out of felt. It pretty much suggests itself, doesn’t it?
The Sheep
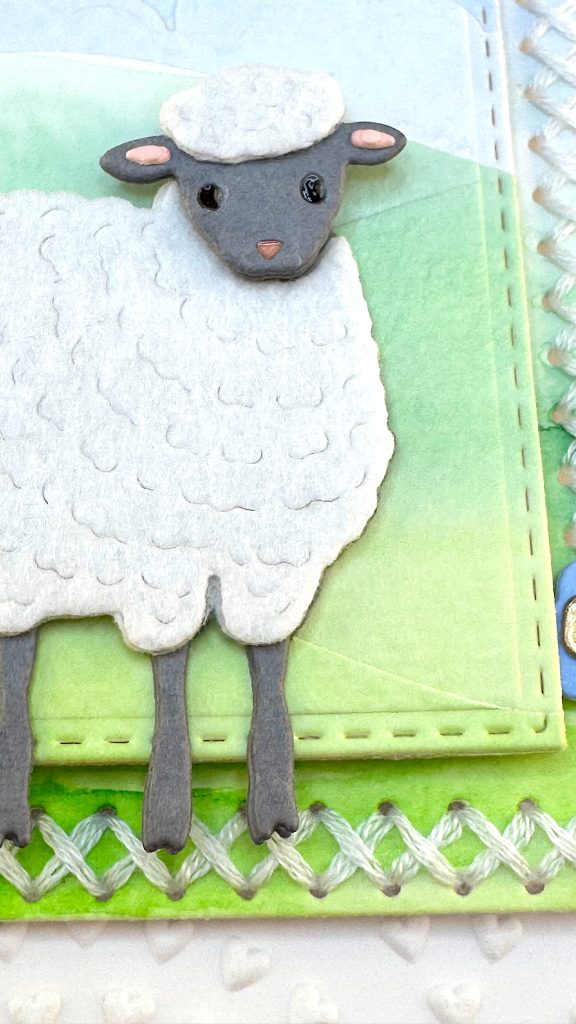
I started by die cutting the sheep parts according to the cut list below. I applied double-sided adhesive to the back of my felt and doubled it up for a more substantial feel.
When I put together the head, I started by adding the base layers for the eyes and nose to the backside of the head die cut. Then I glued the second head die cut to the back of those. Next I glued the pink ear layering pieces and the felt on top of the sheep’s head. Finally I used a foam square to adhere the finished head to the body.


Backgrounds
I started by watercoloring a landscape in greens and blues on two pieces of watercolor paper.
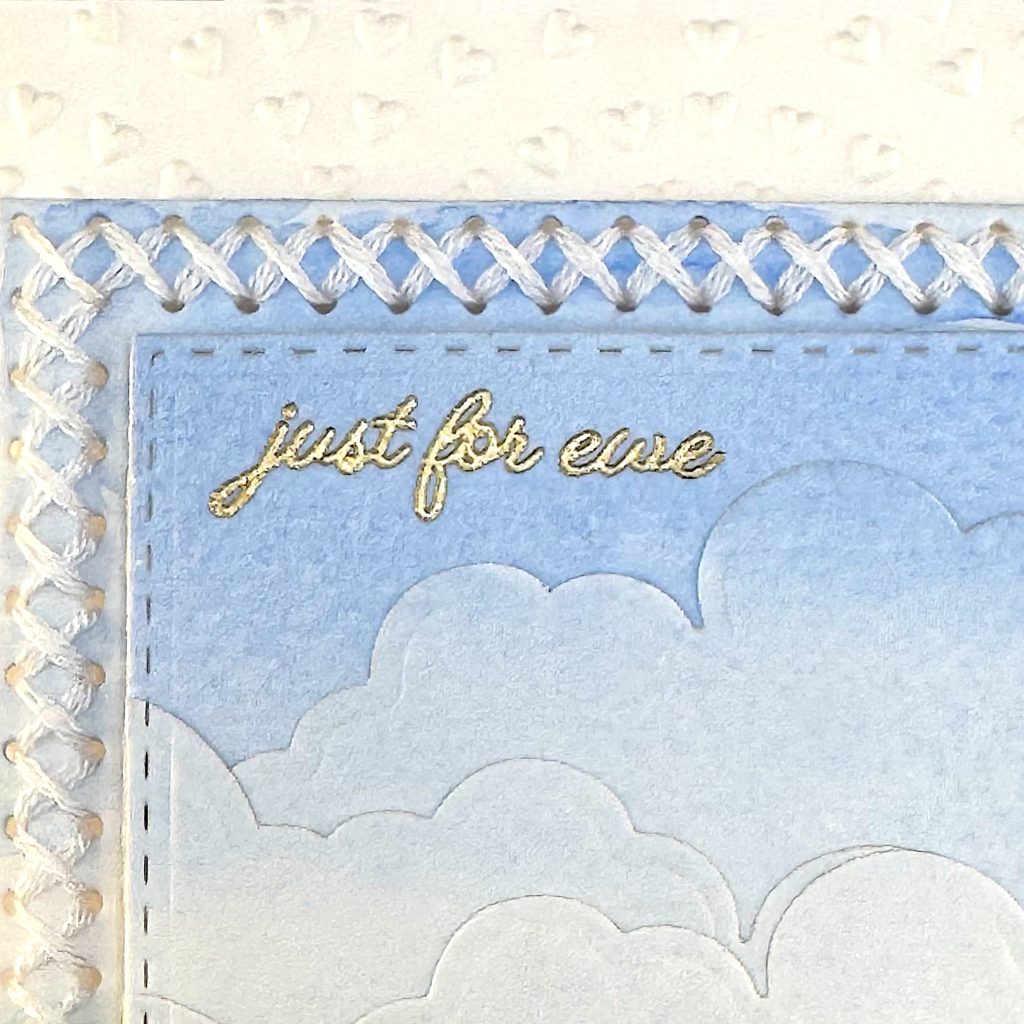
Front Panel
Then I cut one of them apart with the Spellbinders Landscape Edges Die Set. I cut 4 parts with the cloud die, two with the tall hills and the remainder with the gentle hills dies. There’s also a grass edge die in the set, but I didn’t use it today.
Then I overlapped the die cuts on a piece of printer paper, starting from the top. When the glue had dried, I die cut the panel with the fourth largest die from the Spellbinders Cross Stitched Nested Card Front Die Set. I doubled it up with Accent Opaque. Finally I used one of the stamps included in Counting Sheep to stamp and heat emboss the sentiment in gold at the top left.
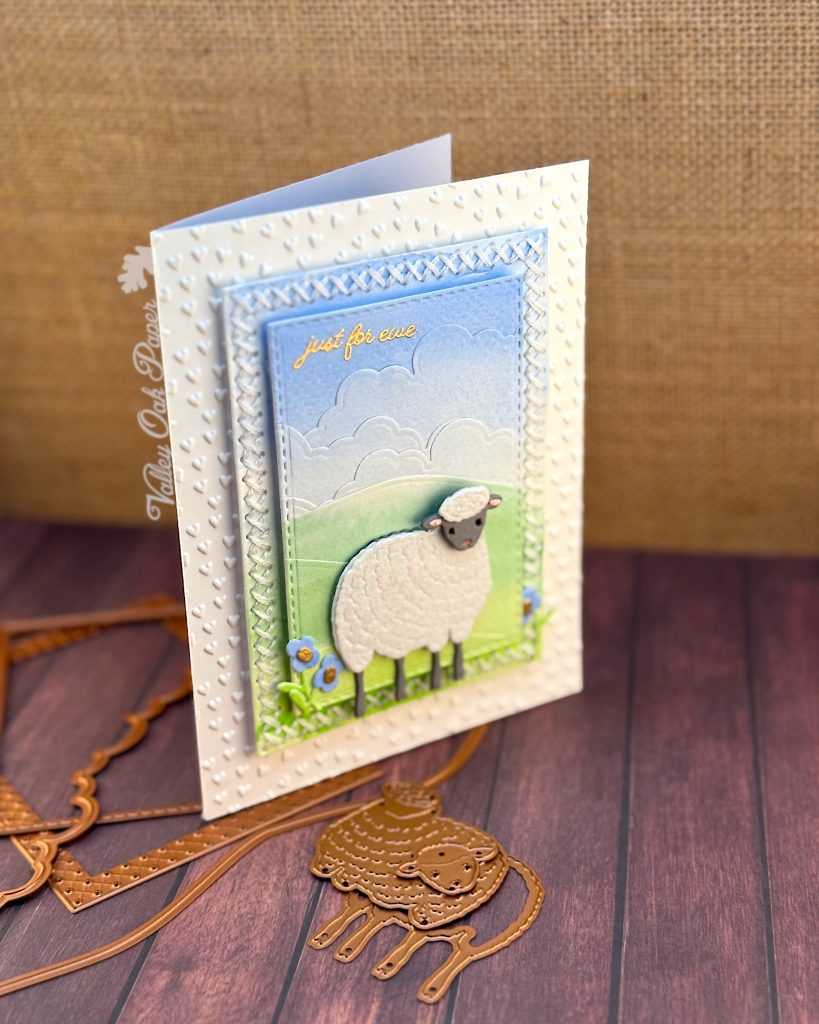
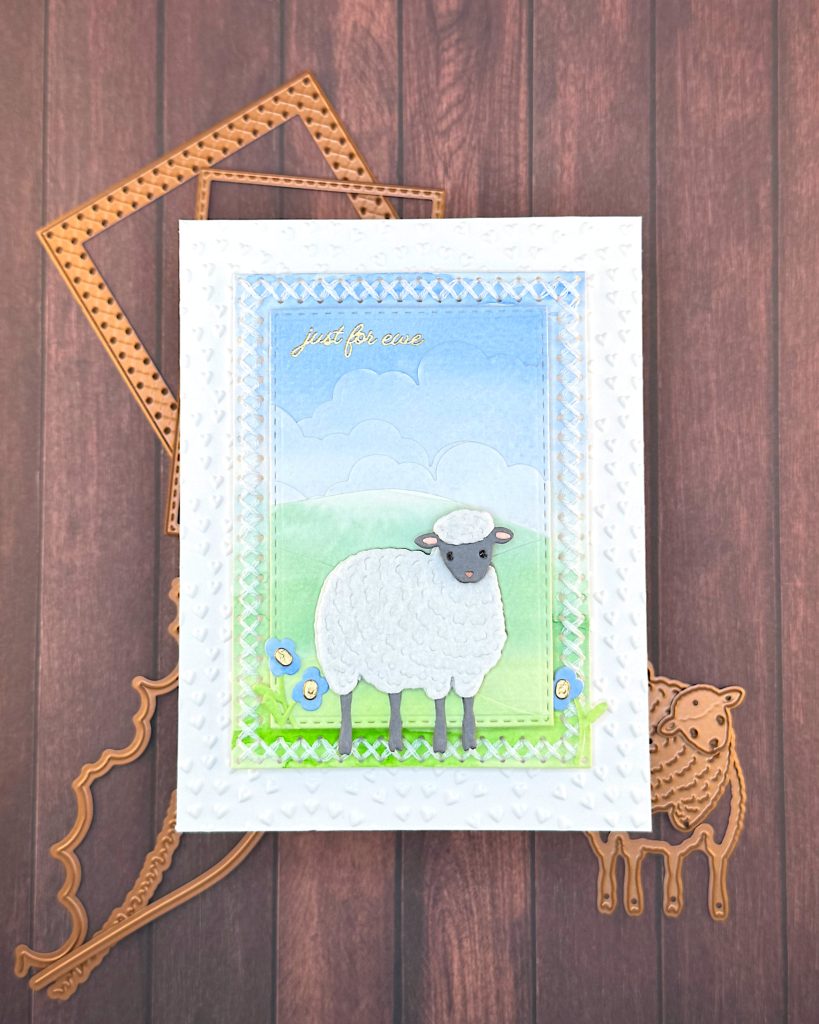
Middle Panel
The other watercolored landscape I cut out with the third largest die from the Spellbinders Cross Stitched Nested Card Front Die Set. I doubled it up with Accent Opaque and stitched it with four strands of white embroidery floss. I wanted it to be white and fluffy, like a sheep.
Back Panel
I dry embossed a piece of Hammermill Cardstock with the Spellbinders Tiny Heart Scallop 3D Embossing Folder. Then I glued it to my card base and cut off the excess.
Assembly
I put foam tape on the back of the middle panel and centered it on the back panel. Then I repeated the same procedure with the front panel. I glued the sheep to the front panel with the hoofs sticking out below.
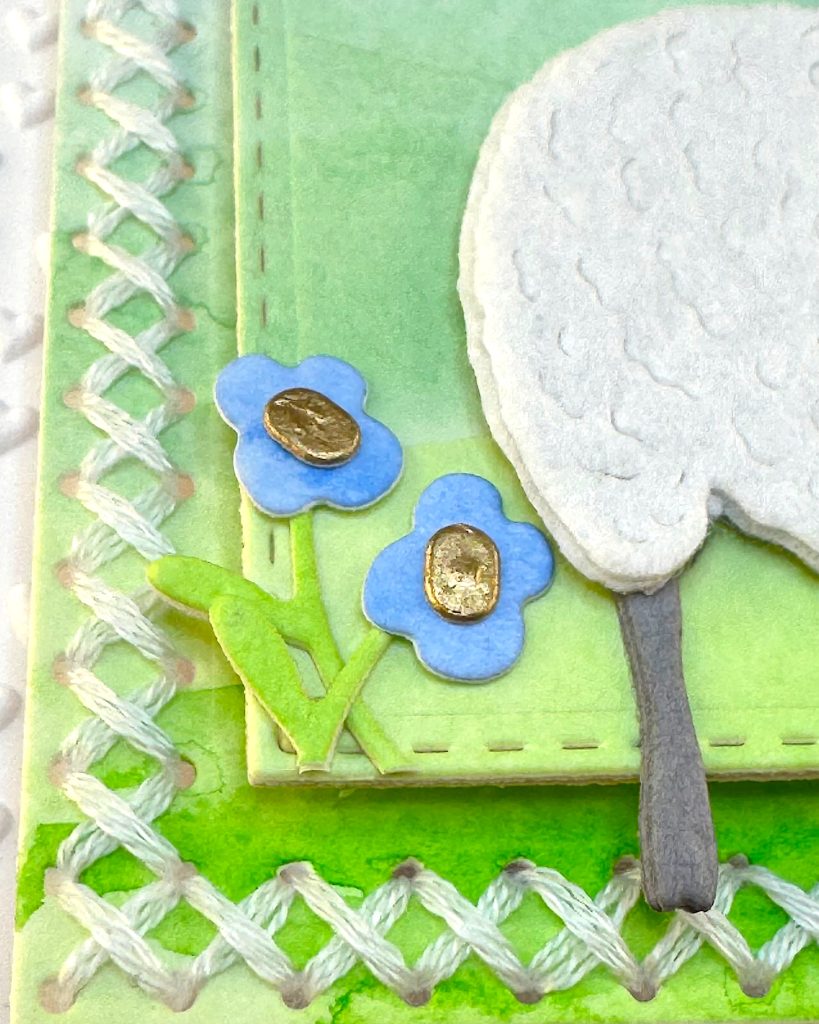
Finally I added three little blue flowers to the front and middle panel as embellishments. Video link https://youtube.com/shorts/xB9ohllETFs?feature=share