I created these three cards as sample cards for an Instagram giveaway focusing on cardmaking supplies for 5-by-7 cards. The giveaway ends on Sunday March 9, 2025 at midnight Pacific.
Viola Card
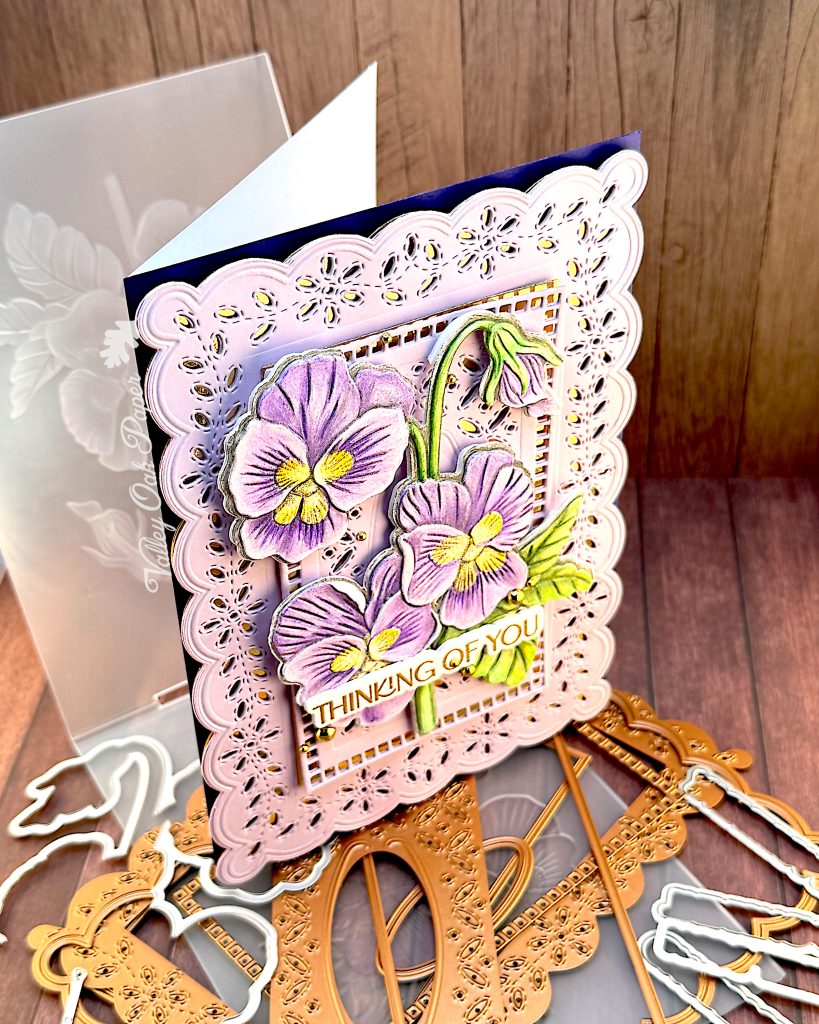

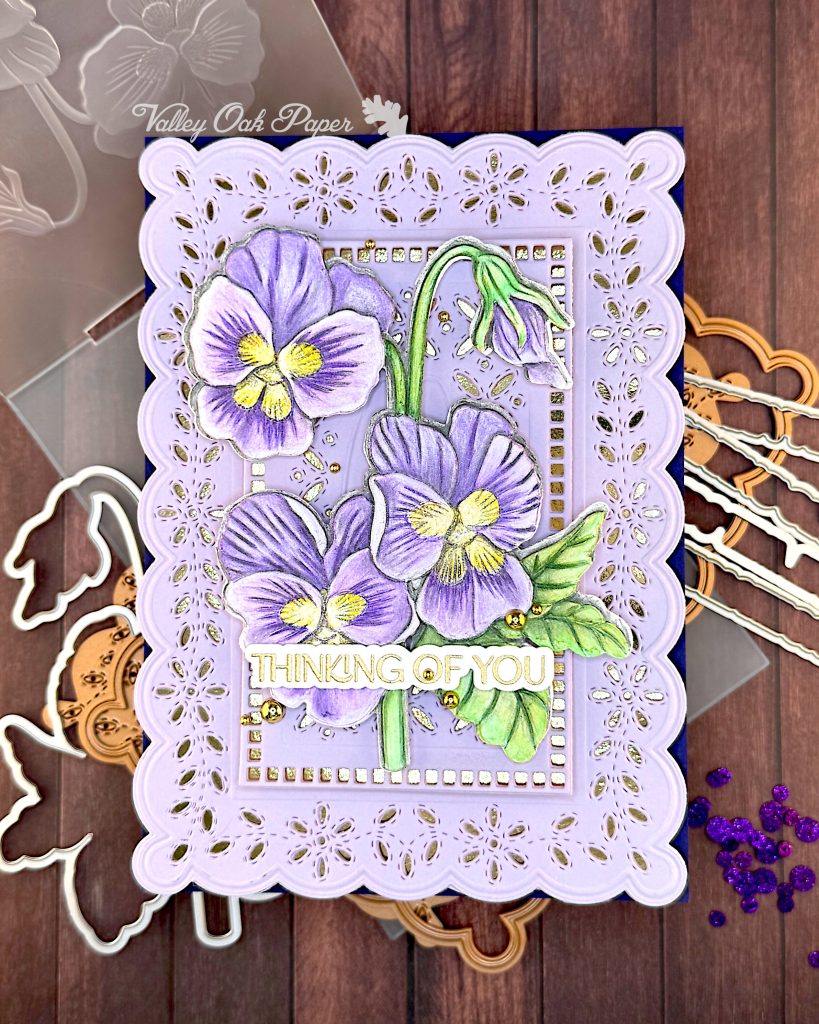
Focal Point
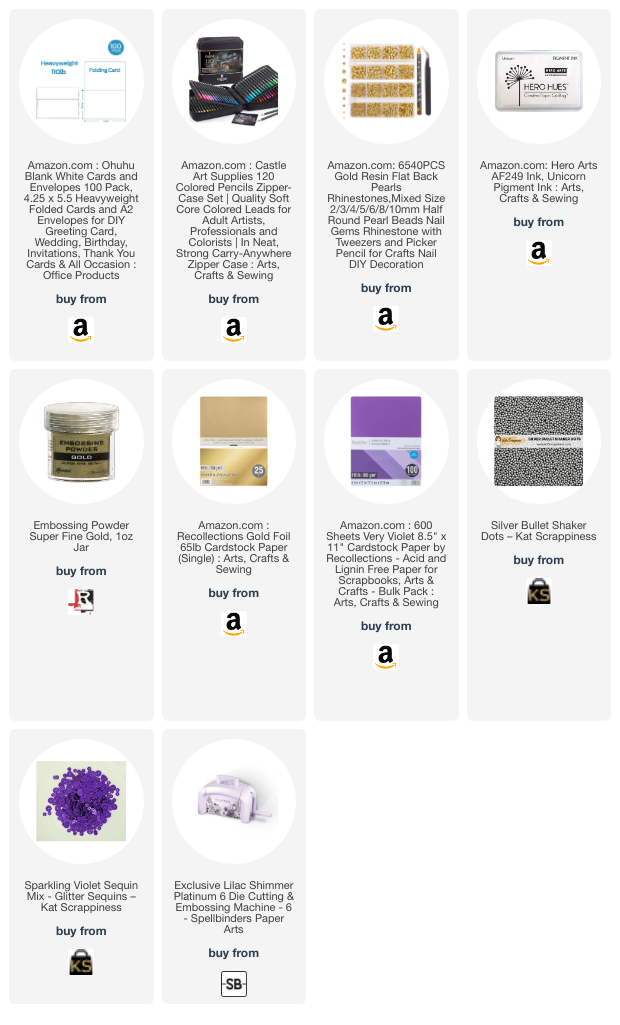
For the focal point of this 5-by-7 card, I used Lisa Horton’s Viola 3D Embossing Folder and Die. I cut out the viola shape with the coordinating die. Then I embossed it and colored it with my Castle Arts Premium Soft Touch Colored Pencils. Then I embossed the viola again to add back what detail I had flattened while coloring. I also added foam tape to the back of my viola before I moved on to the background.
Background
For the background I used pale purple cardstock and gold foil cardstock, both from Recollections. I cut out the largest die from the Spellbinders Amazing Paper Grace Eyelet Lace Frame Die Set by Becca Feeken out of gold foil cardstock. Then I cut it again, but added the eyelet detail die from purple cardstock. I glued the lavender cardstock on top of the gold cardstock.
Then I repeated the process with the next size down. If this die set looks familiar, that’s because I used it for a cupcake card last year.
Sentiment
The sentiment is heat embossed with Ranger Ink’s Super Fine Detail Embossing Powder in Gold. The stamp set is by Waffle Flower. It’s called Elegant Sentiments. I cut it out with the coordinating die set.
Assembly
I glued a dark purple cardstock to the front of my 5 by 7 notecard. Then I added the larger frame panel with foam tape on top. Next I glued the smaller panel in the center of the larger one.
The viola fit on top of the smaller frame. I placed the sentiment toward the bottom and scattered some gold pearls around it.
Porthole Shaker
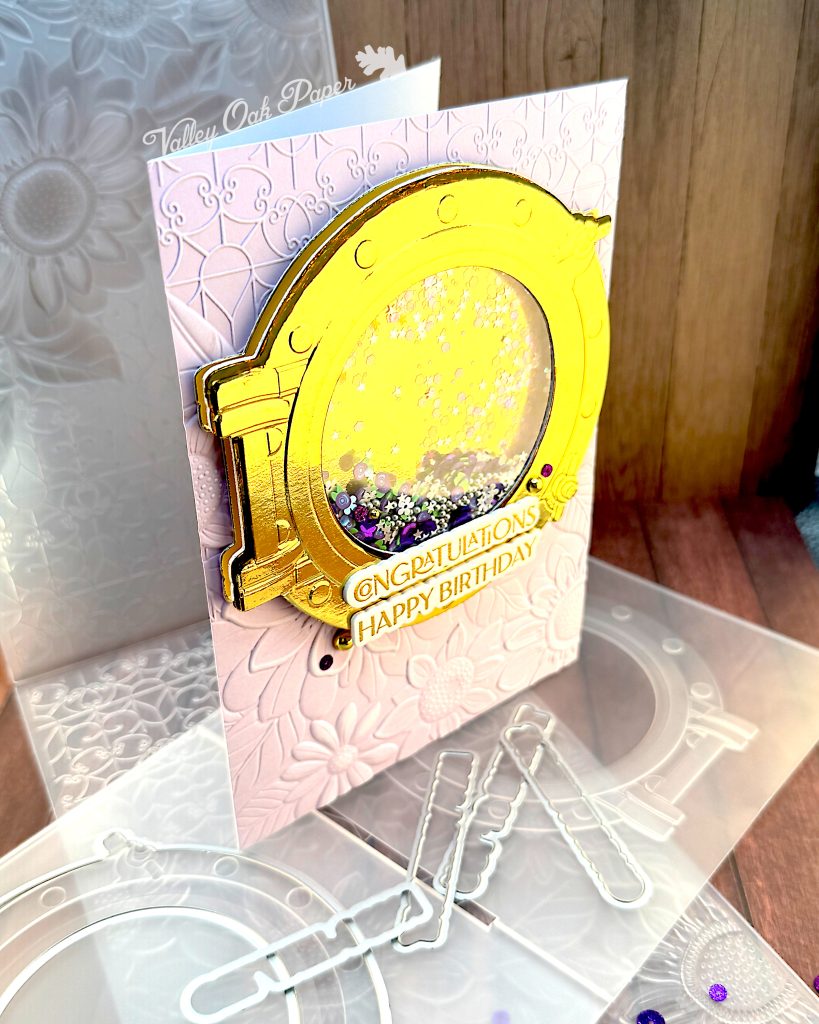
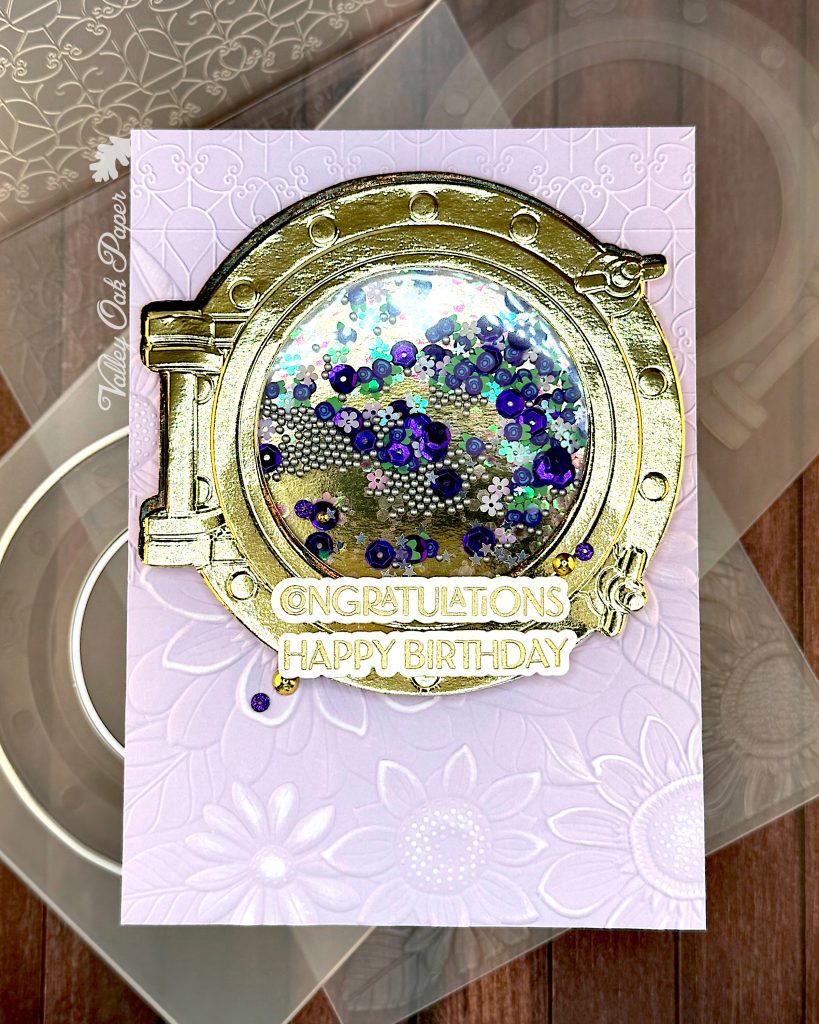
Shaker Element
I used the coordinating dies from the Lisa Horton Nautical Porthole 3D Embossing Folder and Die Set to cut out a circular frame from gold foil cardstock. Then I embossed the frame with the 3D embossing folder. I also cut some frames from Accent Opaque to help in constructing the shaker element.
Then I used only the outer die to cut a piece of acetate and another piece of gold foil cardstock.
I added an Accent Opaque frame behind the embossed gold frame for stability. Then I glued the acetate to the back of that and added another Accent Opaque frame behind it.
When the glue had dried, I added a double layer of foam tape behind the frame to form my shaker well. The nautical porthole frame is so substantial that I was able to use regular ½” foam tape, without need to cut it lengthwise.
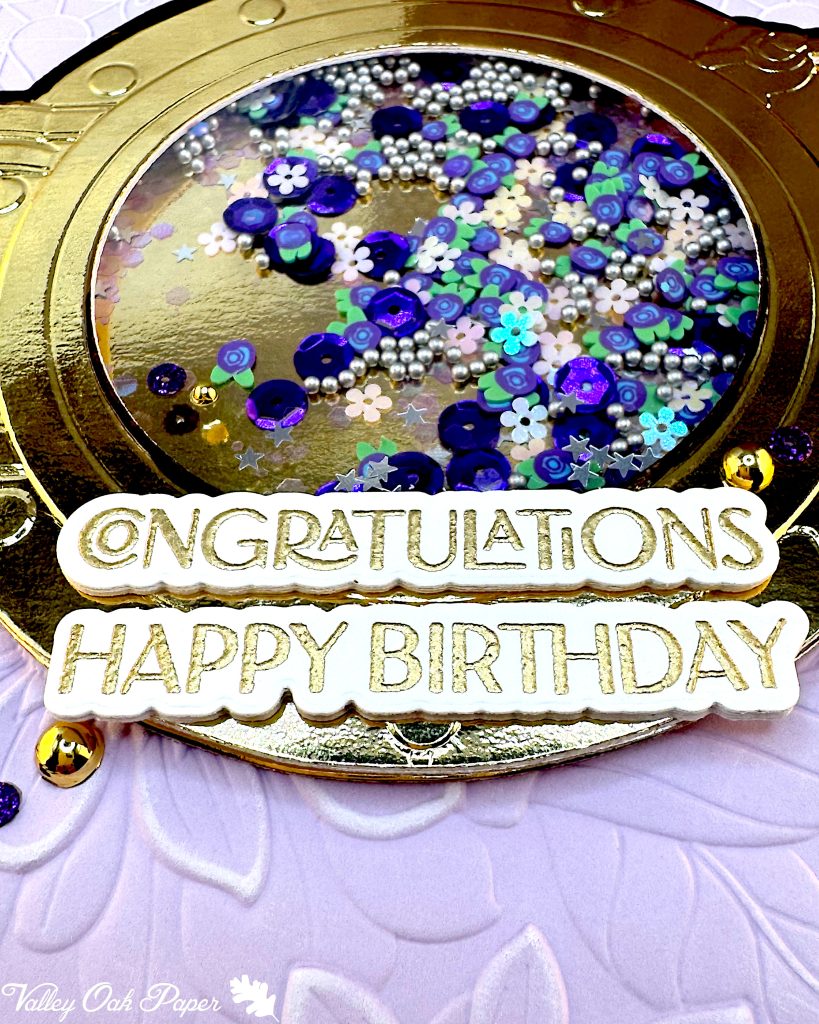
I added lots of shaker goodies to my large window, including Kat Scrappiness Silver Bullet Shaker Dots. They keep the shaker bits moving nicely! Then I added glue to the foam tape and placed the gold foil lid/bottom on top of the shaker well.
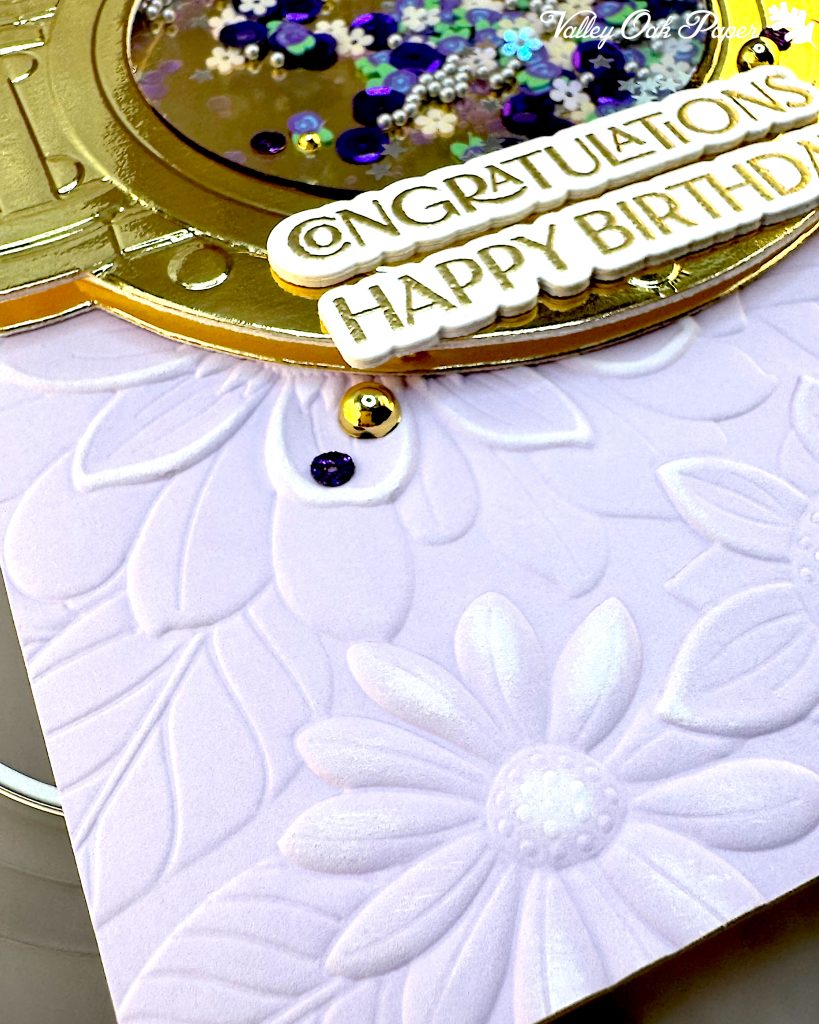
Background
For my background I used the 3D Embossing Folder that came with my Spellbinders Lilac Shimmer Platinum 6 Die Cutting Machine. I don’t actually know what it’s called. It’s rather similar to a folder designed by Susan Tierney-Cockburn that’s called Wildly Beautiful. In my post I called it Garden Fence, but I just made up that name. It’s labeled as E3D-104, but I can’t find any reference to it on Google.
Be that as it may, I used the folder for a piece of lavender cardstock. When I had embossed it, I dragged a white pigment ink pad across the raised areas to highlight them.
Sentiments
These sentiments are also from the Waffle Flower Elegant Sentiments Stamp & Die Set. I again heat embossed them in gold and cut them out with the coordinating dies.
Assembly
Once the pigment ink was dry, I glued the embossed panel directly to the front of my 5-by-7 notecard. Then I glued the porthole shaker element to the top center. It takes up almost the entire width of the card front!
I glued the two sentiments to the bottom of the shaker element and finished up with some gold pearls and purple glitter sequins.
Frame Shaker
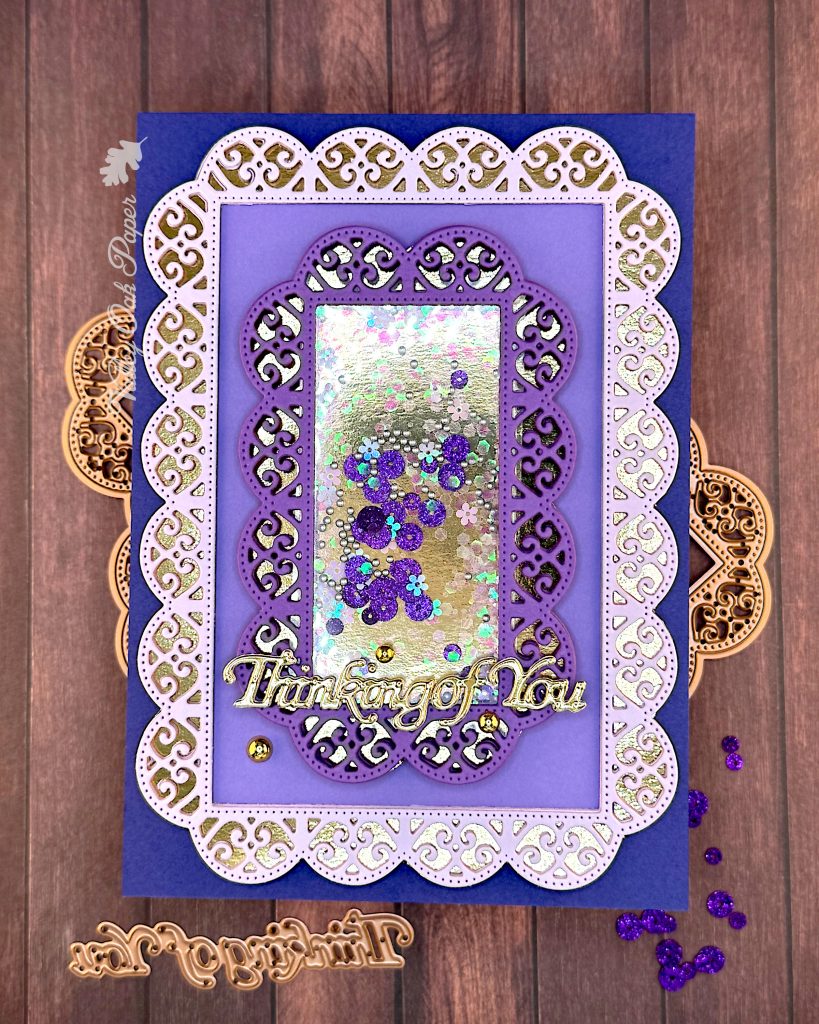
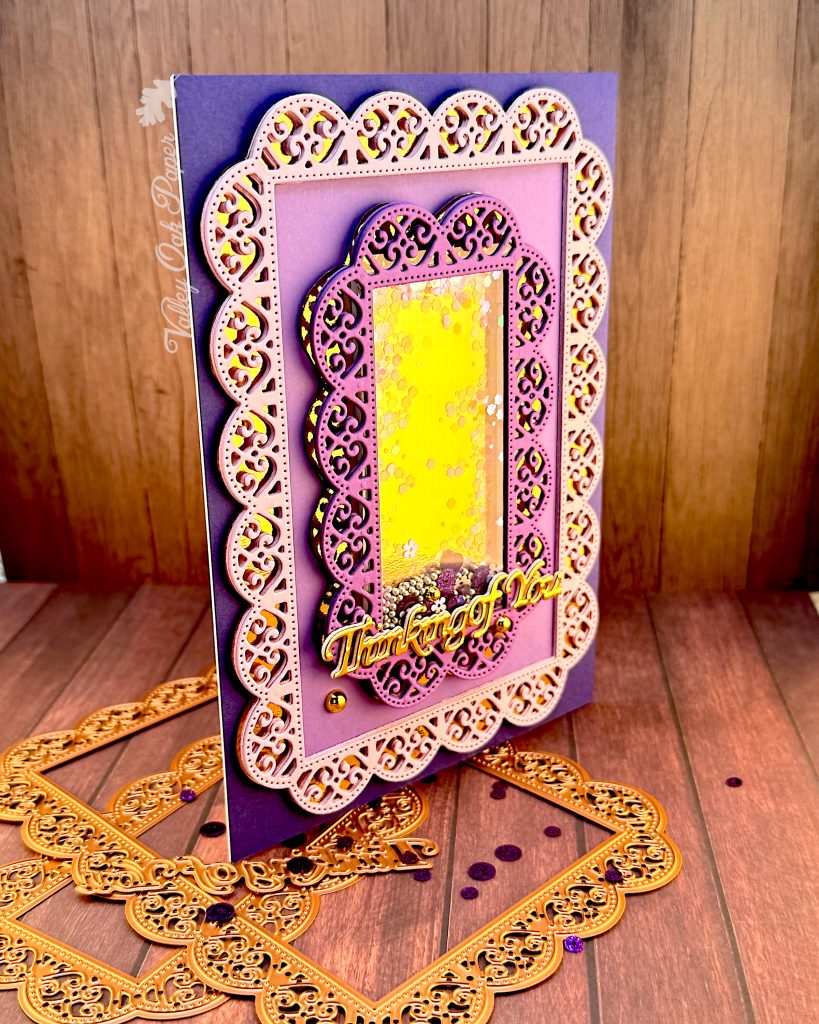
Outer Frame
For this card I used the Spellbinders Thinking of You Scalloped Rectangles Die set. First I cut the outer frame from lavender cardstock and stacked three of them. Next I measured and cut a piece of medium purple cardstock and added it behind the frame. Then I traced the outside of the frame onto the back of gold foil cardstock and fussy cut it out. I glued the gold foil cardstock onto the back of the frame.
Shaker Element
I cut out the smaller of the frames from purple cardstock. Next I measured and cut a piece of acetate. I used double-sided tape to adhere it to the back of the frame. I traced the outside of the frame onto the back of a piece of gold foil cardstock and fussy cut it out.
To construct the shaker well I used ⅛” foam tape behind the inside edge of the frame. I added lots of shaker bits, including Kat Scrappiness Silver Bullet Shaker Dots and Kat Scrappiness Sparkling Violet Sequin Mix. I finished the shaker element by adding the gold foil lid/bottom to it.
Sentiment
I cut the sentiment that’s part of this die set from gold foil and white cardstock. Then I stacked them.
Assembly
I again started assembling my card by gluing dark purple cardstock directly to the 5-by-7 notecard. Then I centered the larger frame panel on the card. I glued the shaker element to the center of the outer frame. I finished up by gluing the sentiment to the shaker element and adding a few gold pearls around it.