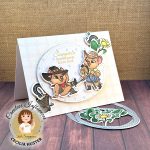
I found it easiest to create the decorative feature first and then the slider.
Truck
The truck I used was a Spellbinders Small Die of the Month from 2021 called Holiday Haul. As you can imagine, it sold out pretty quickly. It’s just so cute and versatile! It came with dies for pumpkins, a holiday tree and a present. Of course you can also fill the truck bed with hearts, eggs, bunnies, berries, produce, flowers…
Alternatives
But if you missed out on this little vintage truck, Spellbinders has alternatives:
If you want to shop your stash for alternatives, here are suitable dimensions:
-
Width: 2.75 – 4.25”
-
Height: 1.5” – 3”
Whatever you use as the feature on this card, the back will be partly visible. When I was done with the truck, I placed it on brushed silver cardstock and traced around it. Then I fussy cut the shape and glued it to the back. This serves to create a finished view from the back and adds stability. If you’re using single-sided paper for this layer, remember to trace on the plain side. That way the pretty side will be visible.
For the THX DAD letters I used Taylored Expression’s Mini Caps & Numbers. An alphabet set with 1/2” letters is really useful for details like these. I often use Tim Holtz’ Tiny Type, but horizontal space was at a premium here, so I went with the narrower TE alpha. Of course if you think it’s too fiddly, you can just put a big heart in the bed of the truck instead.
Slider
For the slider mechanism, I used the Pinkfresh Studios A2 Slider Die Set. It consists of three dies. The largest die is a no-frills, A2-size die used as a base. The second largest creates the slider mechanism. The smallest one creates the slider tab.
Cutting list
-
Slider base
-
This is optional if you are placing the slider on an A2 notecard, as I did in these cards.
-
-
Slider mechanism
-
1 decorative
-
1 for reinforcement
-
-
Slider tab
-
1 decorative
-
1 for reinforcement
-
Slider mechanism
The center of the sliding mechanism has score lines. Use them to fold along on your decorative piece.
Turn the decorative piece over, because the remaining steps are all done to the underside of it.
Add washi tape to the underside of the score lines, to prevent them from becoming cut lines. From your reinforcement layer, cut off the center part. Glue the remaining frame from reinforcement layer to the underside of your decorative frame. Make sure it’s not peeking out anywhere.
Take the center part of the reinforcement layer and cut it apart along the score lines. Then cut off a little from all four sides of the resulting three pieces. Glue them to the underside of the center part of the decorative folded part. Make sure that the decorative layer can still fold without problems.
Add 1/8” strips of foam tape to three sides of the mechanism. It’s important that the foam tape is placed along the outside edges for the mechanism to work smoothly. Don’t remove the release paper just yet.
Sliding tab
Glue the decorative and reinforcement layers of the sliding tab together. Turn the stabilized tab over over so you see the underside.
Place glue on the bottom part of the center of the sliding mechanism. Make sure it’s flat on your crafting surface with the decorative side facing down.
Take the sliding tab and place it in its resting position, pretty side down, on the underside of the sliding mechanism. It needs to be centered between the two long sides for the mechanism to work properly. Put something heavy on the glued part while you wait for it to take.
Once the glue has set, turn the piece right side up. You should be able to tug at the sliding tab and get the center of the sliding mechanism to fold up. At this step I slipped some ribbon through the hole and attached it with a mini stapler.
If the mechanism works smoothly, you can remove the release paper from the foam tape and place the mechanism on the cardbase.
Now all that’s left is to place the hidden message. I used a retired Spellbinders die set. As of updating this article, the only Father’s Day sentiment I can find on their site, is a BetterPress Plate with Dies.


