

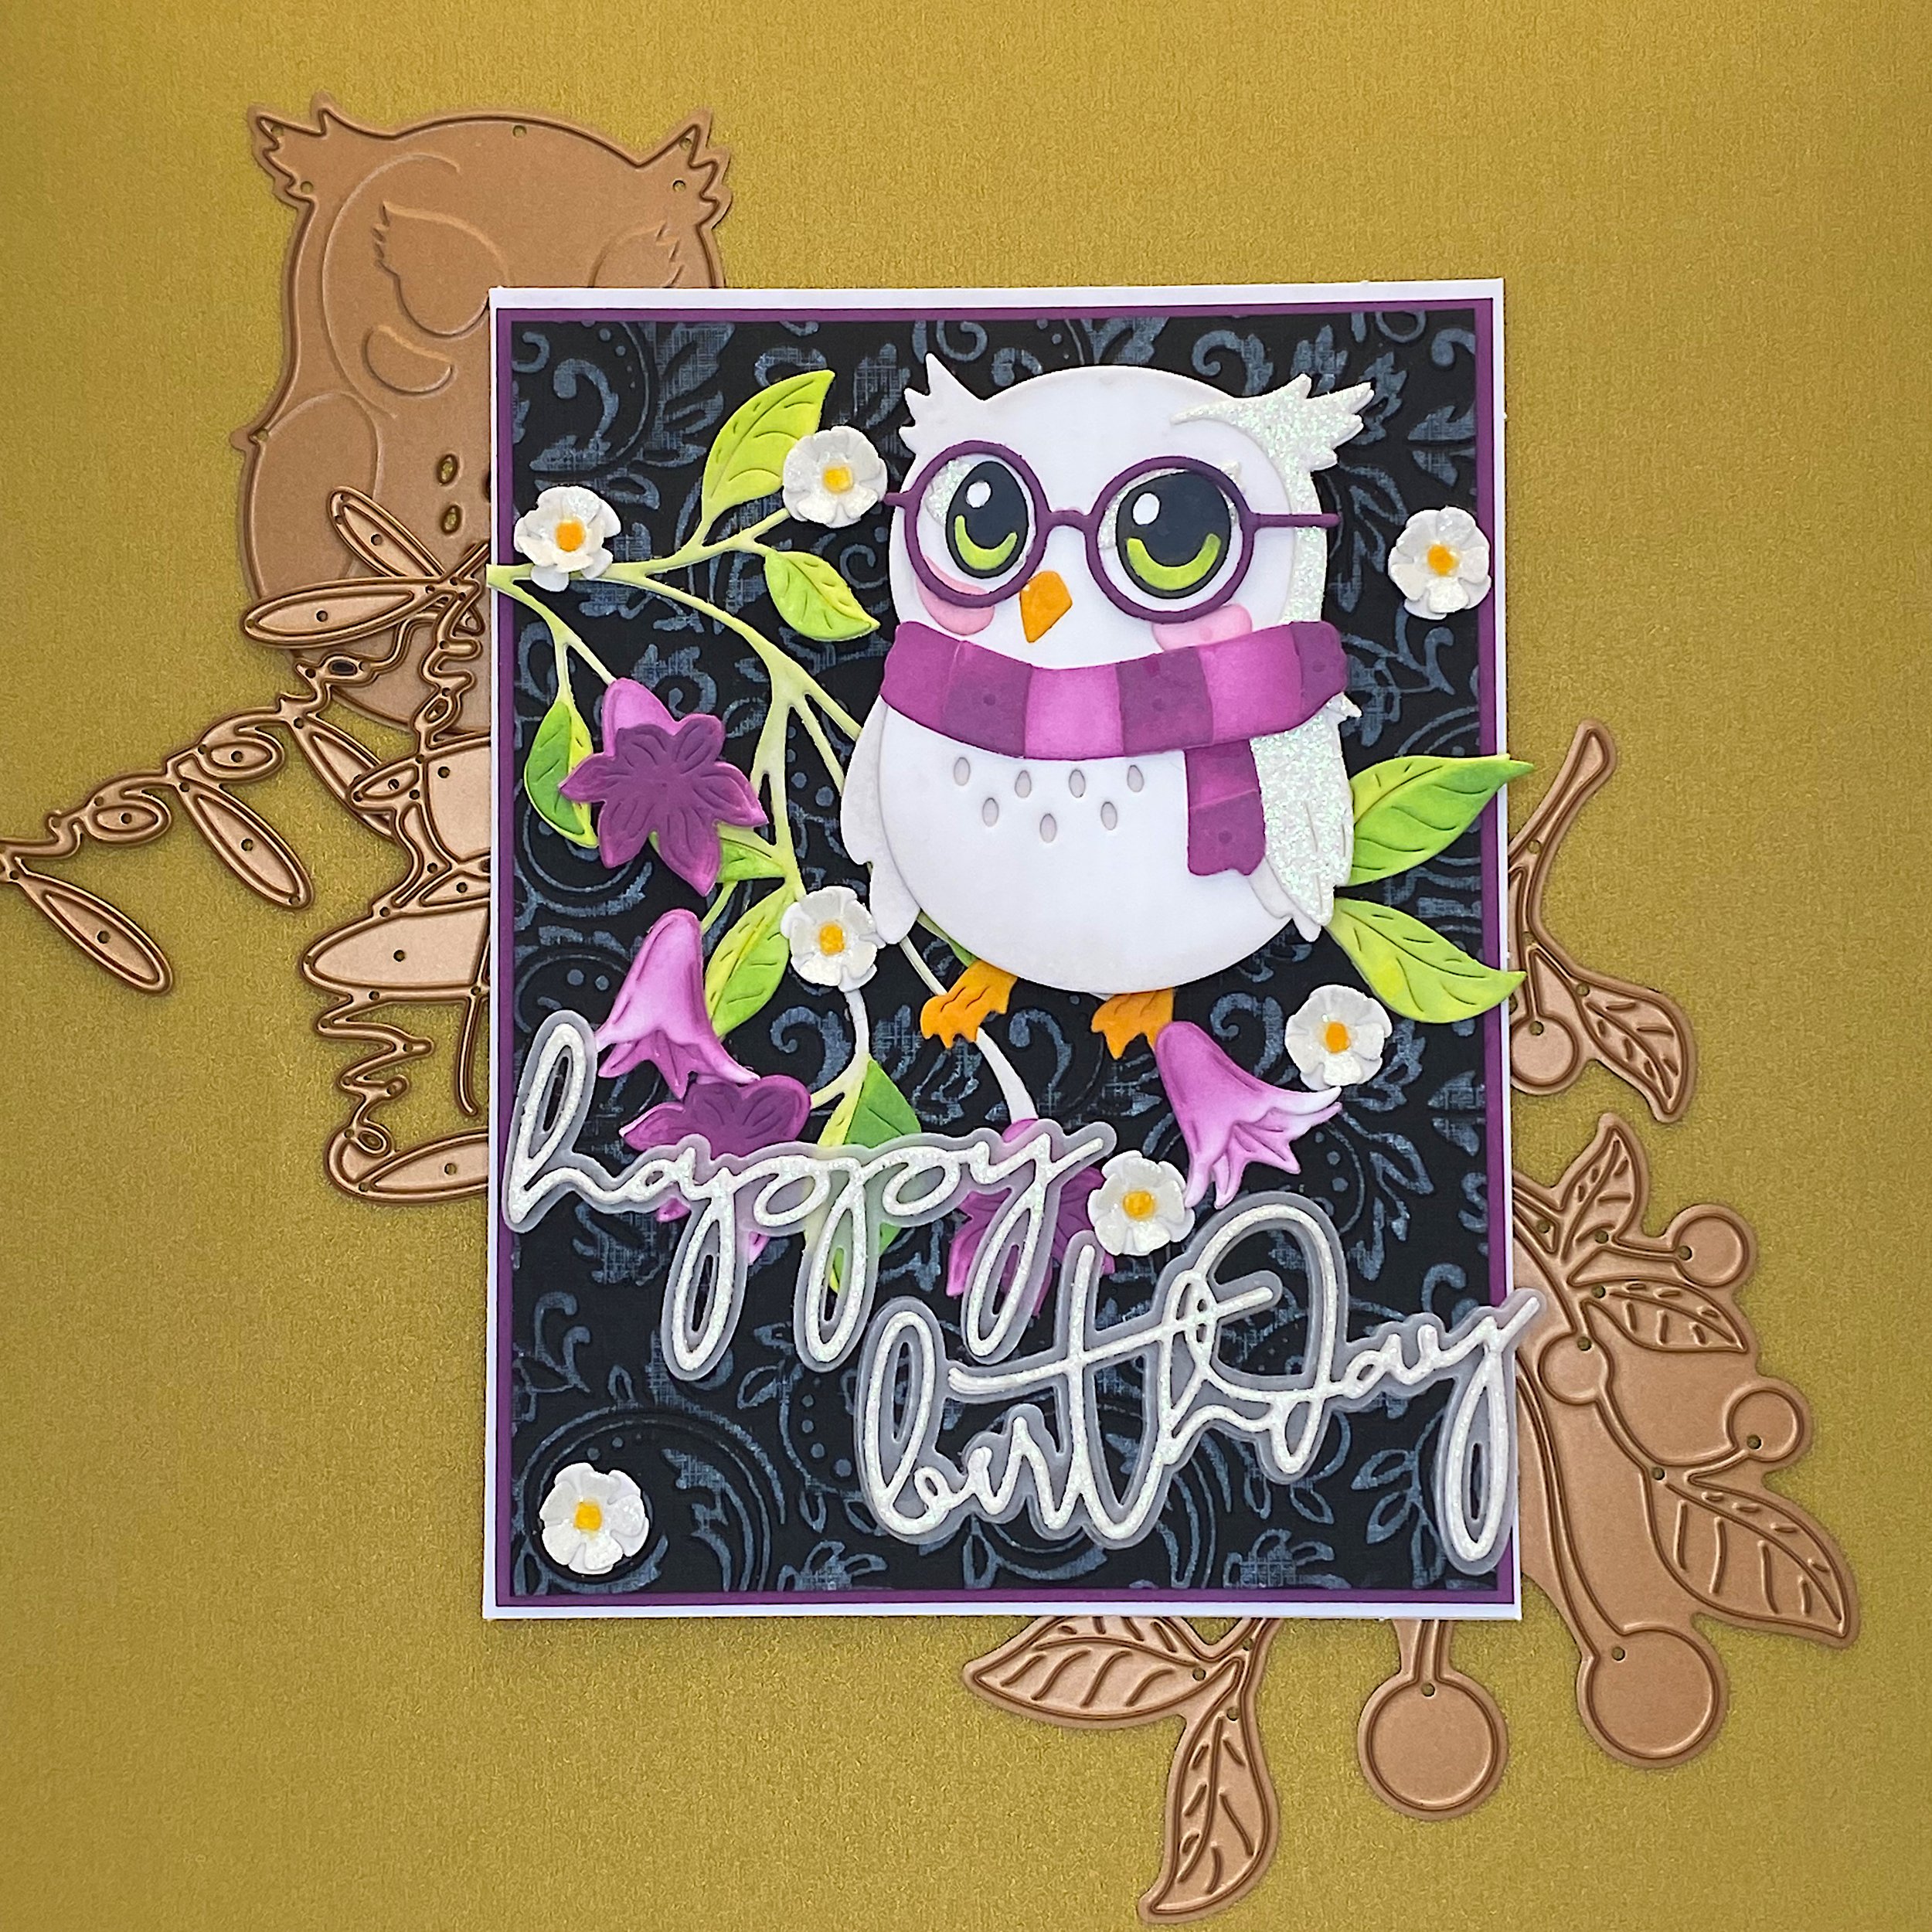
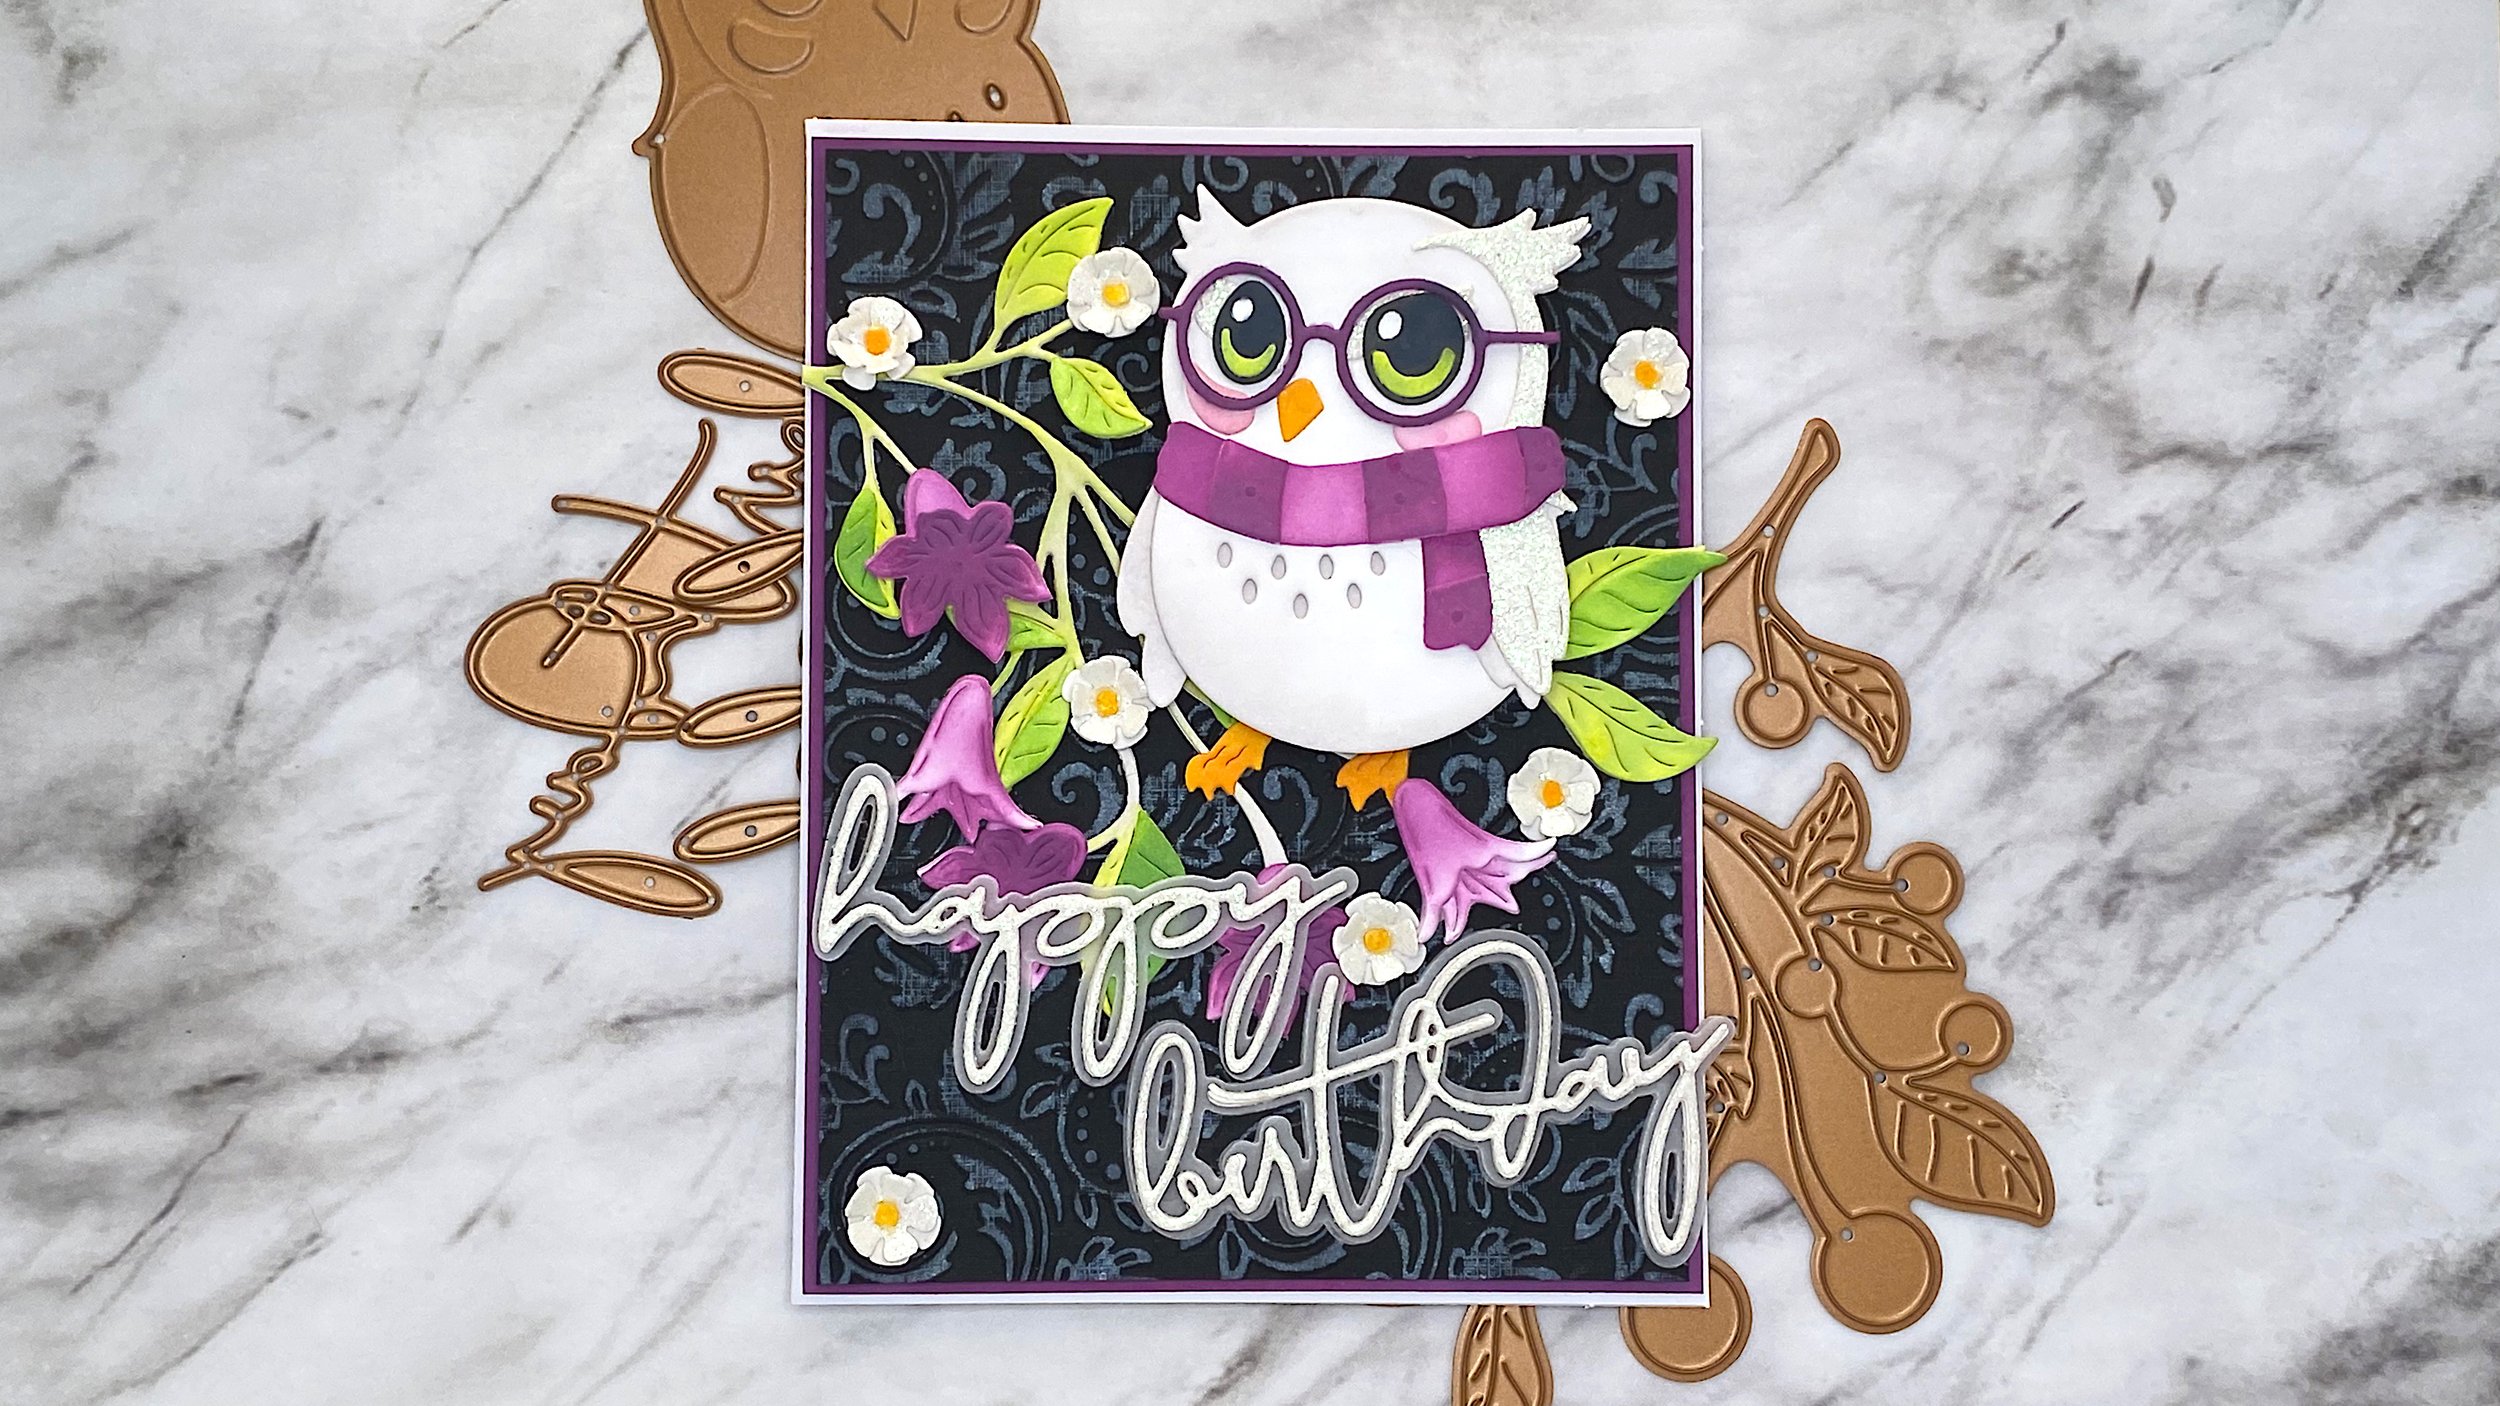
Wise Vintage Owl
Affiliate links: You support my crafty business whenever you click on a link and buy something, and it doesn’t cost you a penny extra.
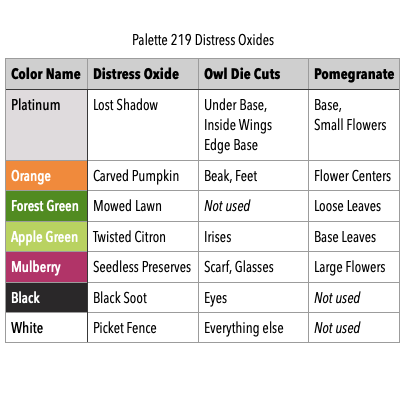
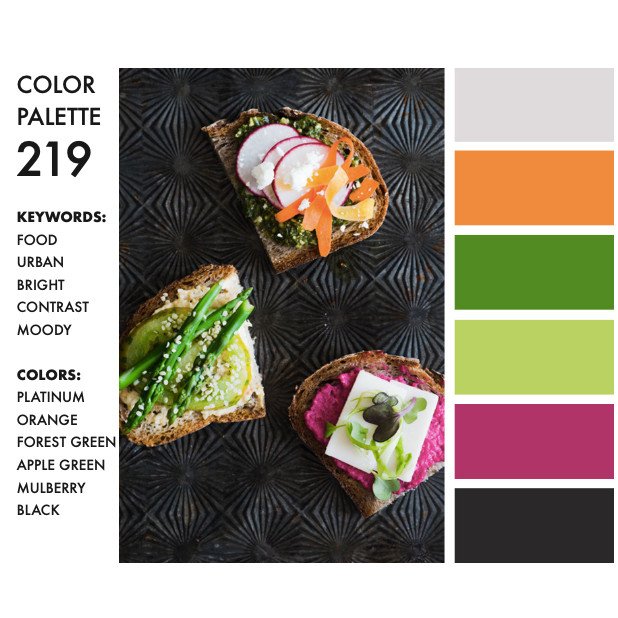
I’m going to use palette 219 from Sarah Renae Clark’s Color Catalog. Distress Oxides will help me achieve most of the colors, but I also use Recollections White Glitter Cardstock and Black Cardstock. Note the Distress Oxides colors I’ve assigned the palette colors above.
Owl
The owl die set is from Spellbinders and it’s called Wise Owl. It was the Small Die of the Month for March 2024.
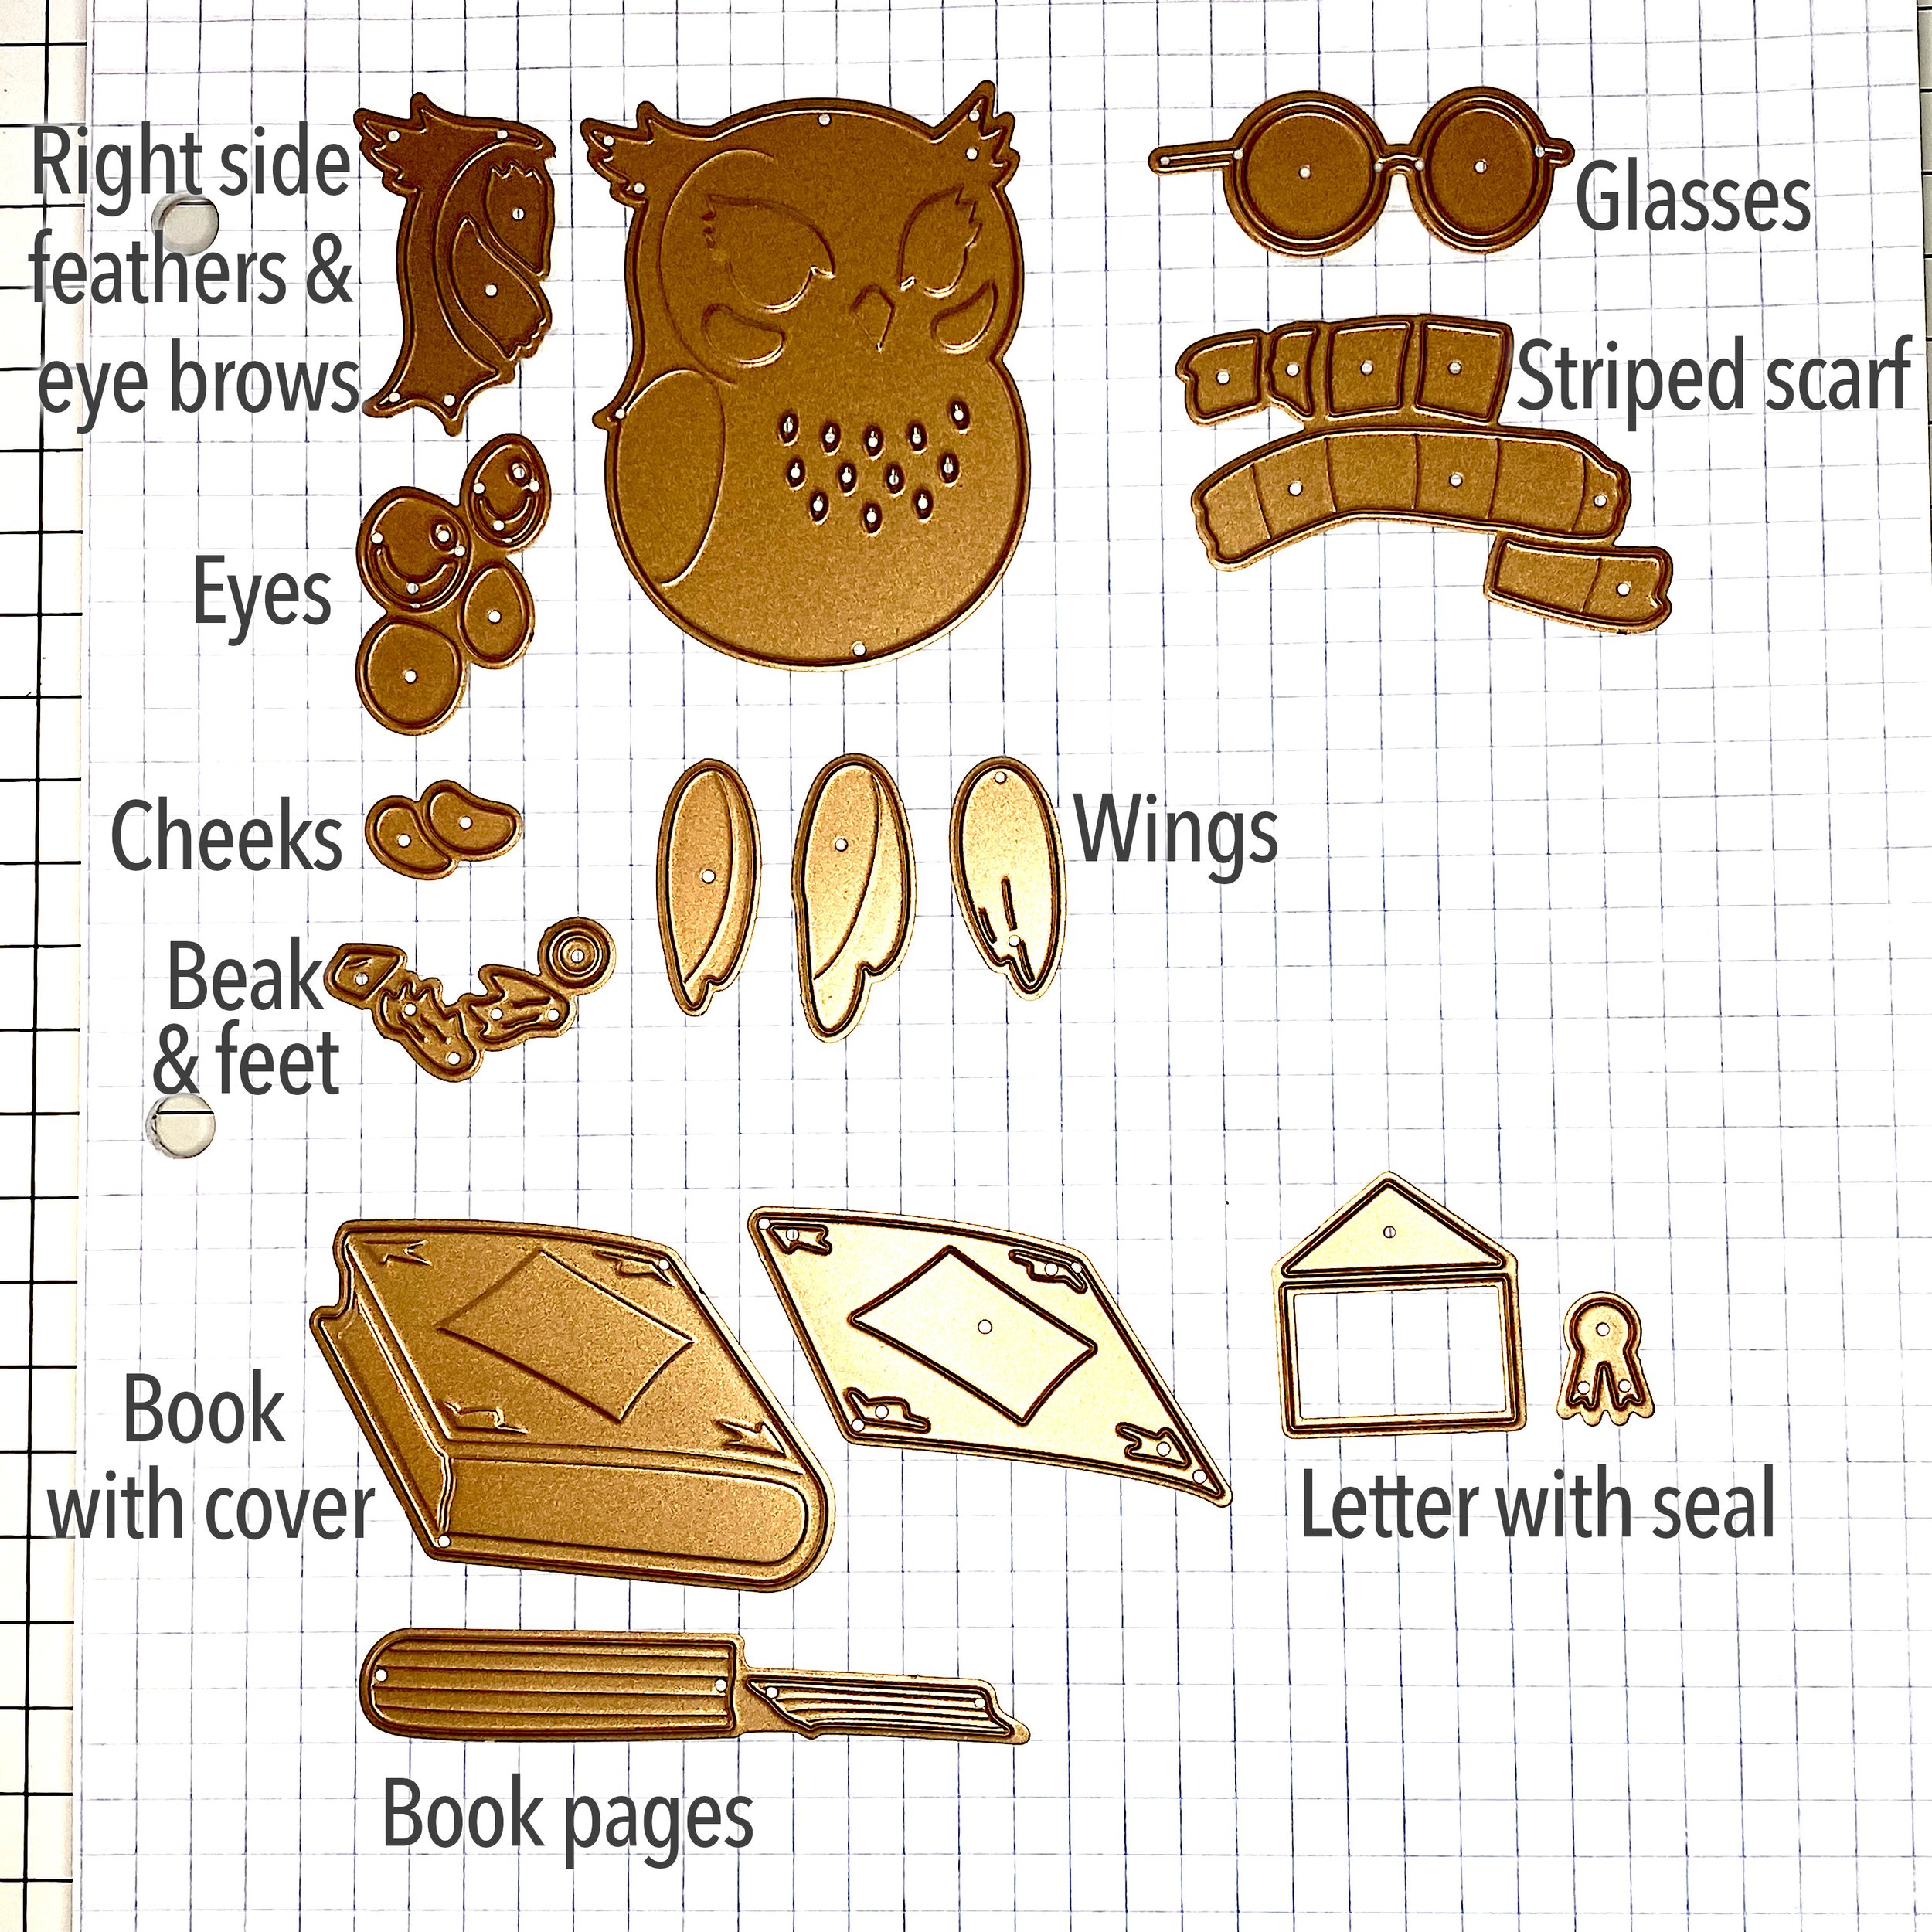
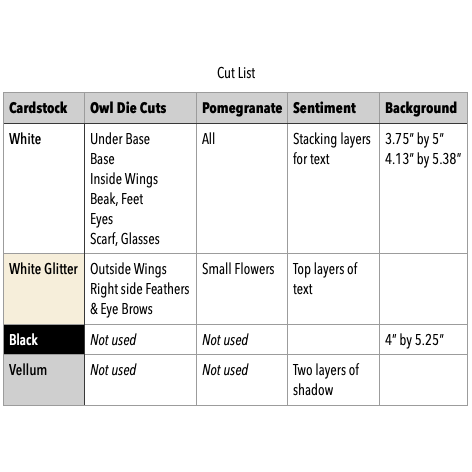
You’ll find the cut list in the images below. For the owl I used Accent Opaque 100 lbs white and white glitter cardstock. I doubled up the owl body for stability.
The owl base has holes for the darker feathers on the chest. But there’s no base die included in this small set. So I traced and cut one out with scissors. I inked the wings and the under base layer with Lost Shadow Distress Oxide. That’s the color I’m using for Platinum in palette 219. I also edged the owl body with Lost Shadow. Then I glued together the main parts of the owl.
Feet, Beak and Cheeks
I inked the beak and feet with Distress Oxide Carved Pumpkin. That’s the Orange color I’m using.
There’s no pink in palette 219, but I used a little Distress Oxide Spun Sugar on the cheeks.
Then I glued down the cheeks and beak to the owl’s face. But I saved the feet for later.
Eyes and Eye Brows
My eye brows are made out of white glitter paper. I glued them down in the depressions in the owl face.
The eyes come with a base. It stays white to provide a highlight. The iris will be Twisted Citron. That’s the color I’m using for the Apple Green in palette 219.
I’m colored the rest of the eyes with Black Soot. You could also die cut the eyes from black cardstock instead. Then I put together the eyes and glued them on top of the eye brows.
Background
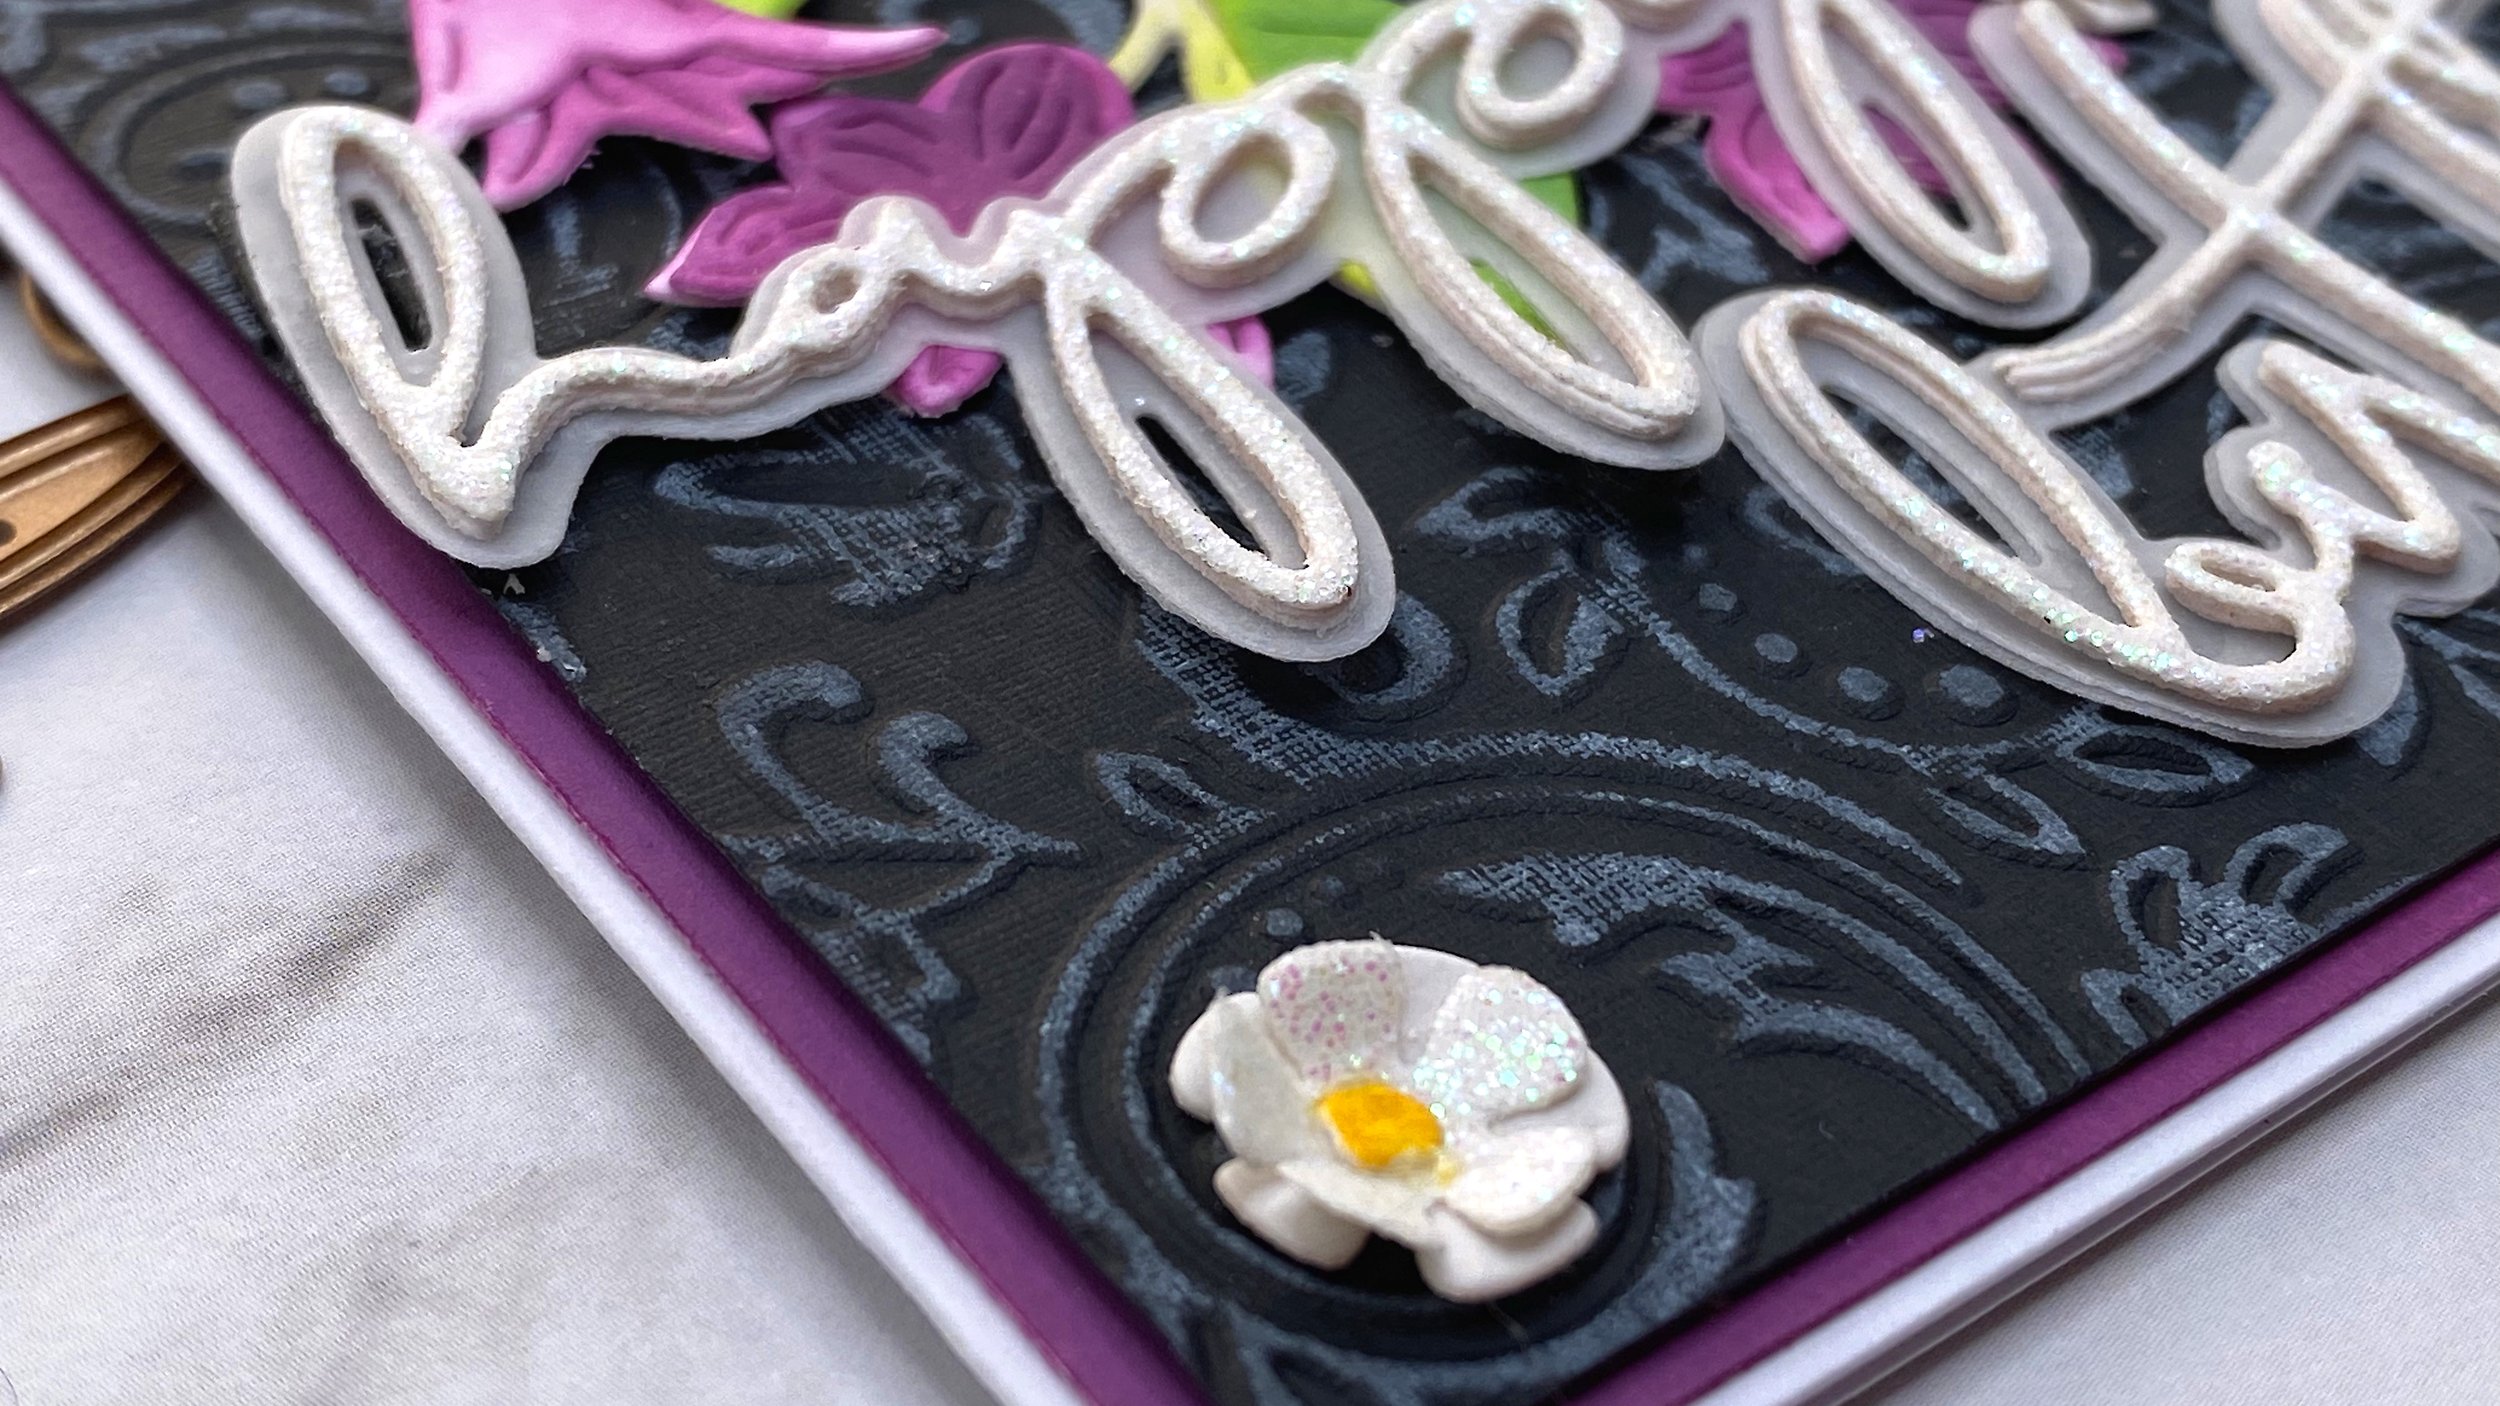
For my background I used Recollections Black 110 lbs Cardstock and a floral Spellbinders embossing folder. It’s a single-sided folder with a great price point!
To highlight the vintage floral pattern, I used my Tim Holtz Medium Brayer to add some Lost Shadow Distress Oxide on the raised areas.
Then I layered a smaller piece of white cardstock under it for stability.
Blooming Perch
My little owl is going to sit on a branch with flowers. For that I’m using Spellbinders Blooming Pomegranate Die Set. It was the Large Die of the Month for August 2023 and it includes a nice, big branch with leaves and places to attach flowers.
I cut out the branch and flowers from white cardstock and doubled up the branch itself. I also cut the smallest flowers from white glitter cardstock.
The woody parts of the branch I colored with Distress Oxide Lost Shadow and the leaves with Distress Oxide Twisted Citron.
The extra leaf parts will be Distress Oxide Mowed Lawn. That’s the Distress Oxide color I used for Forest Green in palette 219.
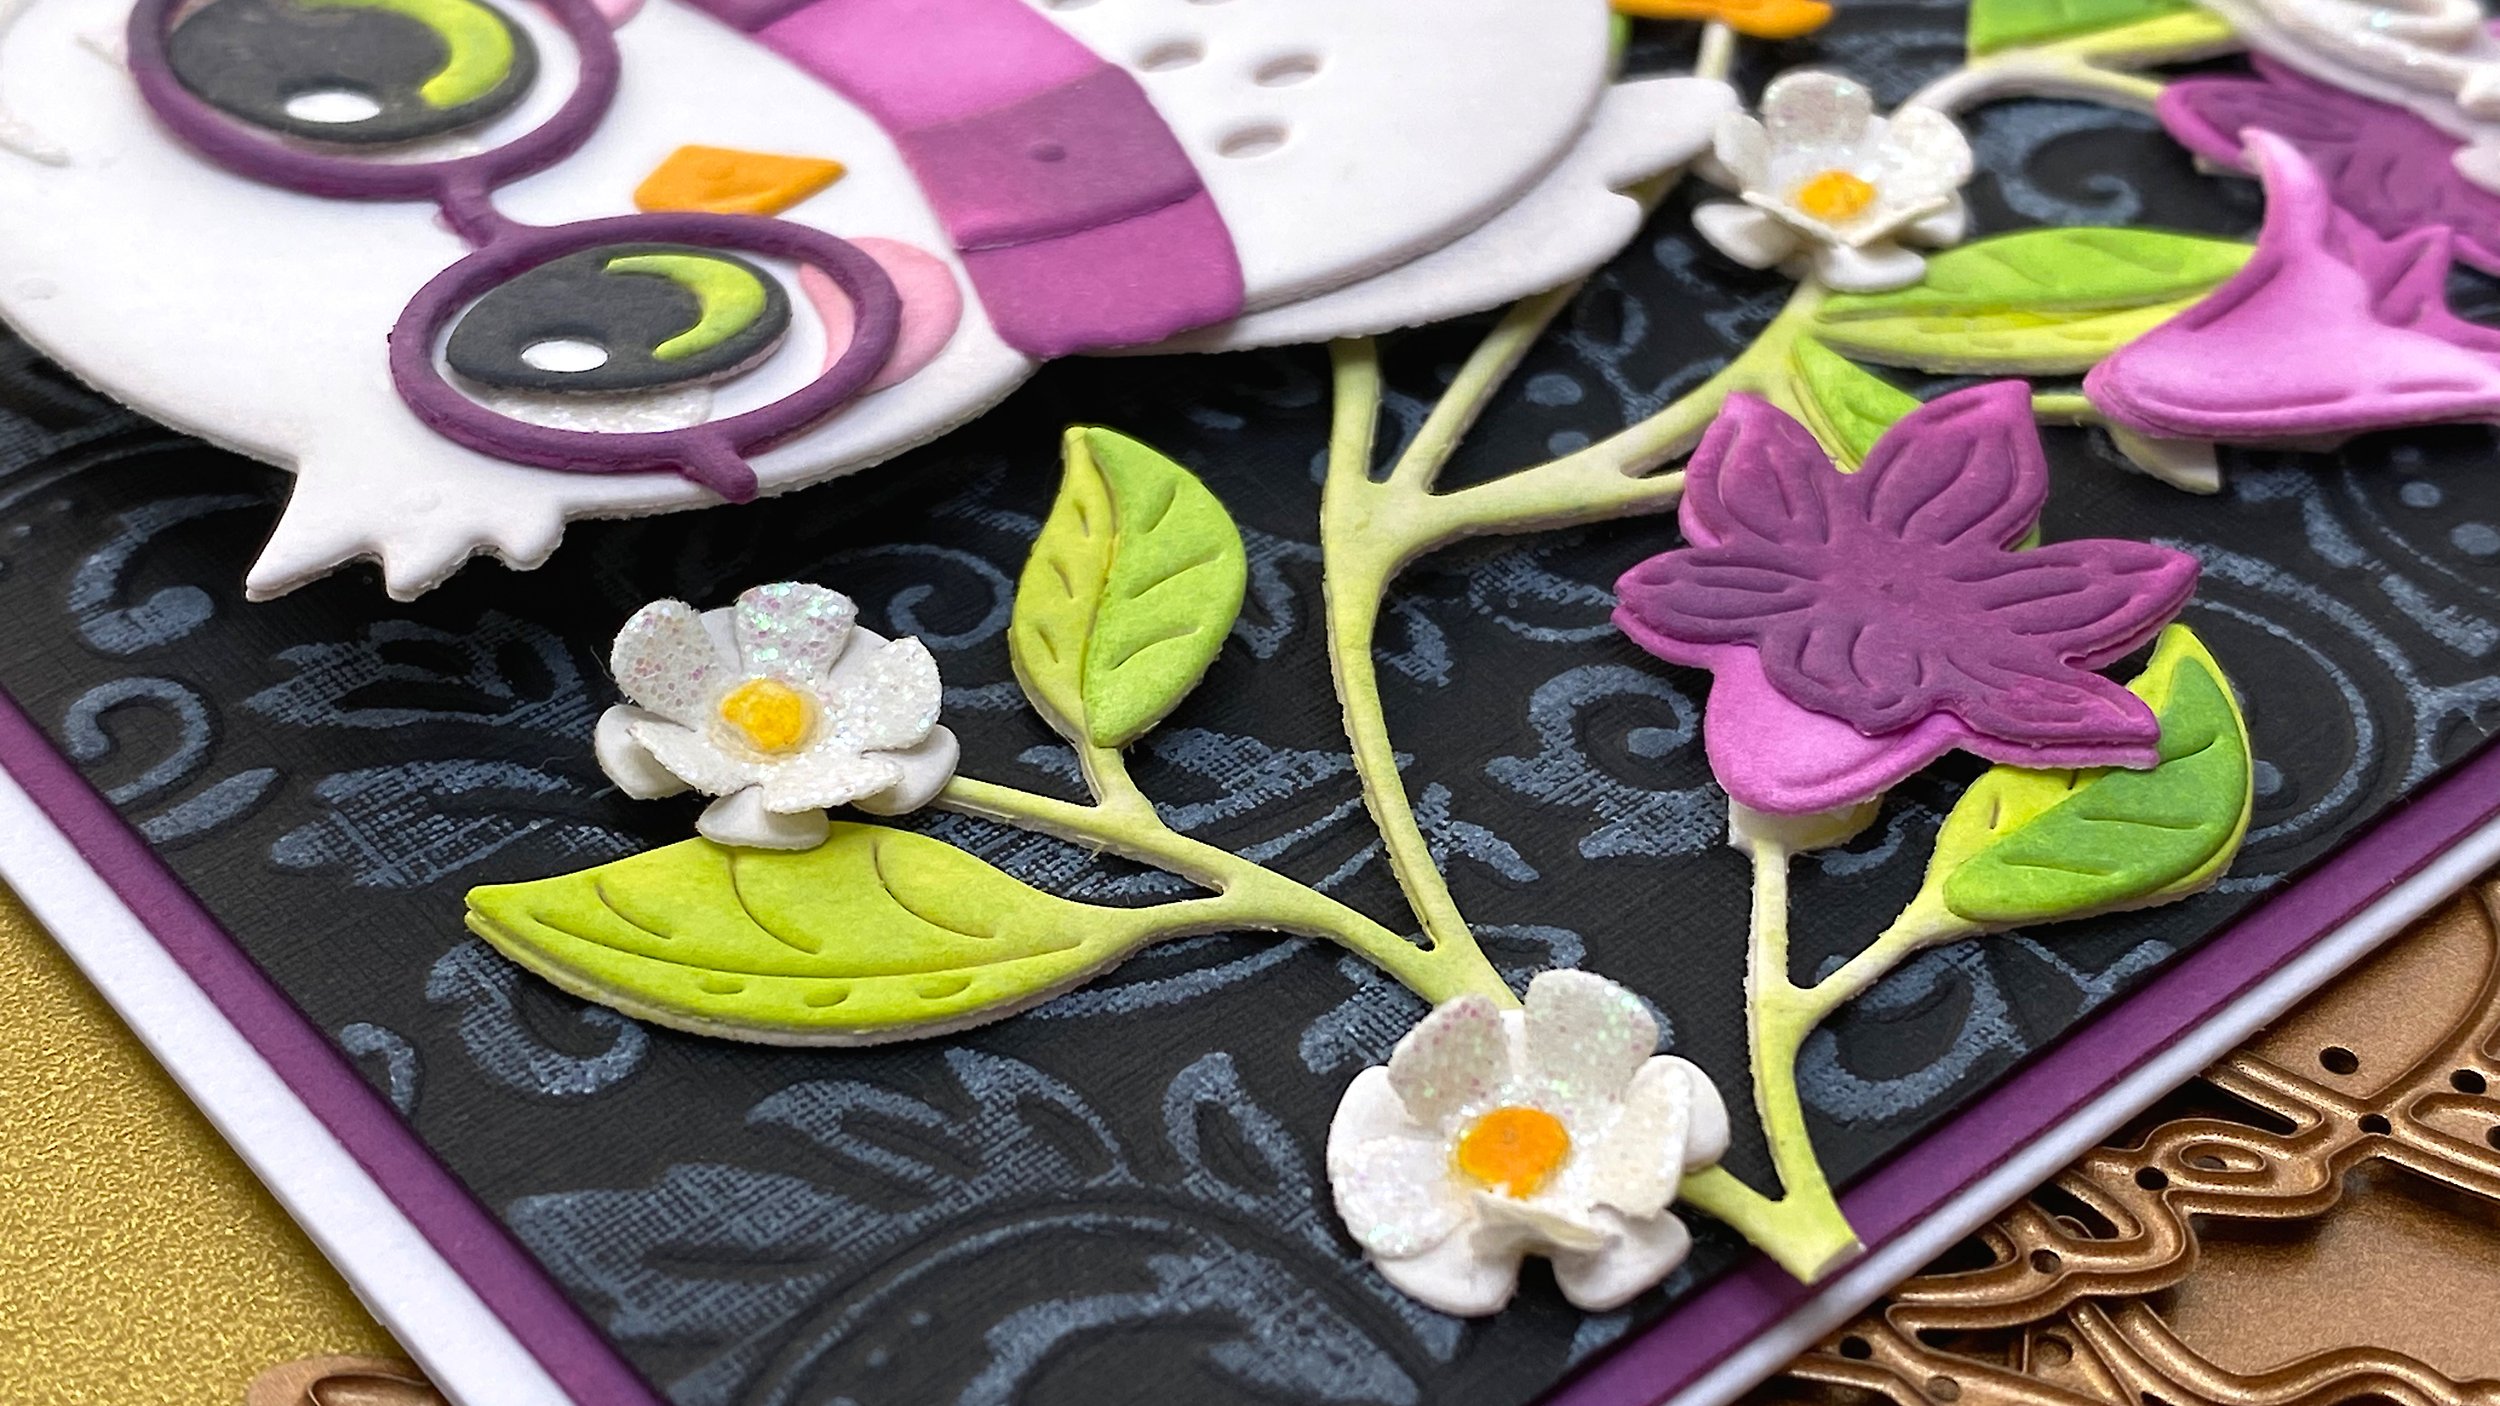
Flowers
I inked the base layer of the small flowers with Lost Shadow and shaped them a little bit. Then I glued on the white glitter layer.
I colored the tiny flower centers with Carved Pumpkin Distress Oxide and glued them to the flowers.
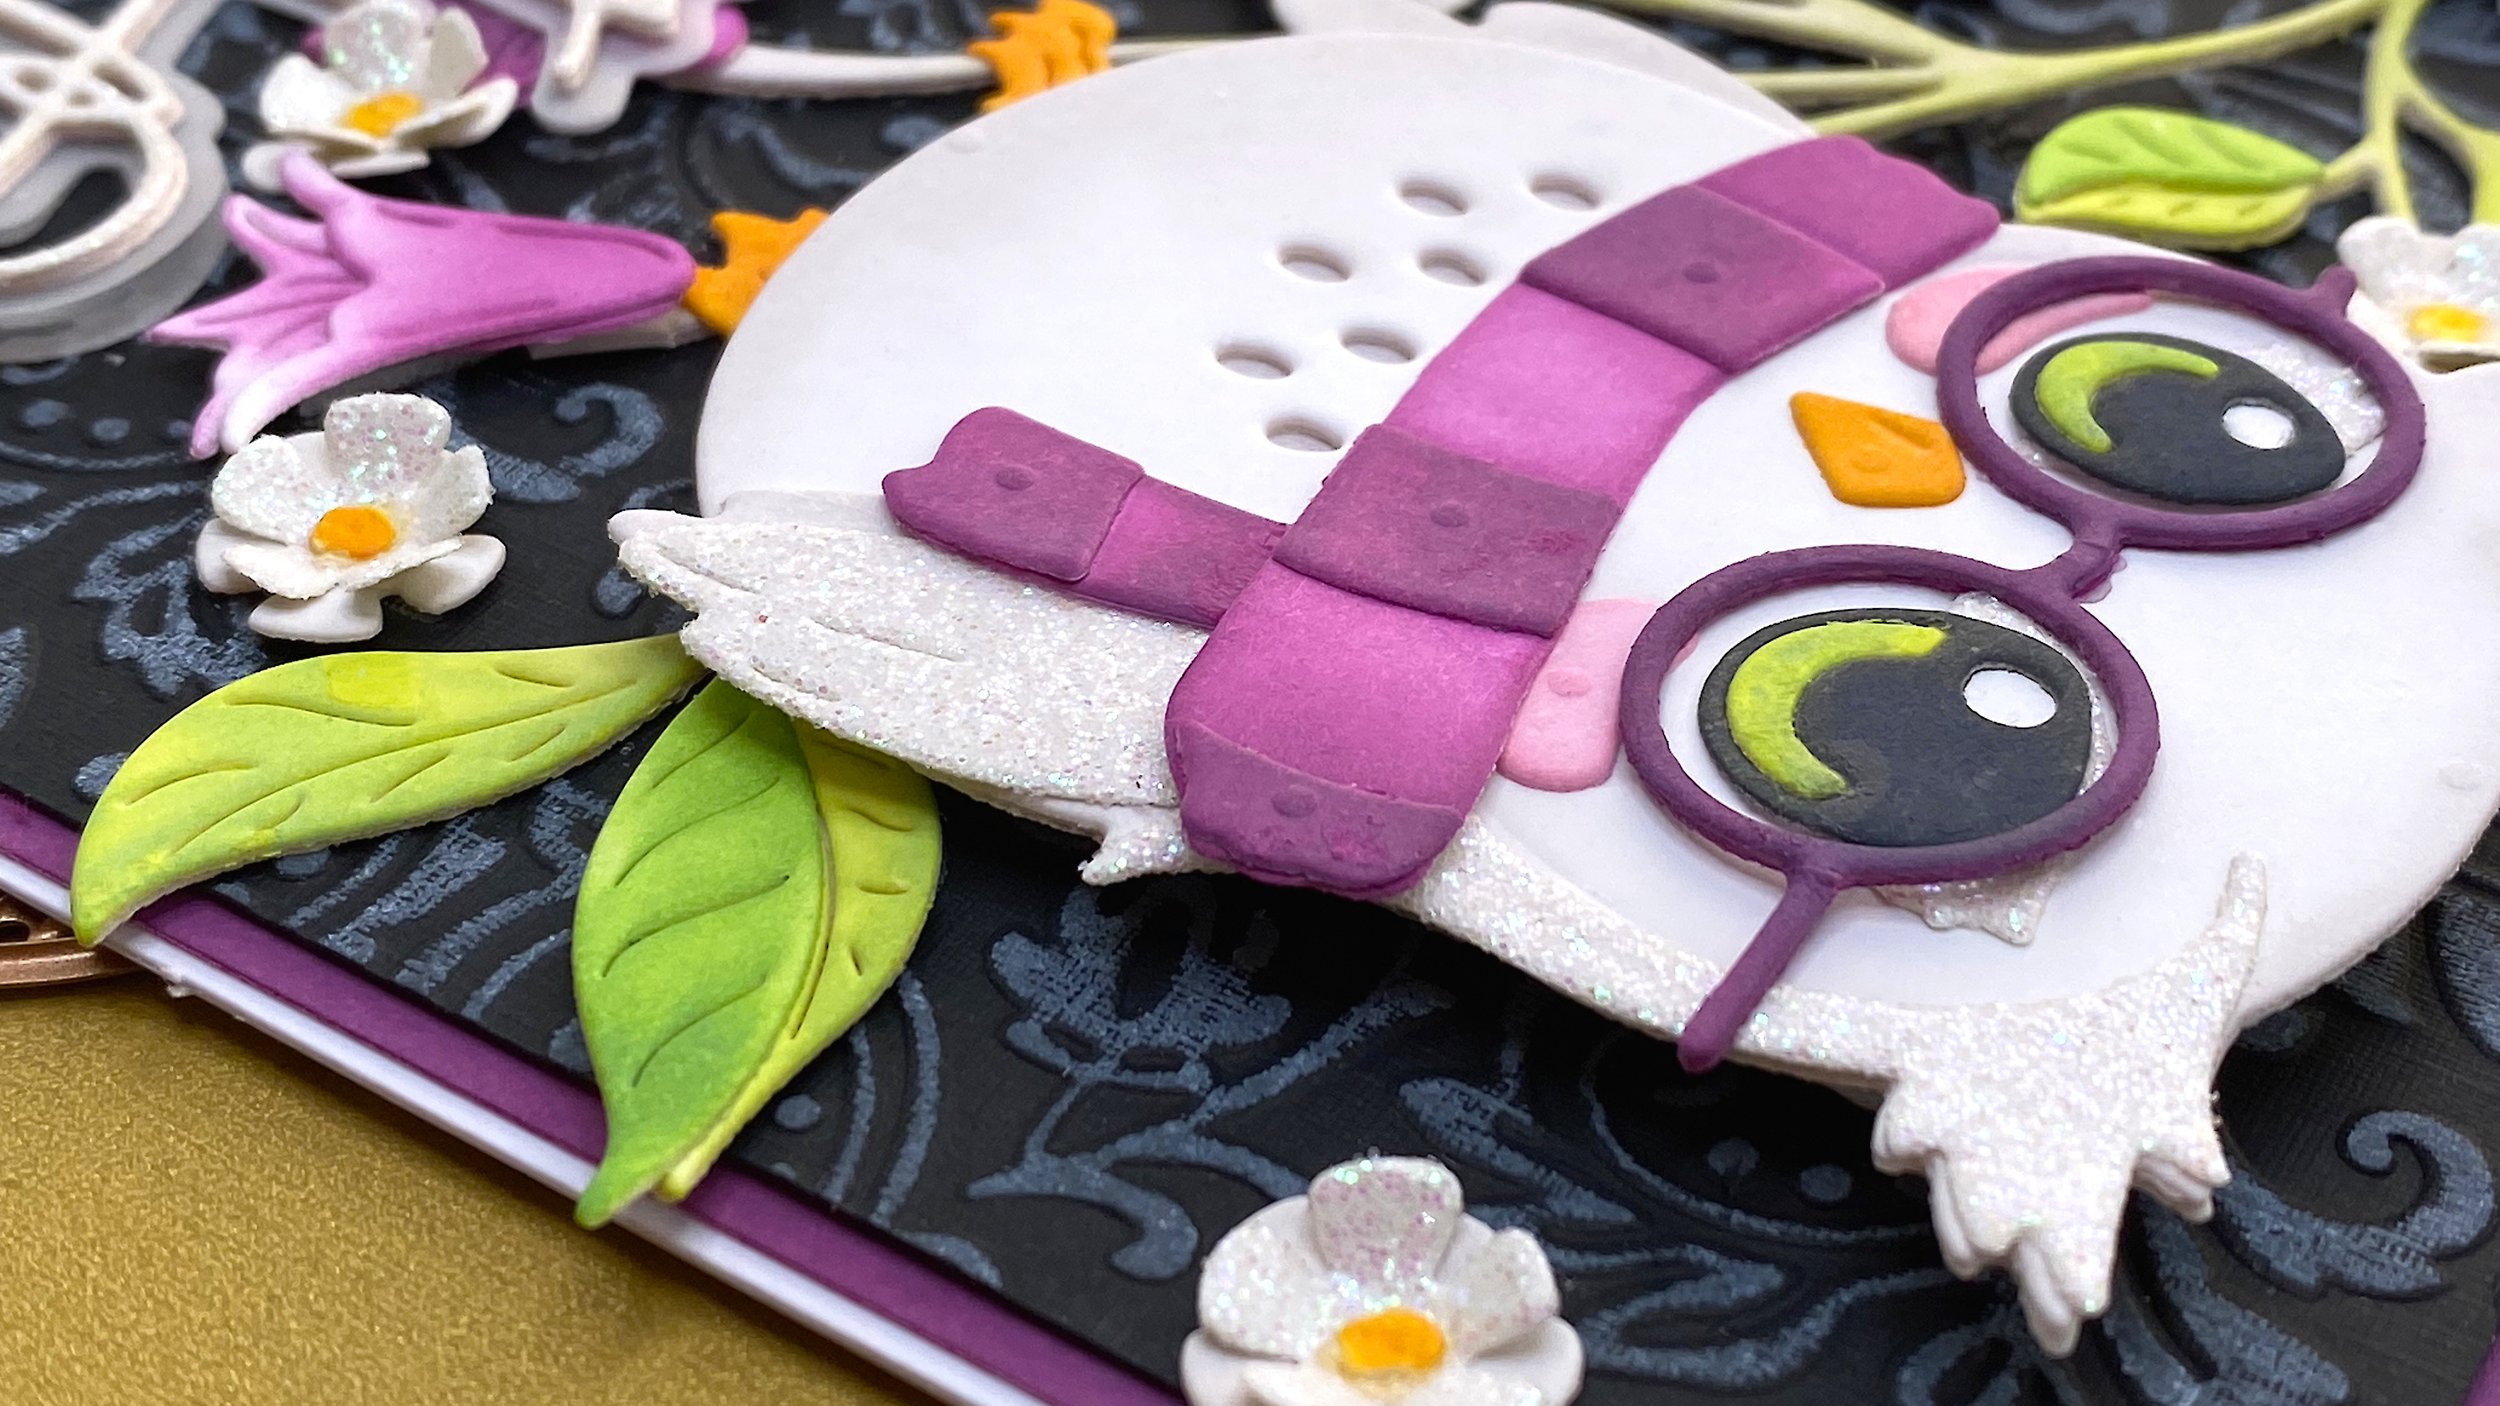
Mulberry
For the color Mulberry in palette 219, I used Seedless Preserves Distress Oxide.
I ink blended the glasses, the bell-shaped flowers and the scarf with Seedless Preserves. For the scarf I used a medium application on the base and a heavy application on the stripes, for a tone-on-tone effect.
Then I assembled the flowers and the scarf and glued the glasses and scarf on to the owl. They really make this cute owl even cuter!
Branch and Flowers
I used the sentiment dies to help me place the branch on the background. Then I used foam tape to attach the owl toward the top right of the background and glued the feet to their perches.
Next I added the mulberry flowers to the tree. I popped up some of them with foam tape. Others I glued directly to the tree.
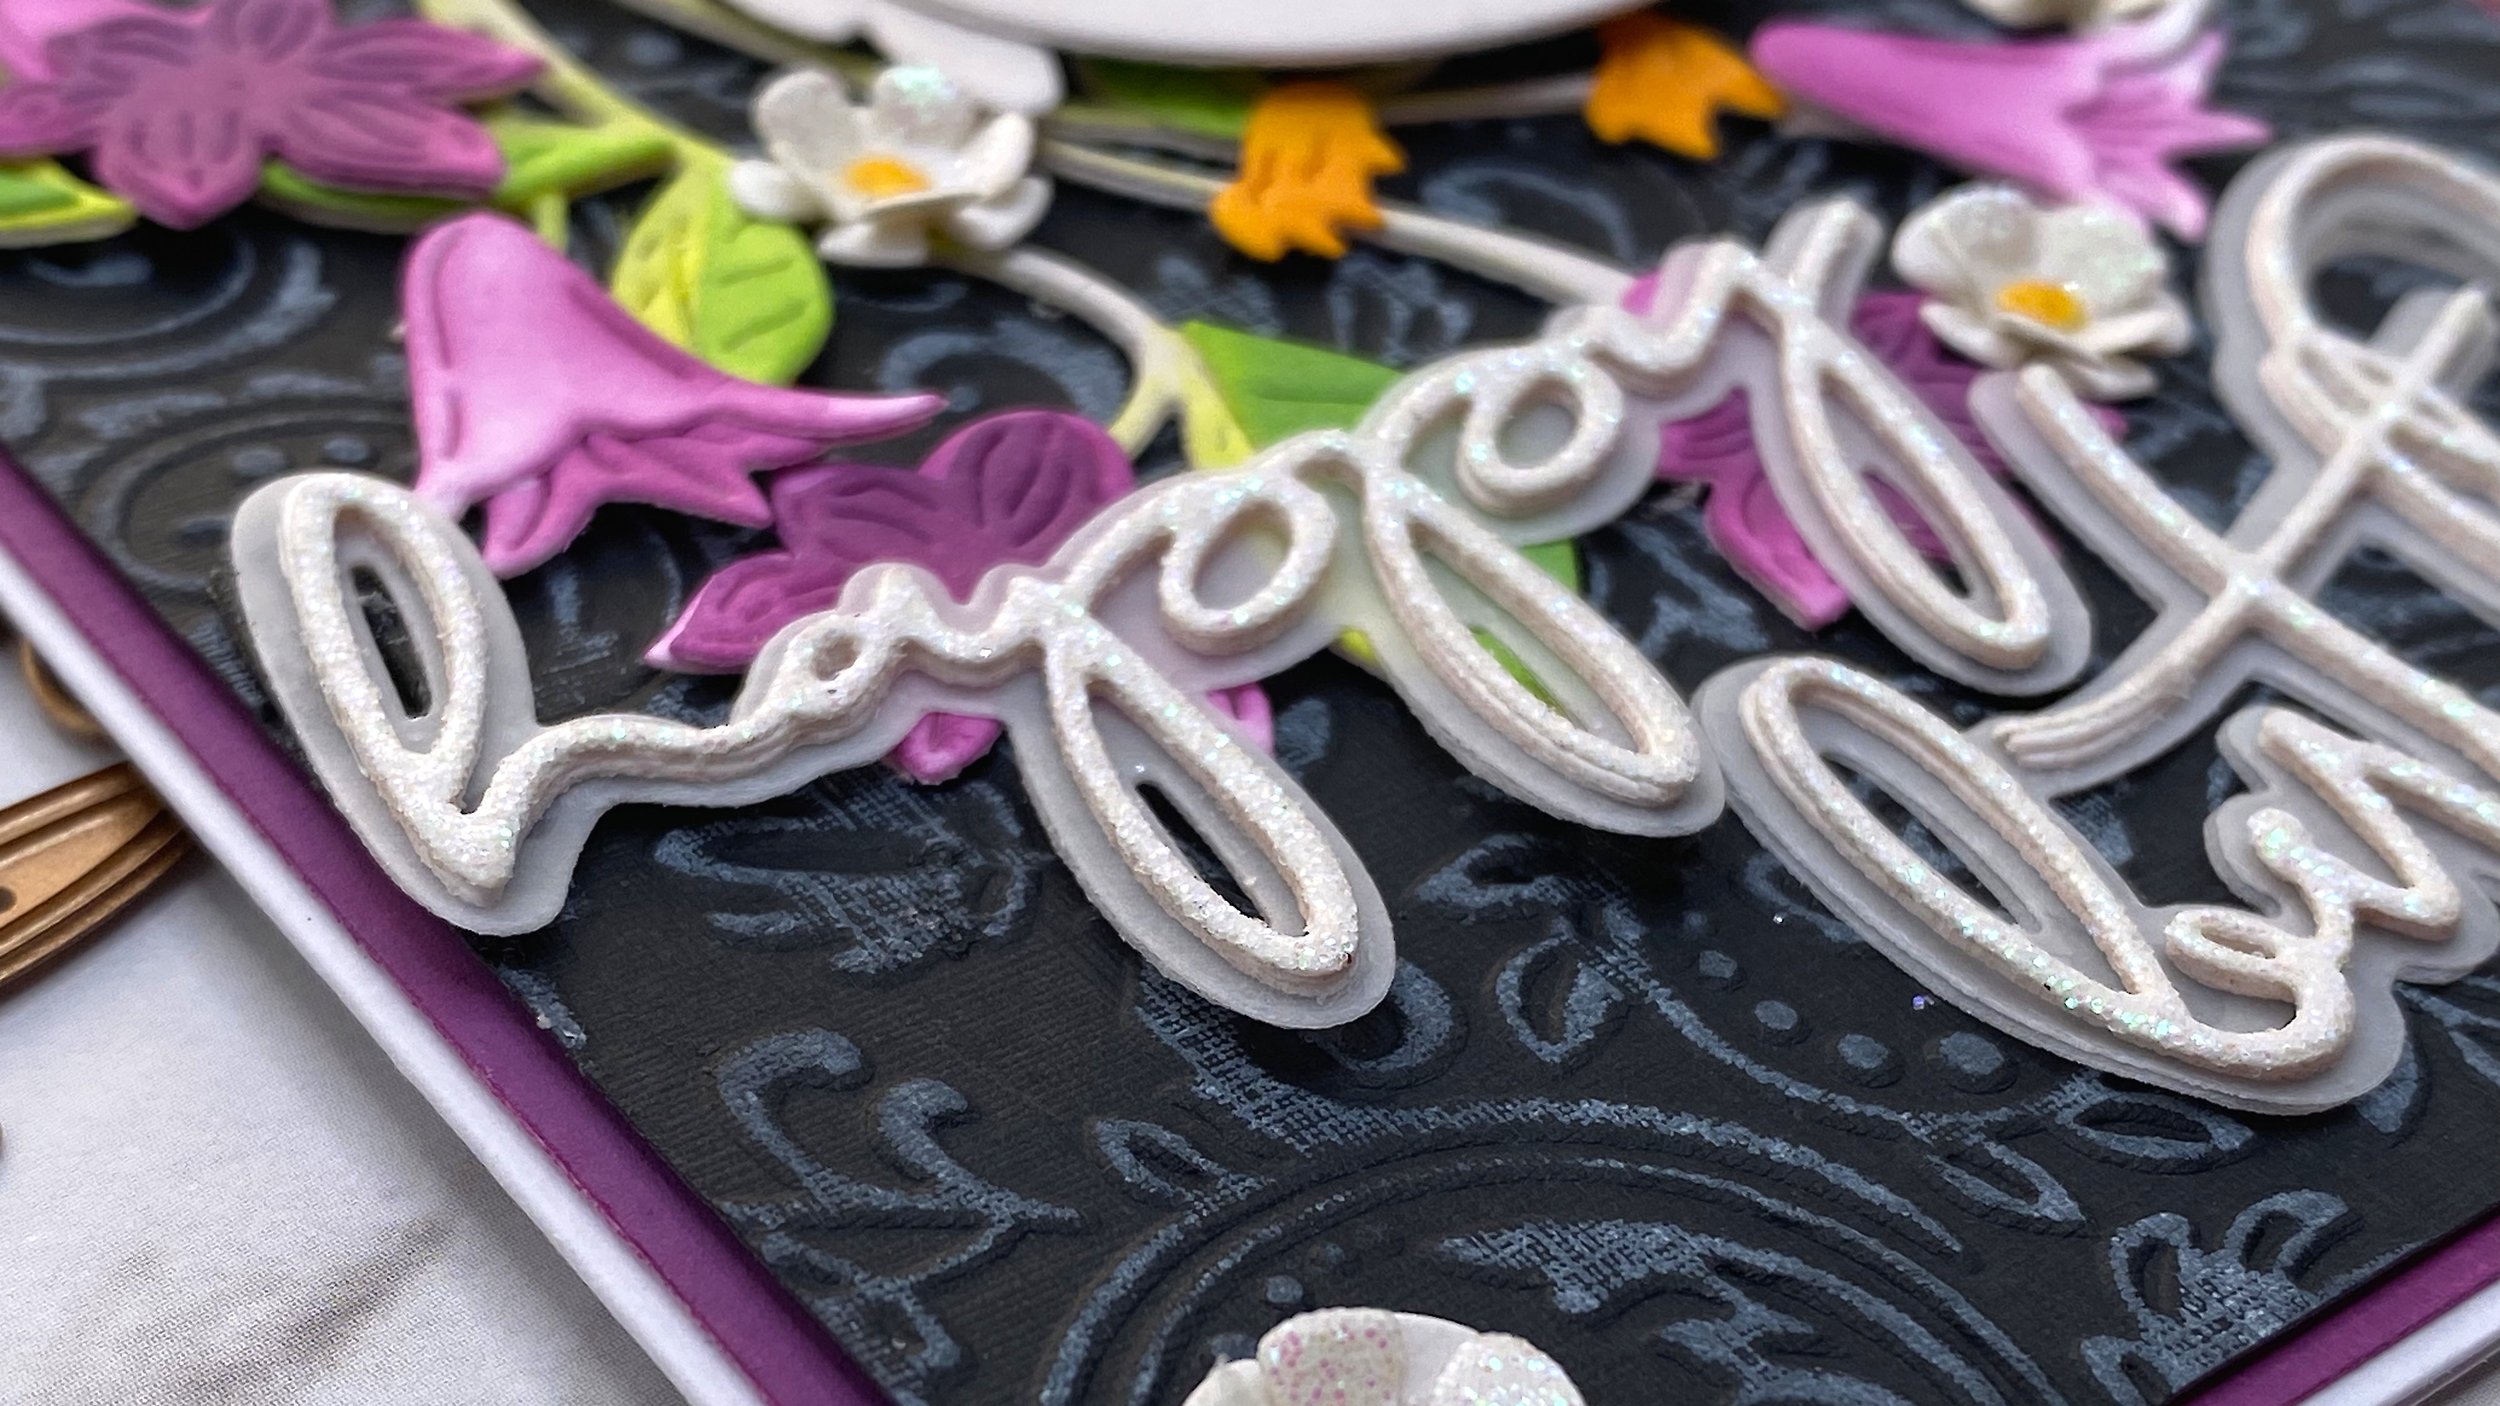
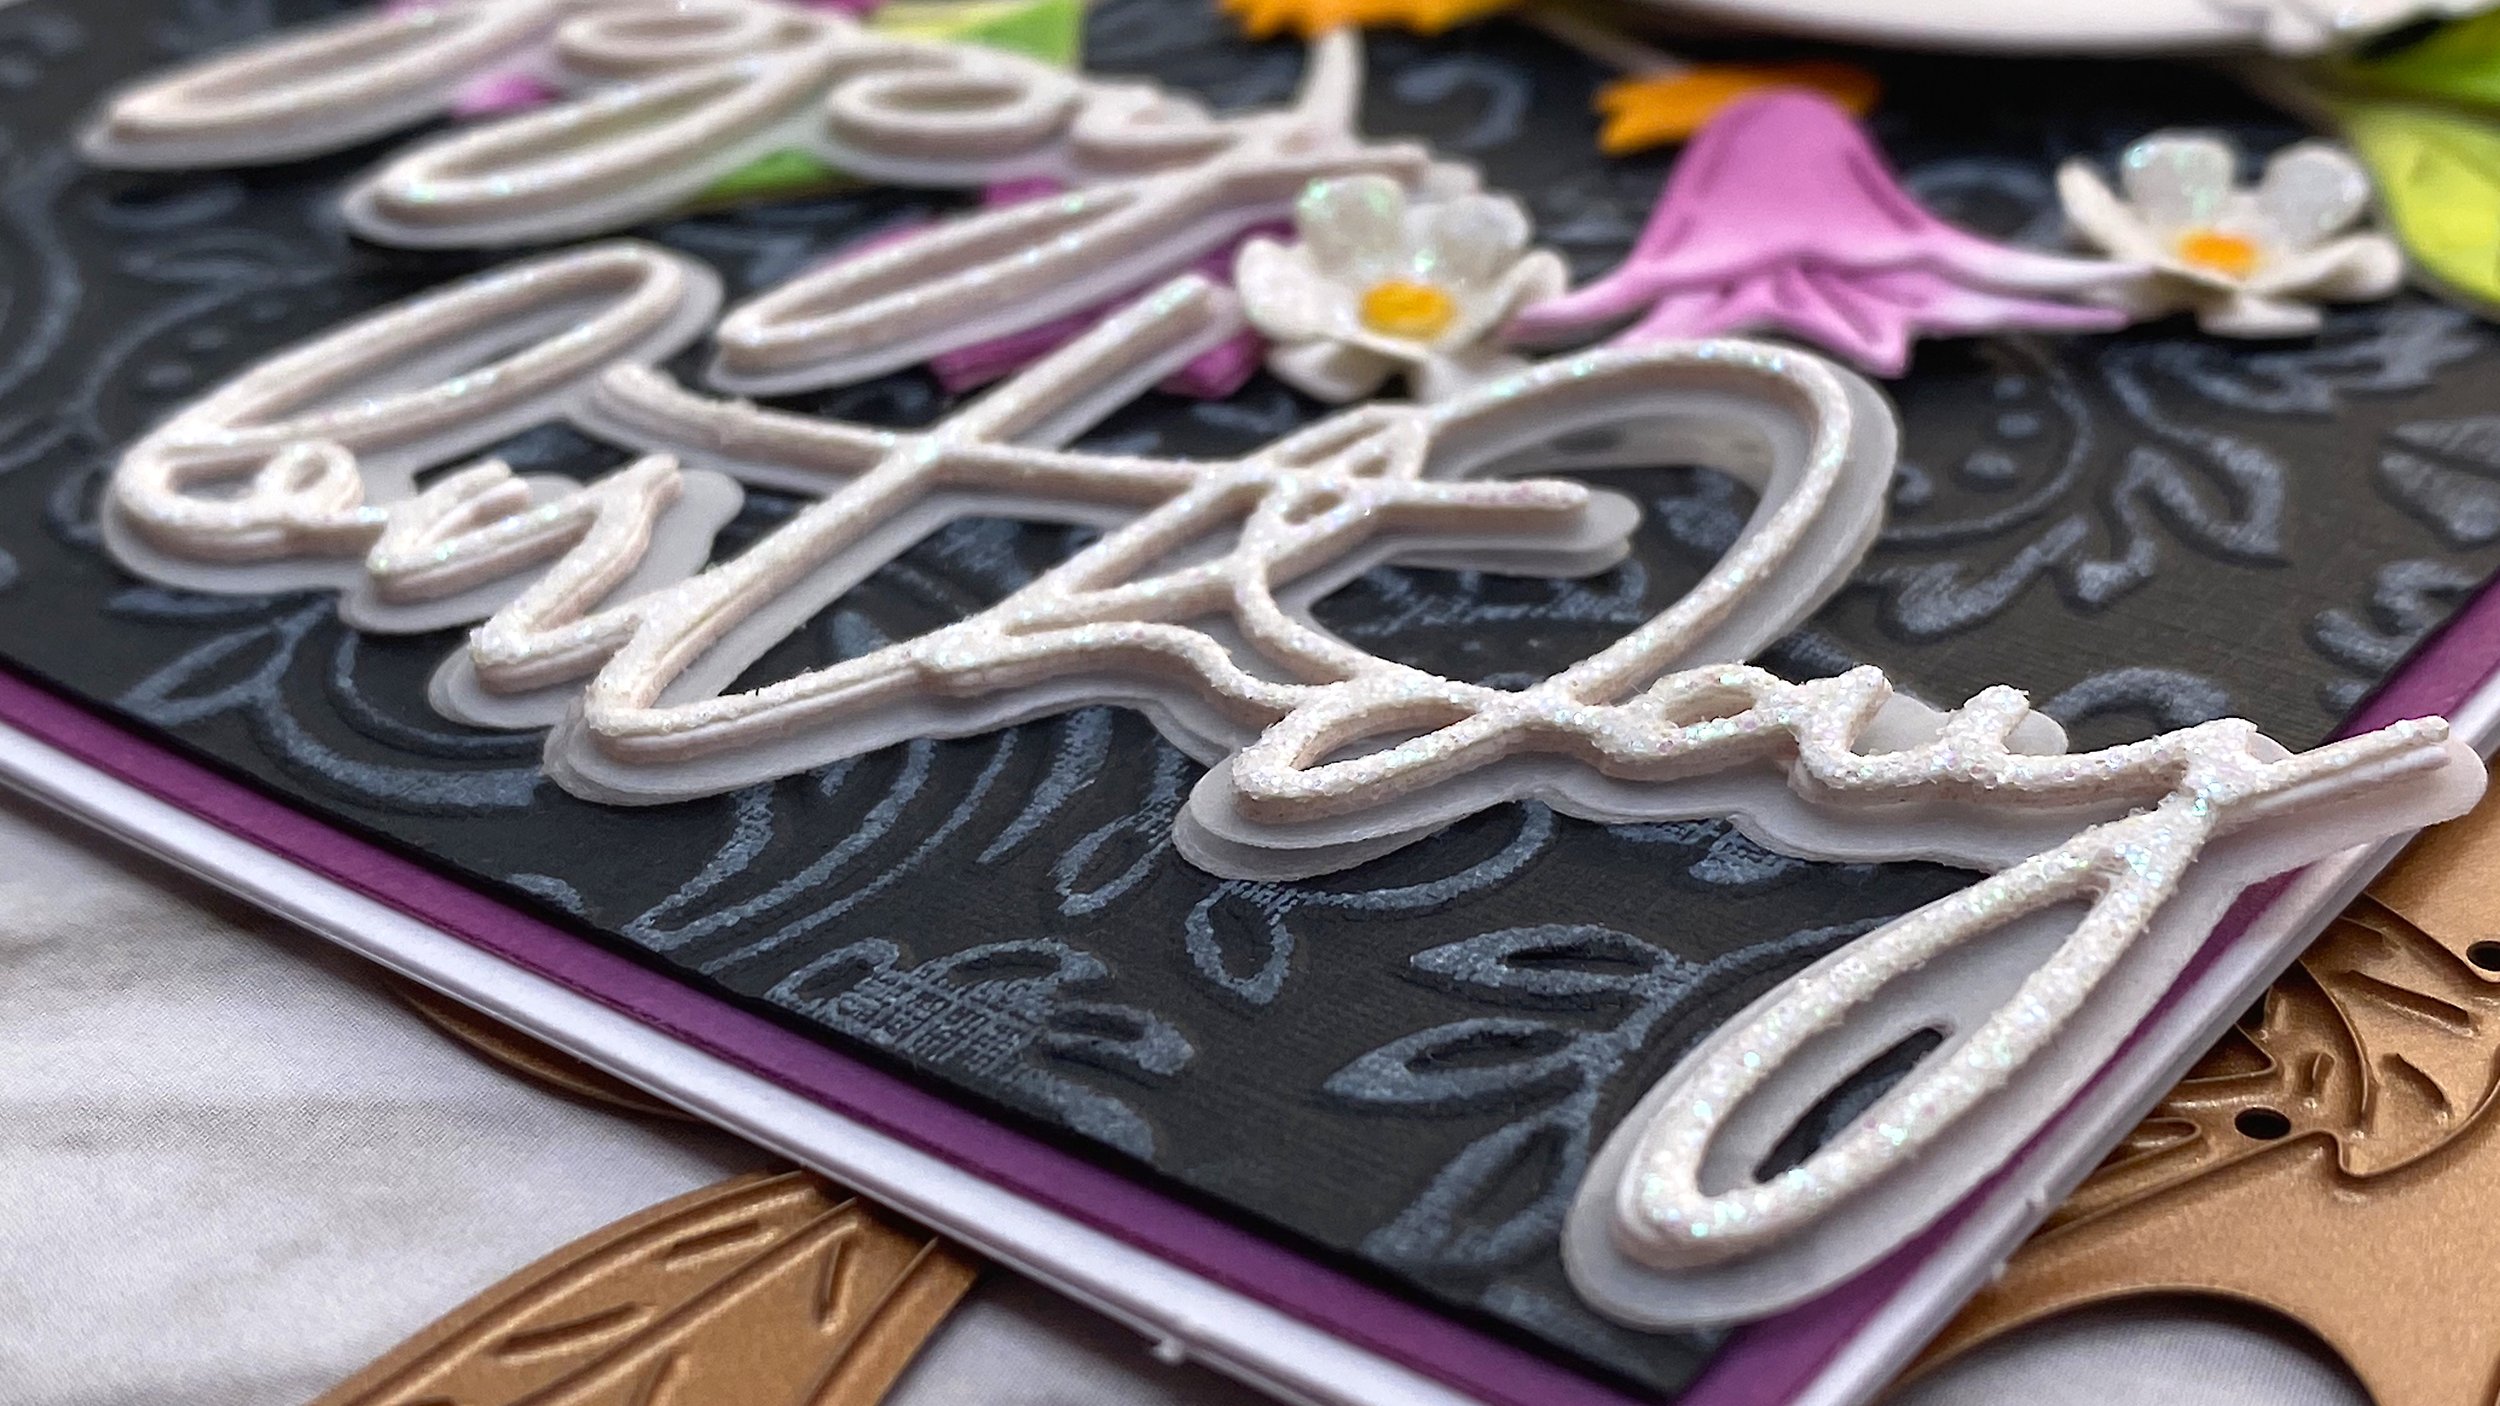
Sentiment
For my Happy Birthday sentiment I’m using Spellbinders Yana’s Layered Script Die Set. I cut out two shadow layers from vellum and stacked them.
I also cut out the text from two layers of white cardstock and one layer of white glitter cardstock and stacked them. Then I glued the words to their shadows.
My “happy” will be partly overlapping the tree and flowers, so I need to prop up the parts that don’t. For that purpose I stacked 2 layers of black cardstock. That showed much less than white cardstock. Then I finished adhering the sentiments and scattered a few little white flowers.
Matte
To pull out the mulberry color, I cut a matte out of white cardstock. I inked up the edge with Seedless Preserves Distress Oxide. Very little of it will show on the finished card. Then I added it behind my background and add the finished card panel to the front of my A2 notecard.
Video showing how I created the Wise Owl card.
YouTube Product List
Wise Owl Small Die of the Month for March 2024 https://shrsl.com/4hj9y
Blooming Pomegranate Large Die of the Month August 2023 https://shrsl.com/48sux
Spellbinders Floral Single-Sided Embossing Folder https://shrsl.com/4hjcl
Yana’s Layered Script https://shrsl.com/446r5
Waffle Flower Mini Stencil Mat https://amzn.to/3VRuV5a
Tim Holtz Medium Brayer https://shrsl.com/4hjcb
Distress Oxide Lost Shadow https://shrsl.com/4g0nf
Distress Oxide Carved Pumpkin https://shrsl.com/4hjc4
Distress Oxide Spun Sugar https://shrsl.com/4hjct
Distress Oxide Mowed Lawn https://shrsl.com/4dudj
Distress Oxide Twisted Citron https://shrsl.com/4gacv
Distress Oxide Seedless Preserves https://shrsl.com/4hjc9
Distress Oxide Black Soot https://shrsl.com/4g0nd
Recollections Black Cardstock 110 lbs https://amzn.to/3Ud94DZ
Recollections White Glitter Cardstock https://amzn.to/3VSU4fI
Accent Opaque 100 lbs White Cardstock https://amzn.to/3VUIj8H